



The complete guide
Cat Spikes Buying Guide, How To Choose, Fit And Get Them Working
The problem these solve
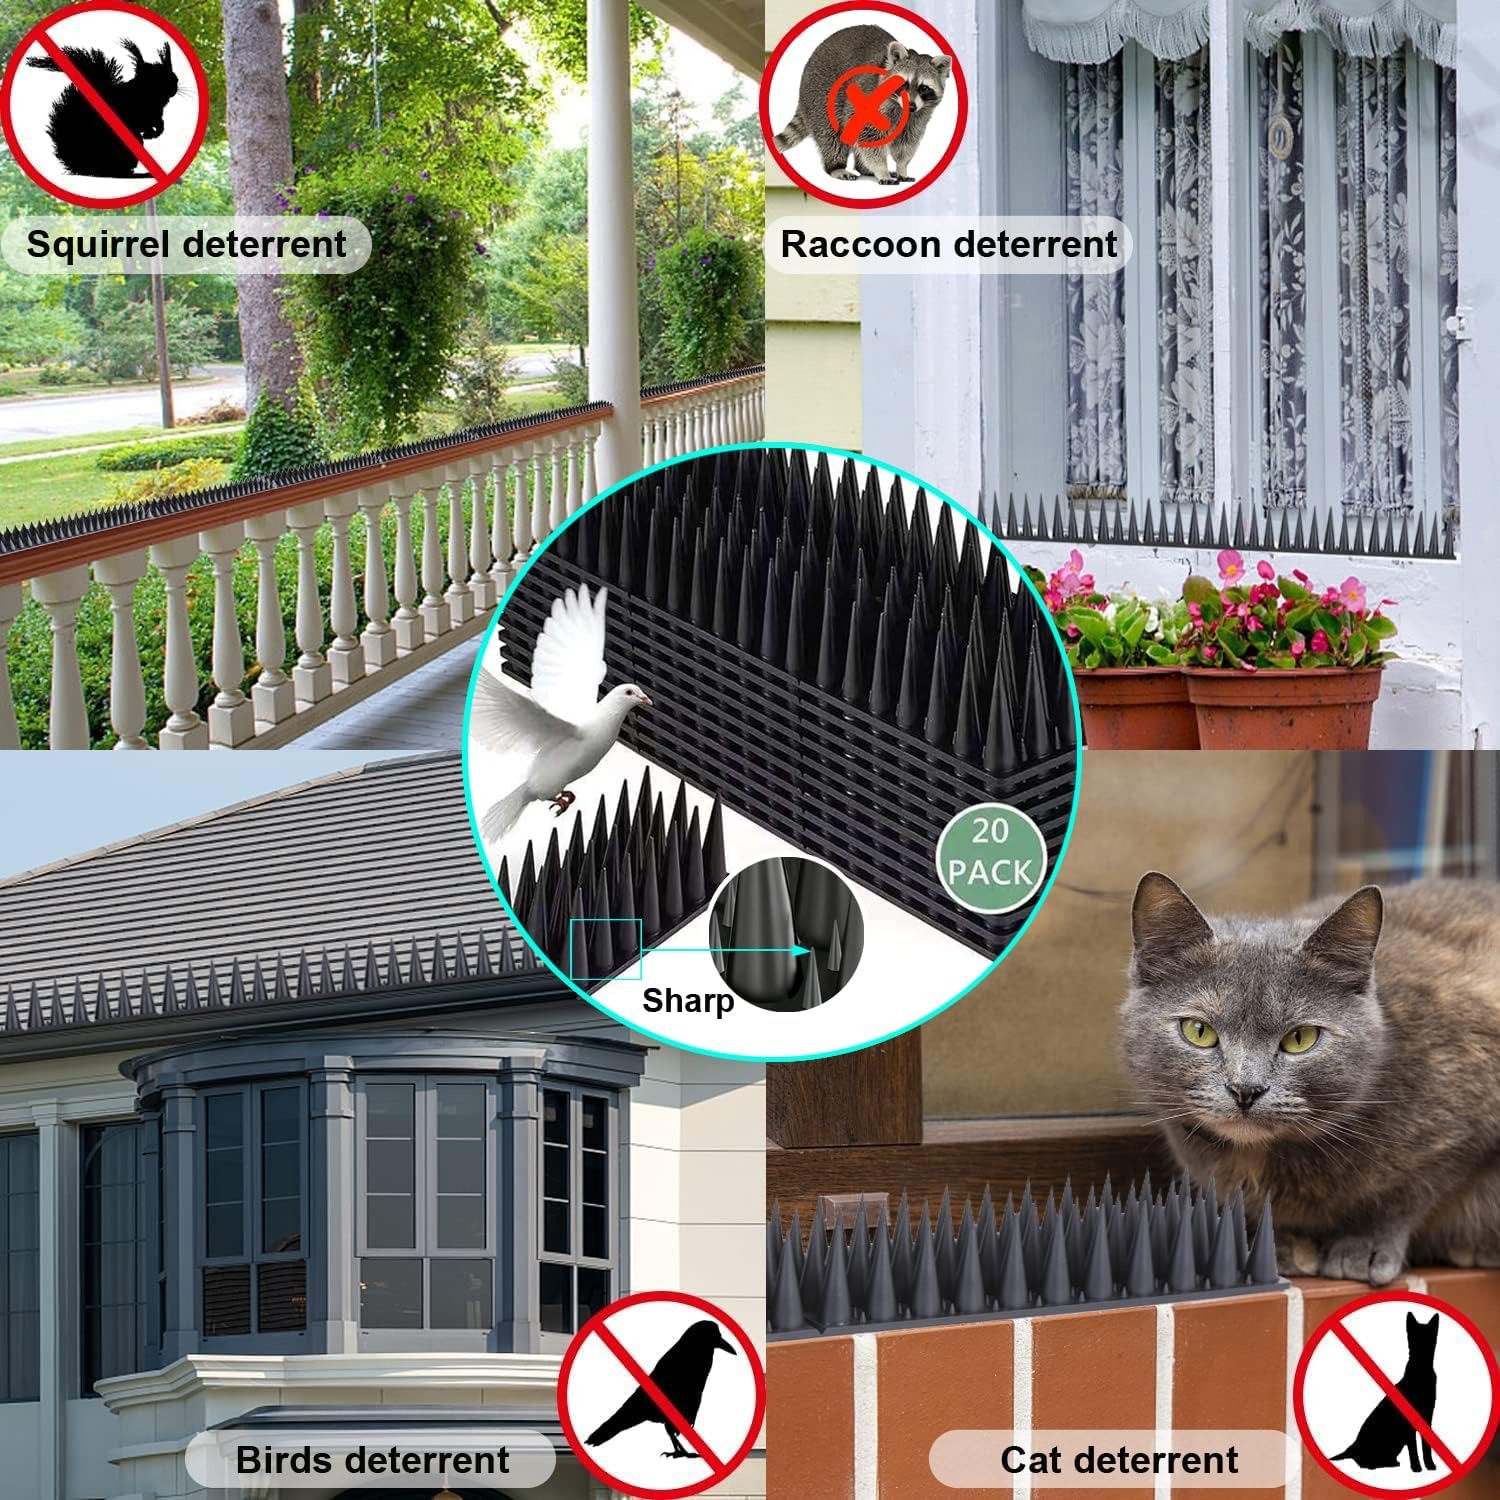
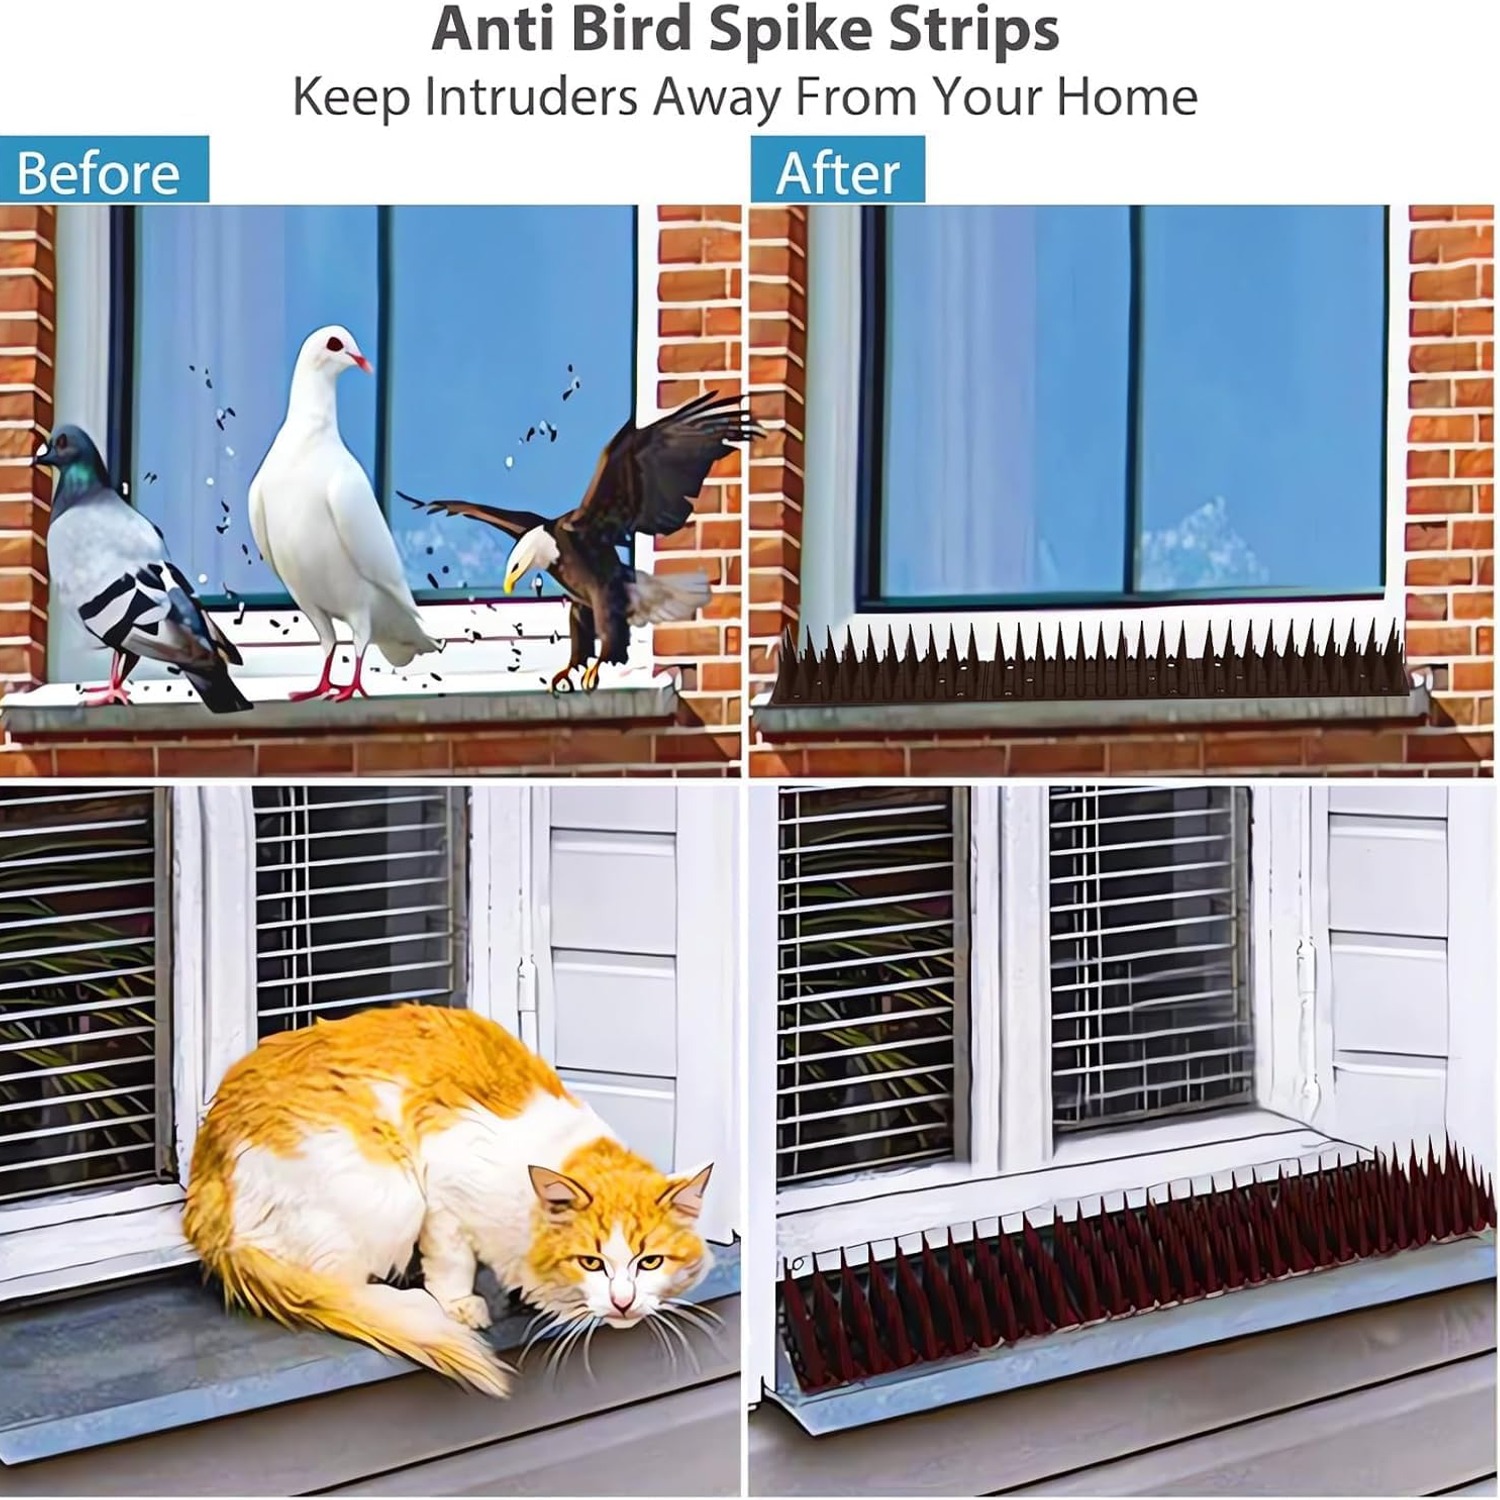
There is a particular kind of frustration that comes from an animal treating your property like a public walkway. A cat uses the back fence as a nightly route and leaves a mess in the vegetable bed on the way through. Pigeons settle on a window ledge and within a fortnight the sill, the wall below it and the car on the drive are all speckled. A squirrel finds the gutter edge and starts investigating the roof space.
The common thread is a flat surface. Animals need stable footing to land, perch, sit or walk, and your fence caps, sills, railings and gutter edges give them exactly that. Spray deterrents wash off. Noise devices get ignored after a week. Chasing works for as long as you are standing there.
Cat spikes attack the footing instead. Take away the comfortable place to put feet and the whole route loses its appeal. No power, no refills, no timing. Once fitted, the strips simply sit there doing their job in the rain and the dark.
How the strips work
The idea is copied from thorny plants. A hedge full of spines is not dangerous in any serious sense, but no animal chooses to stand in the middle of it. These strips do the same thing on a man-made surface. Rows of points across the width mean nothing can settle its weight evenly.
Animals test a surface before committing. A cat will put one paw on a wall top before hauling itself up. A pigeon drops its feet before it stops flapping. That first contact is uncomfortable enough that most of them pull back and find another route. Over a few nights the habit breaks and they stop trying.
What this is not is a barrier. A determined animal with a strong motive, usually food, can work around most things. The strips are a nudge that makes your fence less convenient than the one next door, and for the vast majority of garden visitors that is enough.
What you actually get
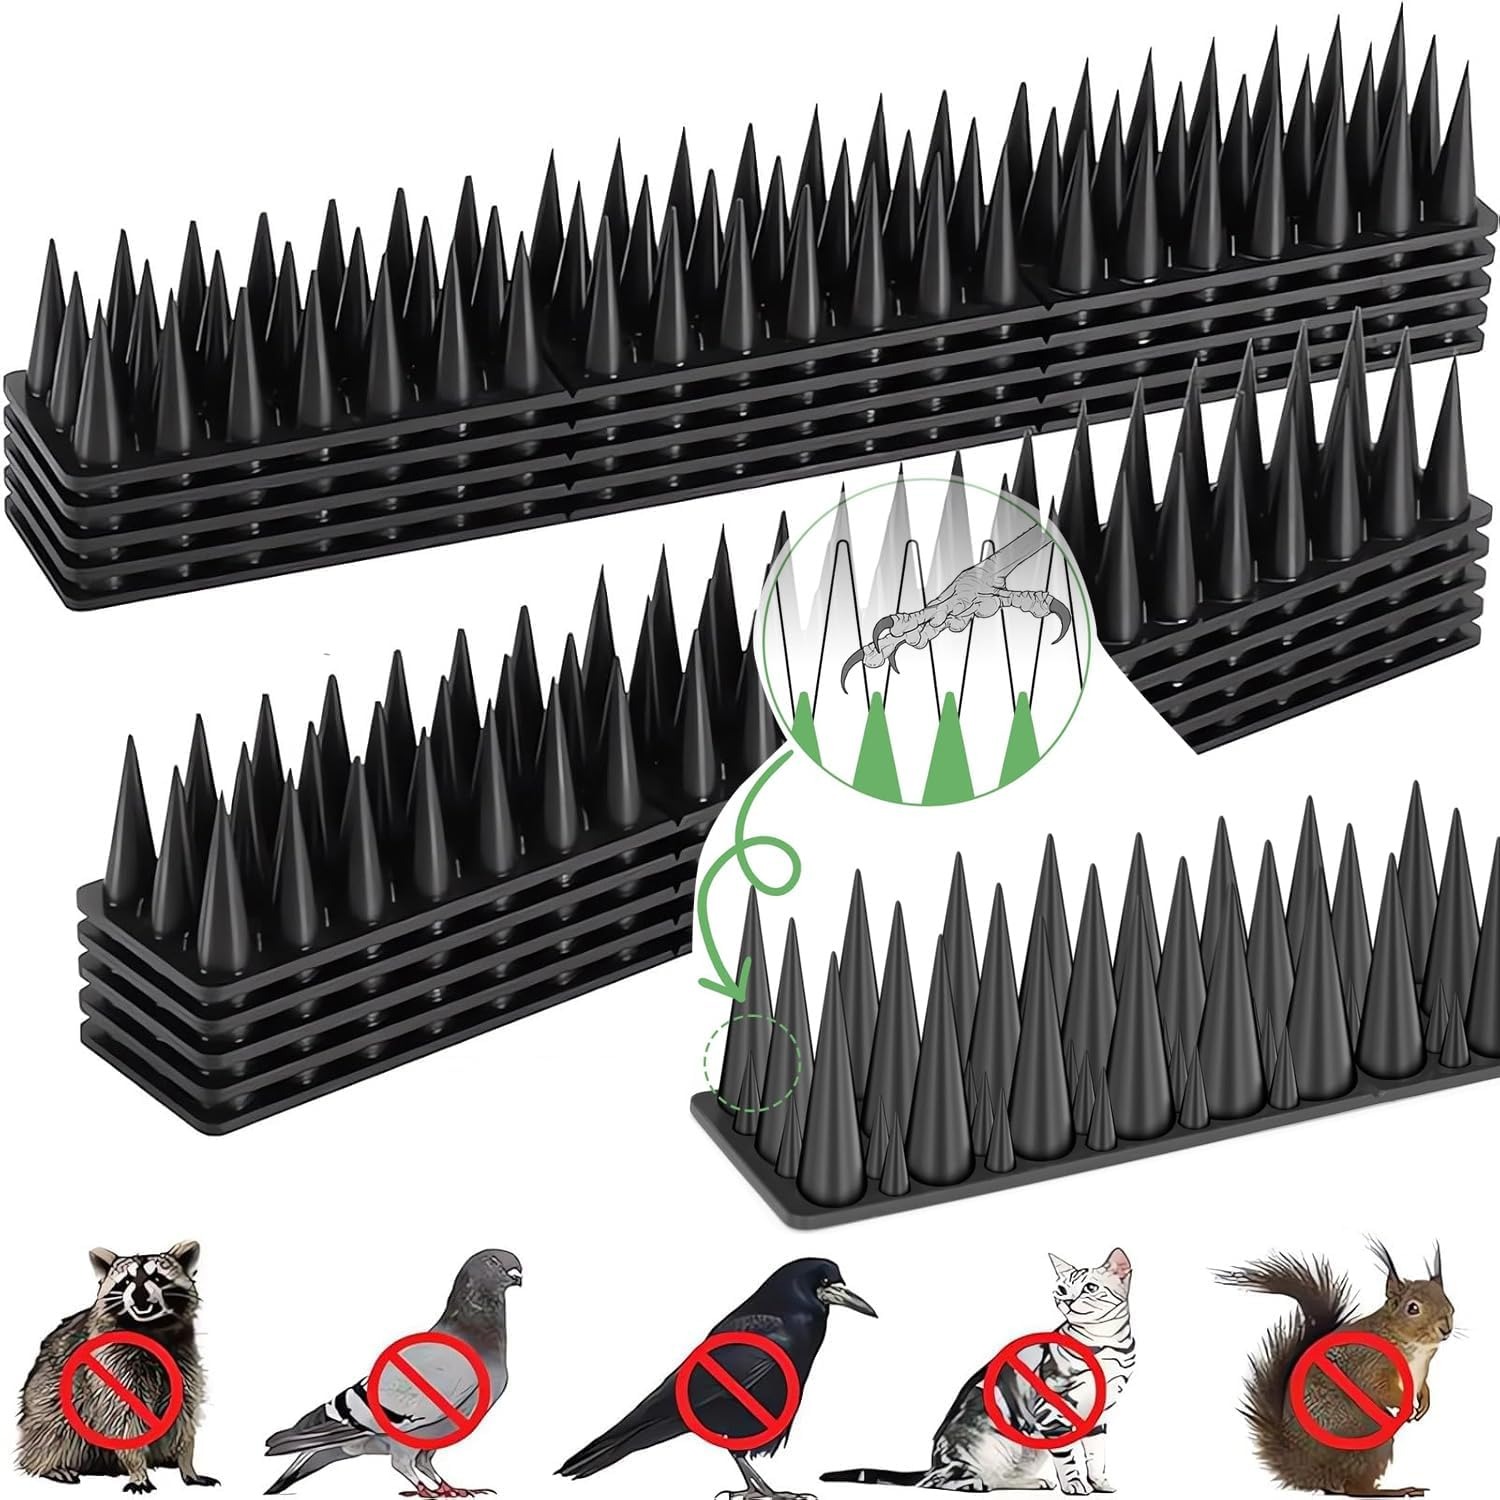
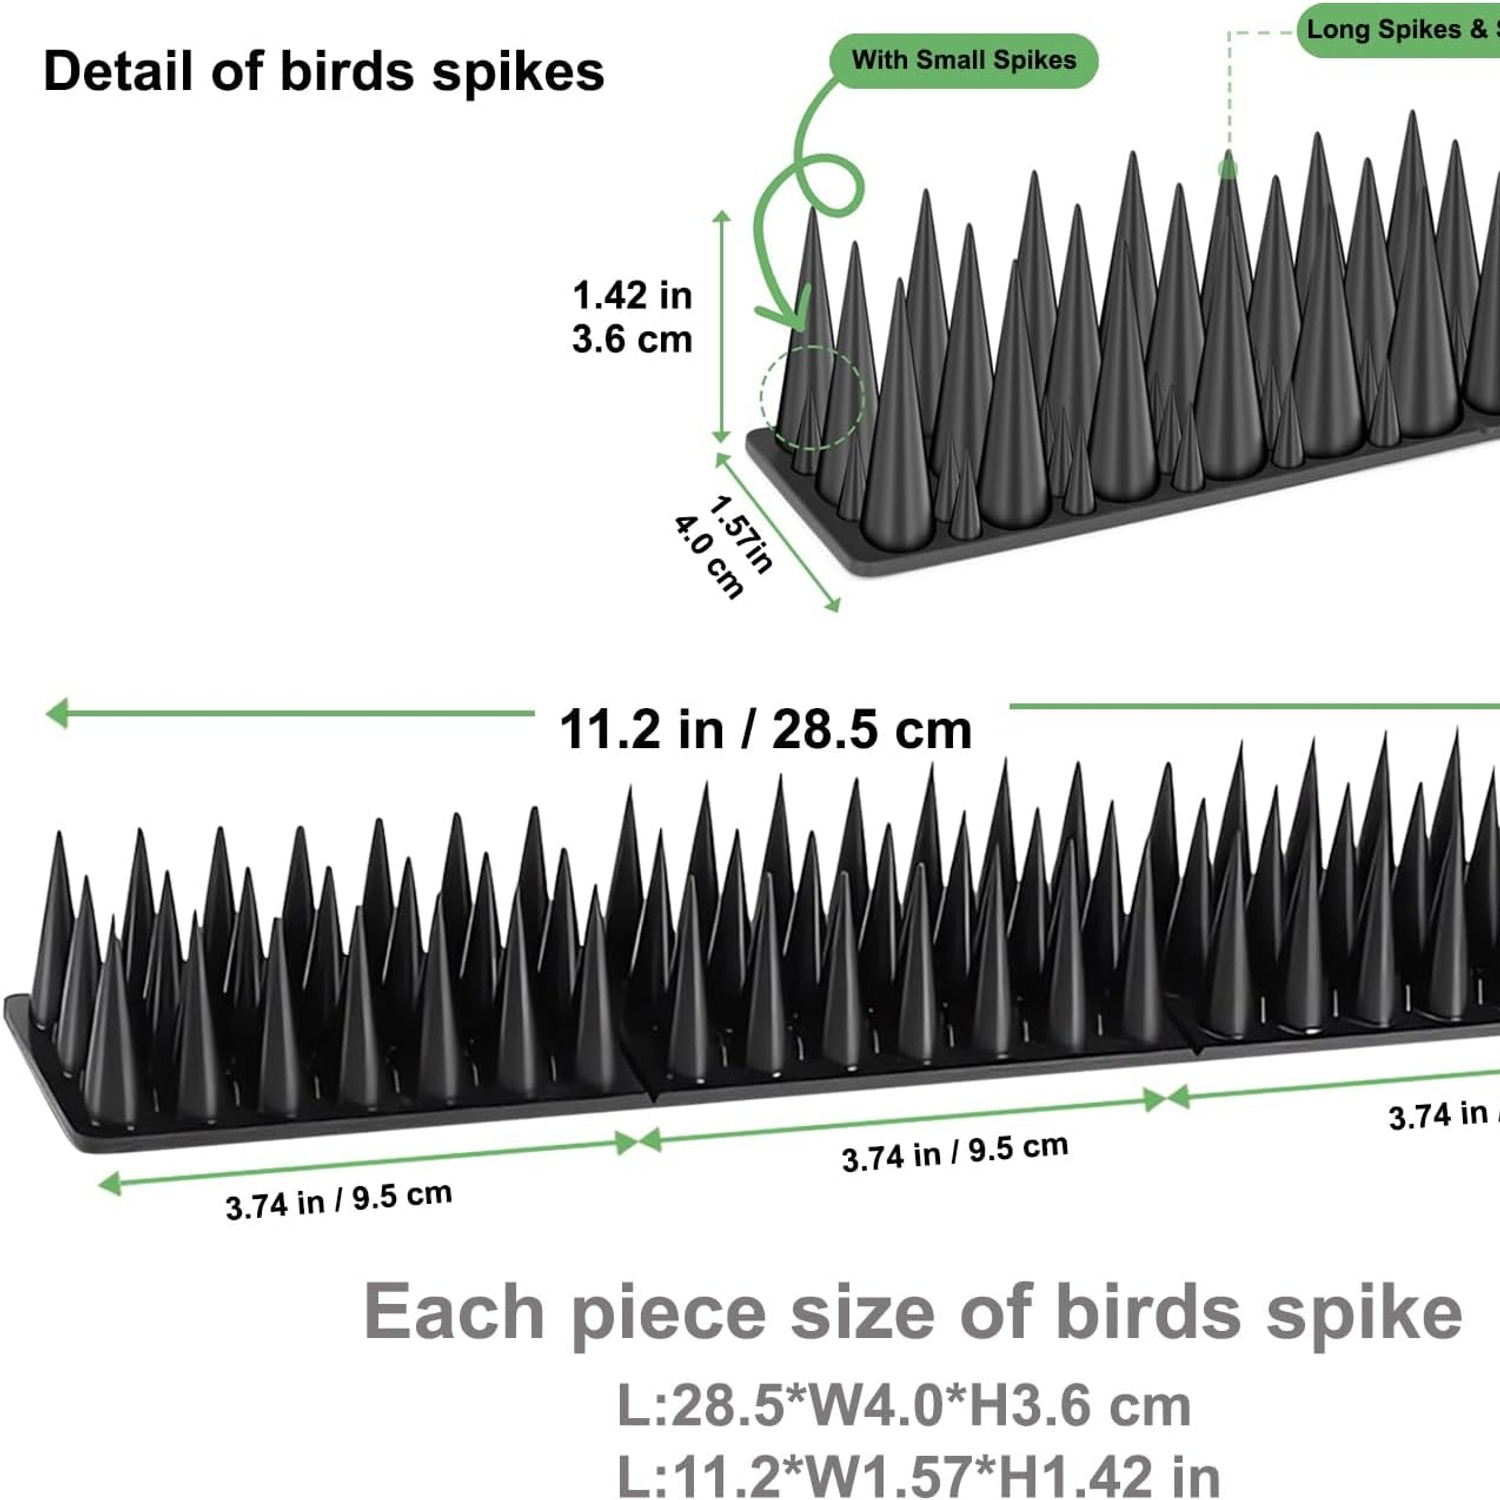
Ten separate strips. Each one measures 28.5 cm long, 4 cm wide and 3.6 cm high. Joined end to end they cover 2.85 metres, which the listing also quotes as 9.35 feet. The whole pack weighs 181 g, so this is light stuff that adds almost nothing to a sill or gutter lip.
Having ten pieces rather than one long rail is the useful part. You can split the pack across four different trouble spots, run them all along one stretch of fence, or trim a couple to fit awkward lengths. Plastic cuts easily with a fine saw or heavy snips.
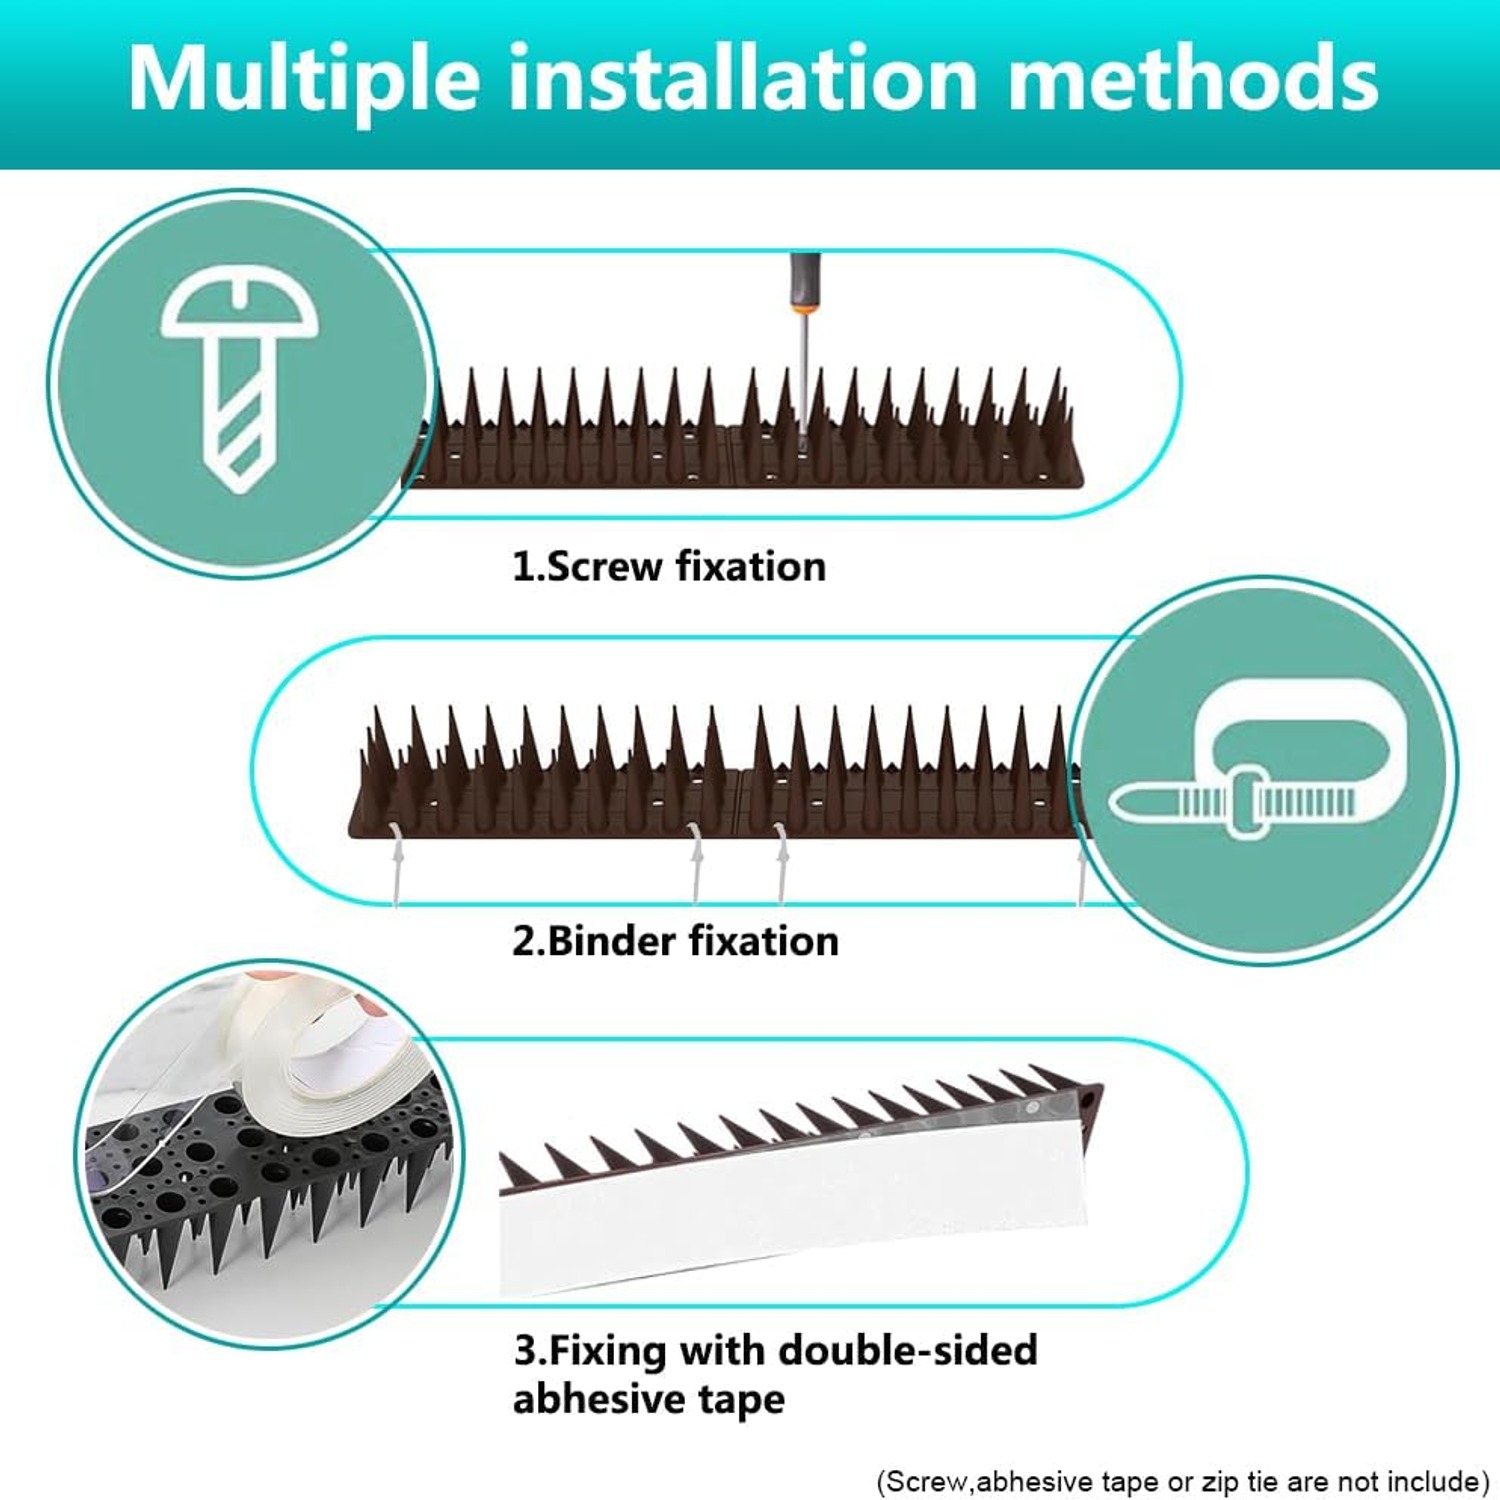
Each strip has pre-drilled holes, which gives you three fixing options rather than one. That flexibility matters more than people expect, because garden surfaces vary wildly in what they will accept.
Working out how much you need
This is the single most common mistake, so it is worth doing properly. Measure the run you want to protect in metres. Divide by 2.85. Round up. That is your pack count.
A standard window ledge of about a metre needs four strips, so one pack covers two ledges with a couple of pieces spare. A single fence post cap takes one strip. A three-metre section of boundary fence needs a little over one pack, so order two and keep the extras for the next spot.
Where people go wrong is spacing strips out to make a pack stretch further. A fence top with spikes for 30 cm and bare timber for the next 30 cm is not protected, it is a stepping stone puzzle, and cats are extremely good at puzzles. Continuous coverage on a short run beats patchy coverage on a long one every single time. If you cannot afford to do the whole fence at once, do the section the animal actually uses and leave the rest for later.
Choosing your fixing method
Screws through the pre-drilled holes are the strongest option and the obvious choice for timber fence caps, posts and wooden window frames. Use short outdoor screws so you do not come through the other side. A pilot hole in hardwood saves splitting.
Zip ties suit anything you can thread through. Metal railings, wire fencing, pipework, balcony rails. Thread the tie through the pre-drilled hole and around the rail, pull tight, and trim the tail flush. Use UV-rated outdoor ties if you can, since cheap indoor ties go brittle in sunlight after a year or two.
Outdoor adhesive is the answer for brick, render, concrete, tile and anywhere you do not want to drill. Clean the surface first, let it dry completely, and give the adhesive the full cure time stated on the tube before you expect it to hold. Rushing this step is why adhesive installations fail.
Rented homes usually point towards adhesive or ties. So do heritage walls, waterproofed roof areas and anything under warranty where new holes would cause trouble.
Fitting them well
Start by watching where the animal actually goes. People often spike the wrong section of fence because it is the section they can see from the kitchen window. Look for worn paint, scratch marks, flattened moss or droppings clustered in one spot. That is the landing zone.
Clean the surface before fitting. Dust, moss and old droppings stop adhesive sticking and make screw fixing messy. A stiff brush and a bucket of soapy water takes five minutes.
Lay the strips out dry first and check your lengths. Trim the last piece if you need to, then fix from one end to the other. Butt the strips tight against each other so there is no gap at the joins, because joins are exactly where birds aim.
Finish by checking the ends of the run. If a cat can get onto the fence from a bin, a low shed roof or an overhanging branch at a point past your spiked section, the spikes will not help. Sometimes the real fix is moving the bin.
Who this suits
Homeowners dealing with cats on boundary fences and wall tops. Flat dwellers with pigeons on window ledges. Anyone whose gutters, air conditioner housing or shed roof has become the local perch. Small businesses with a signage ledge or a doorway lintel attracting birds.
They are less suited to very wide ledges, since a 4 cm strip leaves plenty of clear surface on a 20 cm sill unless you run two or three rows side by side. They are also not the answer for animals coming in at ground level through a gap in the fence, which is a fencing repair job rather than a deterrent one.
Looking after them
Maintenance is light. Leaves, seeds and droppings collect between the points over time, so give them a wash with warm soapy water and a soft brush once or twice a year. Keep solvents and wire brushes away from the plastic.
Check the fixings at the same time. Screws can loosen as timber moves through the seasons, zip ties can go brittle in strong sun, and adhesive can lift if water sits behind it. A two-minute inspection each spring catches all of this.
In snow, brush the strips clear rather than scraping. Cold plastic is more brittle than warm plastic.
The short version
You are buying ten plastic strips, 28.5 cm each, 2.85 metres of coverage in total, with pre-drilled holes so you can screw, tie or glue them wherever the problem is. Black, light, mechanical, nothing to plug in.
Measure your run first and buy enough to cover it properly, because gaps undo the whole thing. Pick the fixing that matches your surface and your tolerance for drilling. Fit them where the animal actually goes, not where it is most convenient to reach.
Do that and the fence top stops being a highway. It really is that simple.