


The complete guide
How To Choose And Fit Bird Spikes That Actually Keep Pigeons Away
The problem with a favourite perch
Birds are not random about where they land. A pigeon that settles on your window sill today is very likely the same one that settled there last week, and it will be back tomorrow. Once a ledge becomes a regular roost, the droppings pile up, the paint stains, and the mess spreads to whatever sits below. Balcony furniture, car bonnets, front steps. If you have ever scrubbed a sill clean only to find it dirty again by the weekend, you already know the pattern.
Scaring birds off rarely fixes it. Plastic owls get ignored within a week. Shiny tape works for a while and then stops. Chasing them away by hand just moves the problem a few hours down the line. What actually breaks the habit is removing the comfort of the spot itself, which is where a physical barrier comes in.
How bird spikes work
The idea is simple. A pigeon landing on a flat surface wants room to put both feet down, balance and shuffle about. Rows of raised pins take that away. The bird comes in, cannot find a stable footing, and leaves for somewhere easier. No noise, no chemicals, no moving parts.
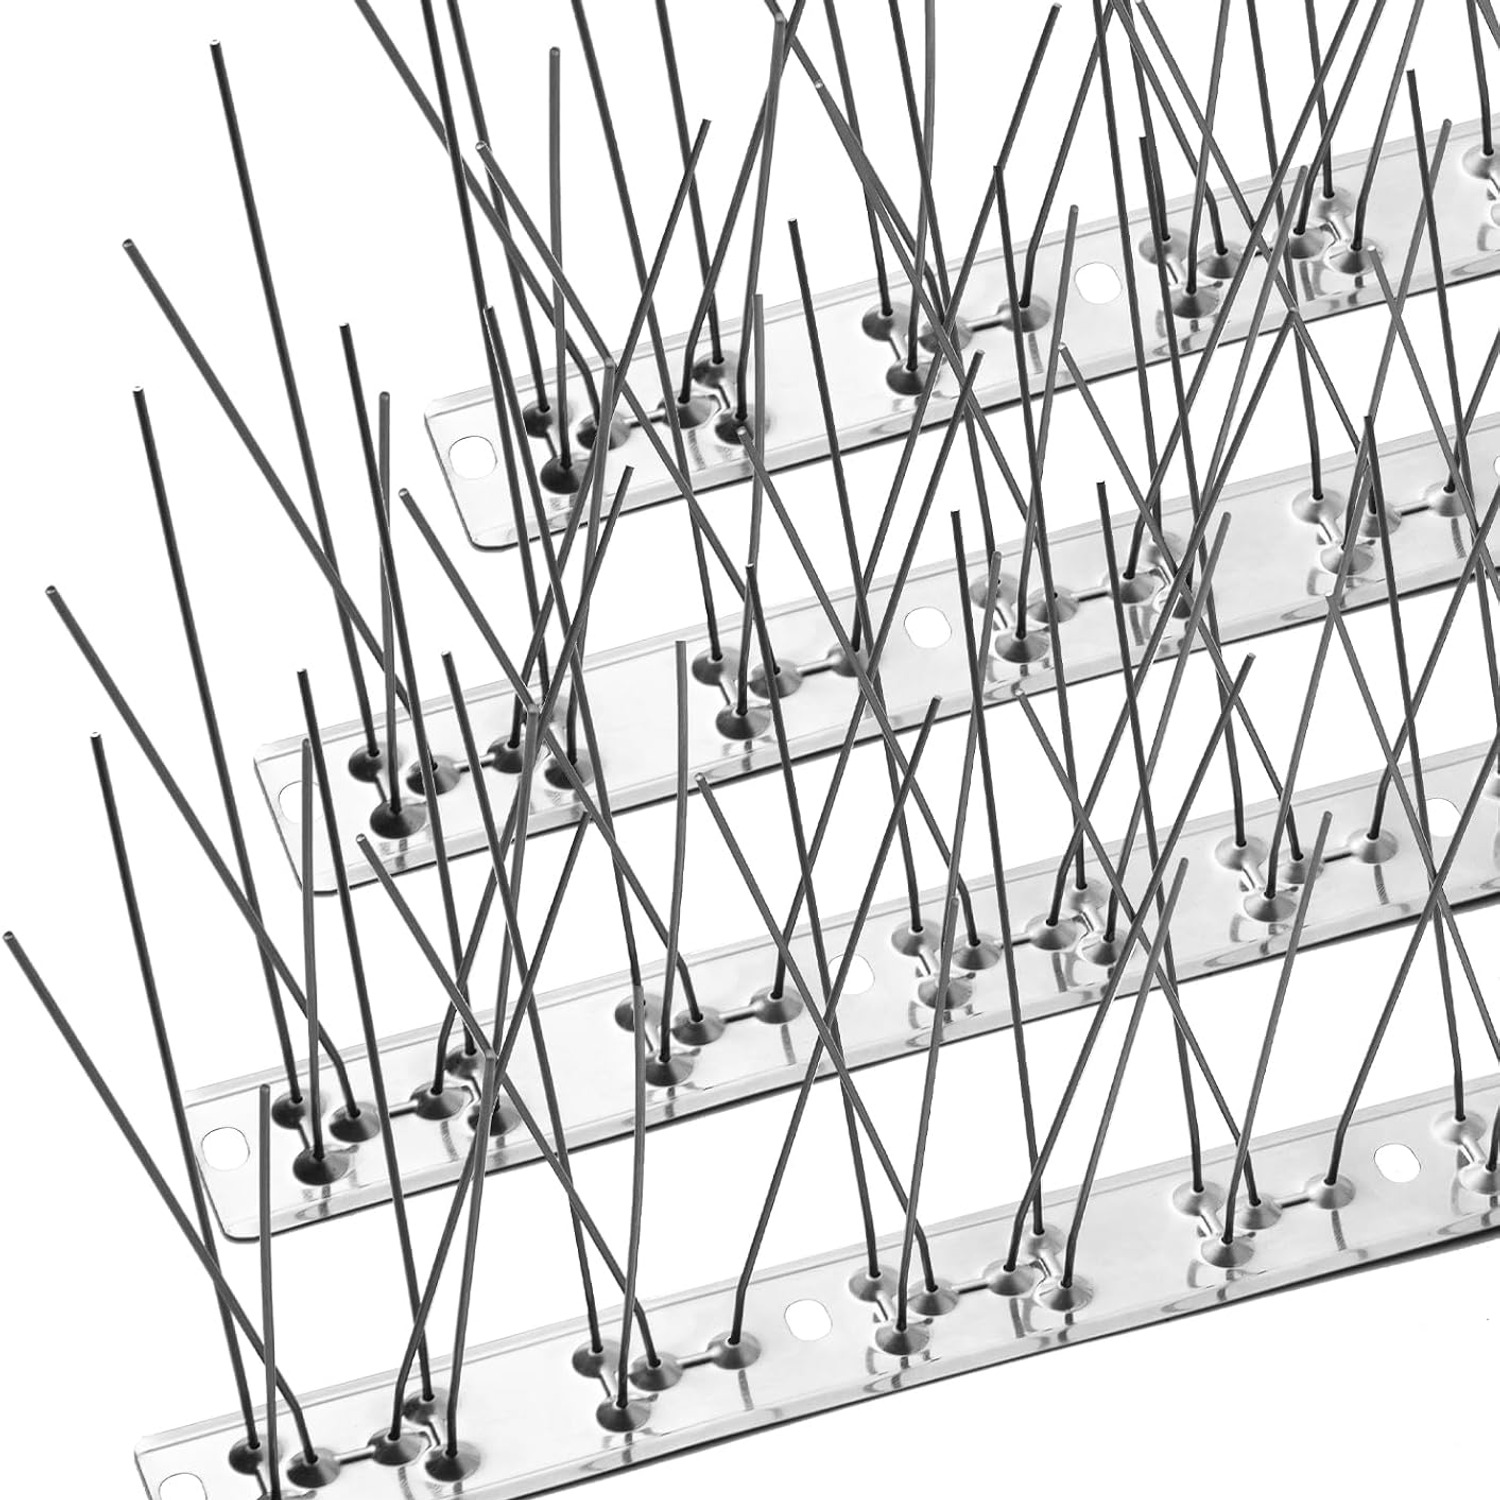
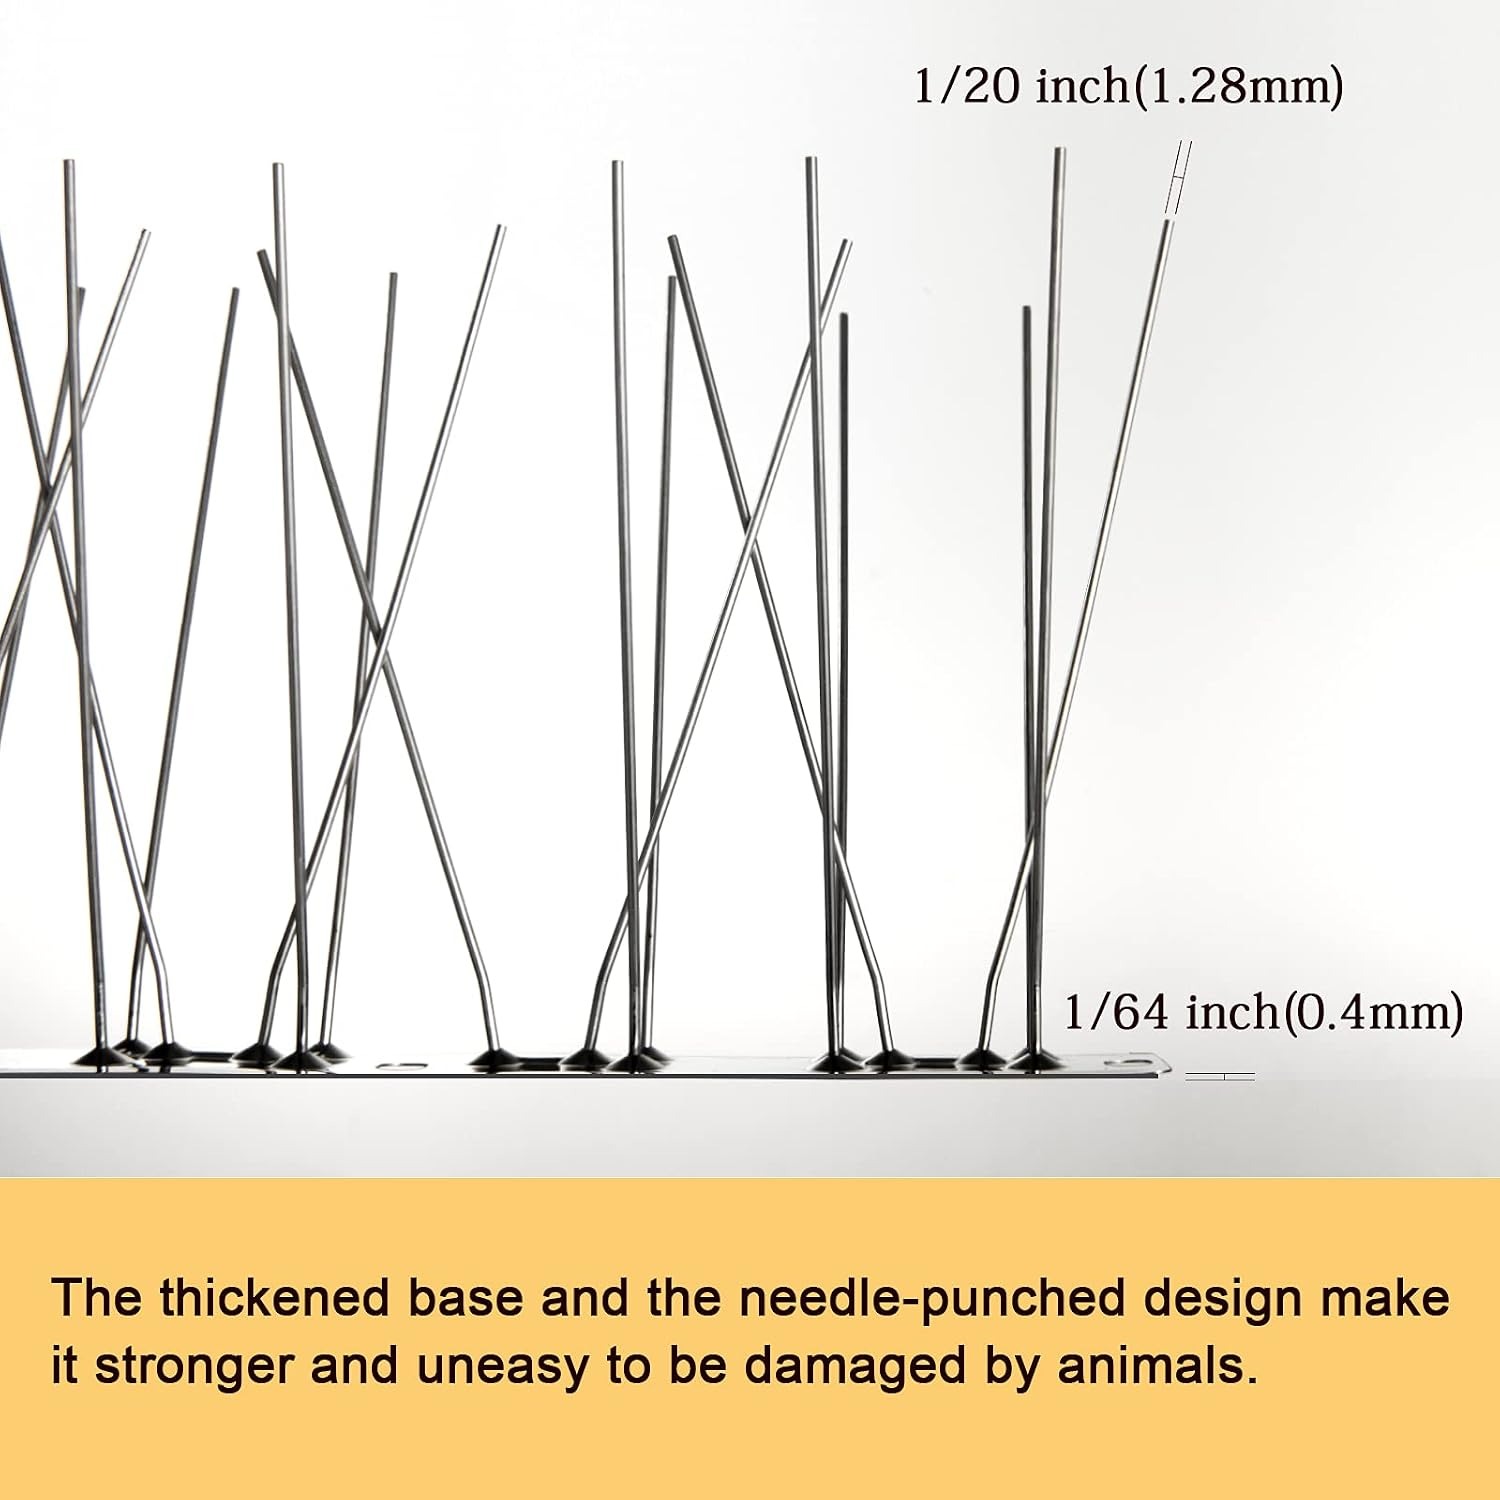
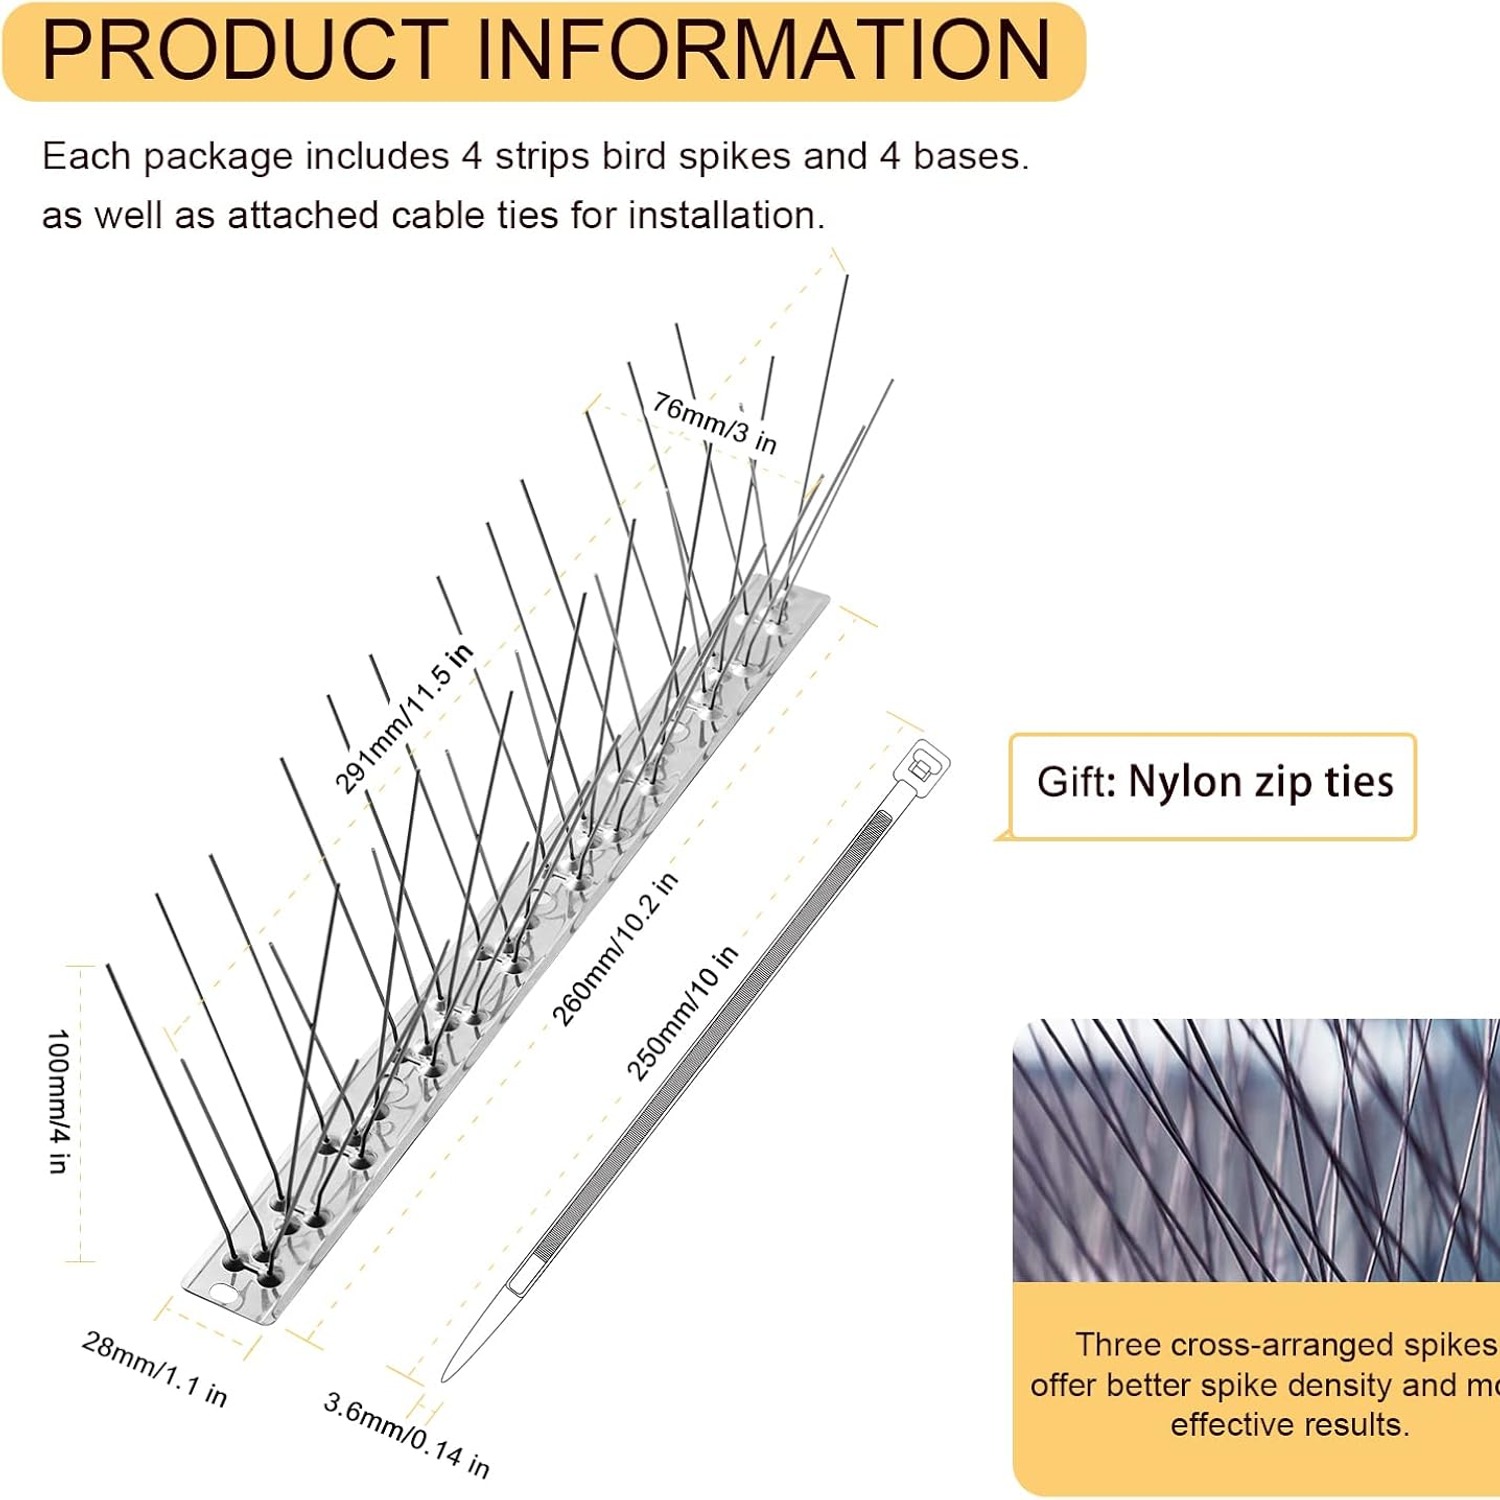
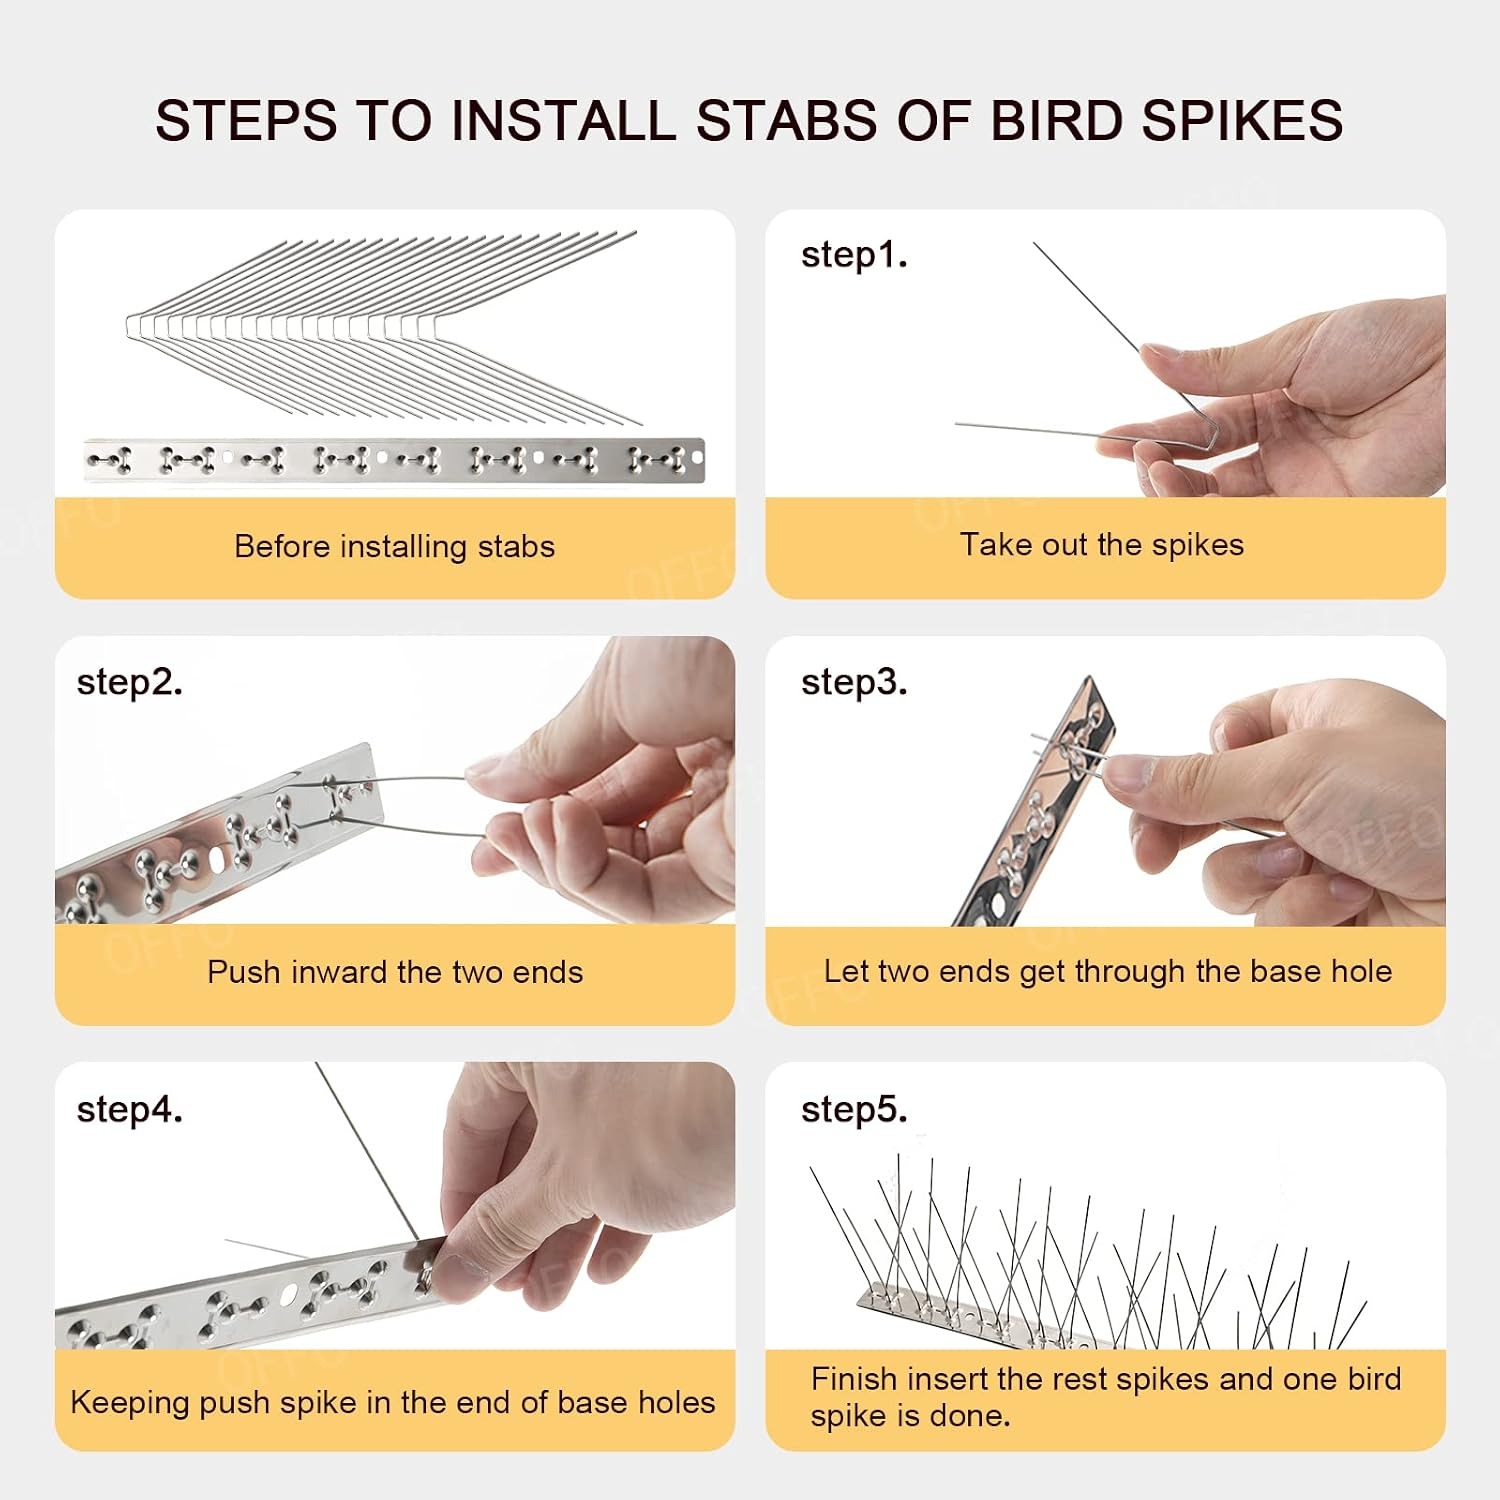
This pack contains four pre-cut strips of stainless steel spikes that cover about 1.04 metres (3.4 feet) in total. The pins are 304-grade metal with a rust-resistant finish, and they are set in rows that span the full width of the base, so there is no comfortable strip of clear ledge left in the middle. The sections use push-in joints, which means you press one into the next to build a continuous run.
It is worth saying what spikes do not do. They are not a trap. They are not a way of removing birds from your area. They make one specific surface unwelcoming, and the birds relocate. That is the whole mechanism, and it works well as long as you cover the spots that matter.
Who this suits
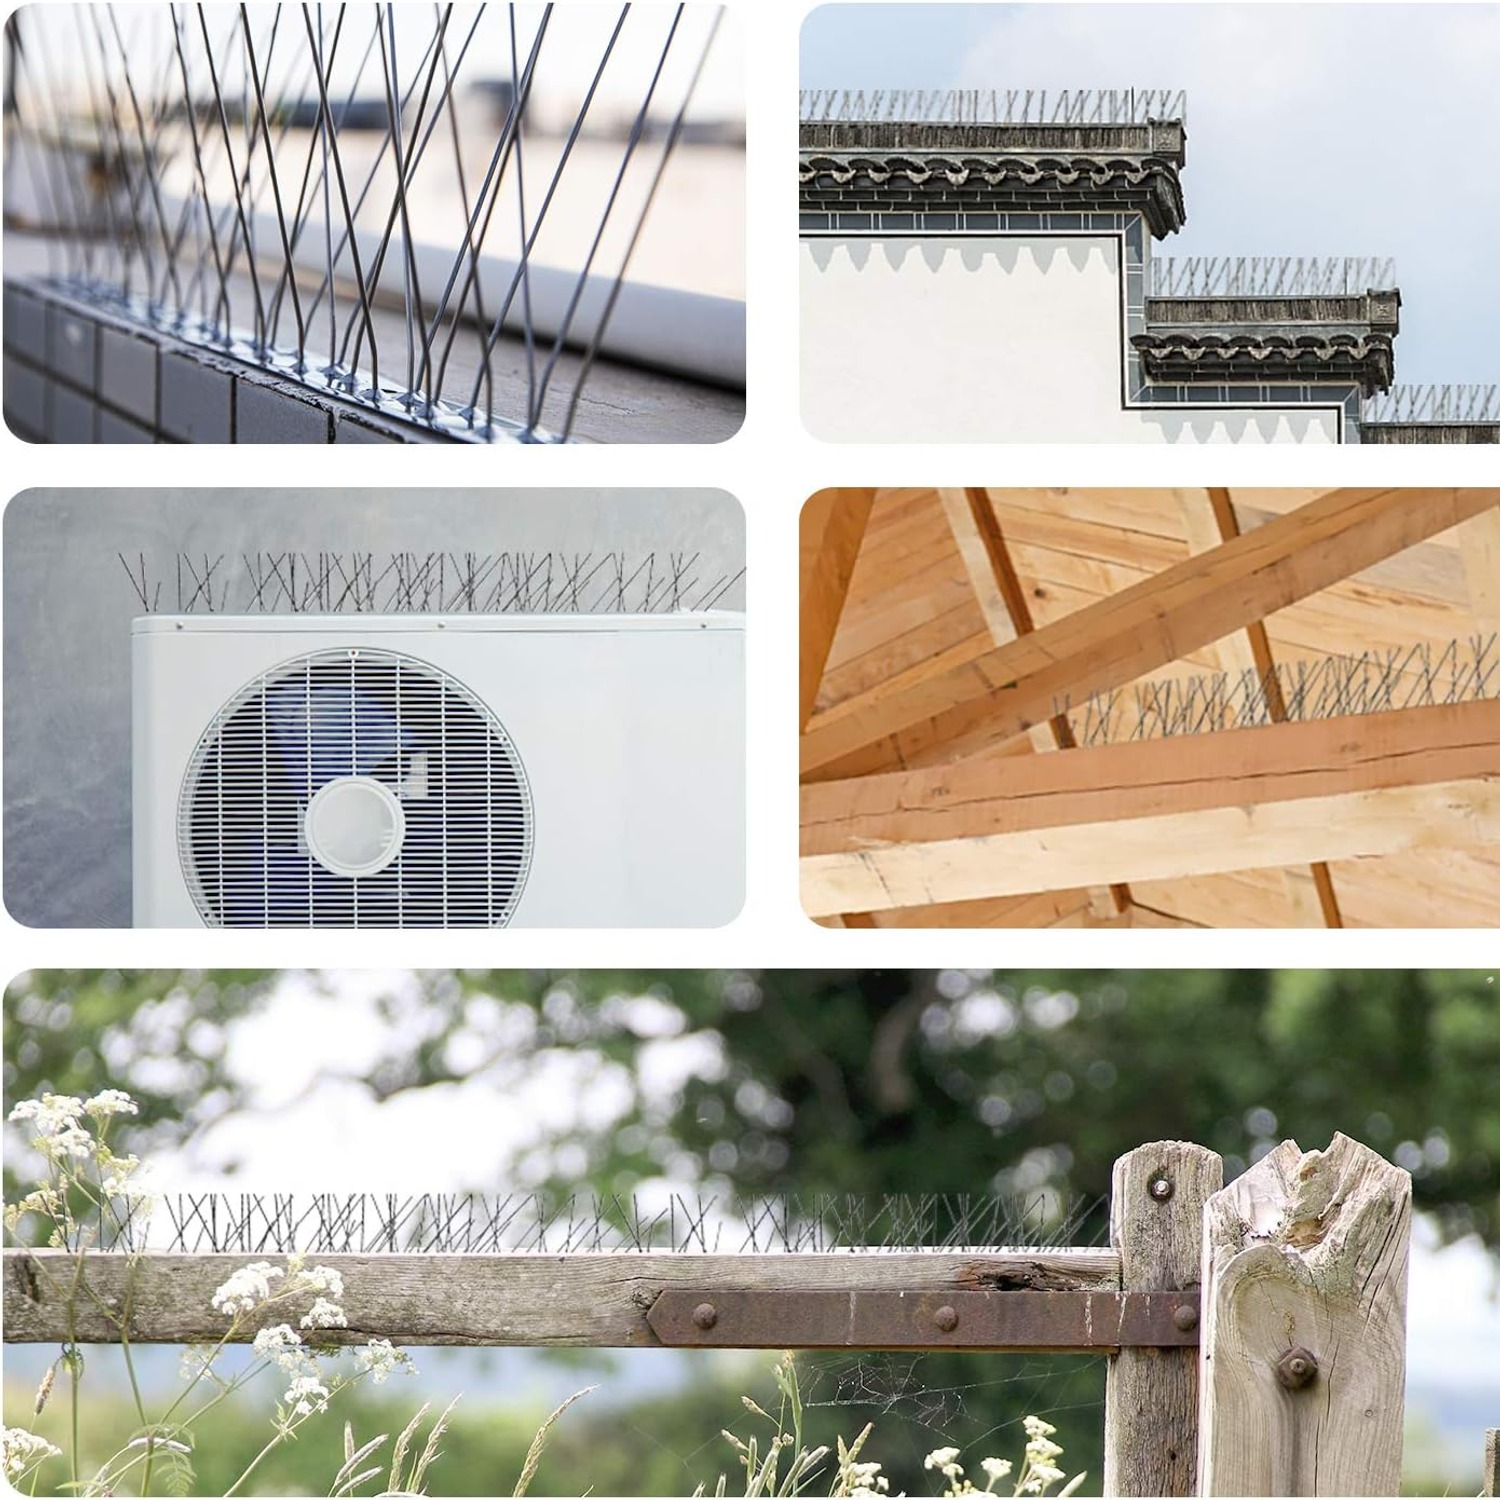
If you have a window sill, a mailbox top, a short balcony edge or a run of fence rail with a bird problem, this is a reasonable fit. The recommended uses listed cover outdoor areas, balconies, gardens, patios, rooftops and fences, which is most of the places people run into trouble.
A 4 pack is a good size for one focused job. Think a single sill, a mailbox and a short rail section, or two small ledges. If you are trying to protect the full length of a long fence or an entire roof edge, you will need several packs, and it pays to measure first. Divide the length you want to cover by 1.04 metres and round up.
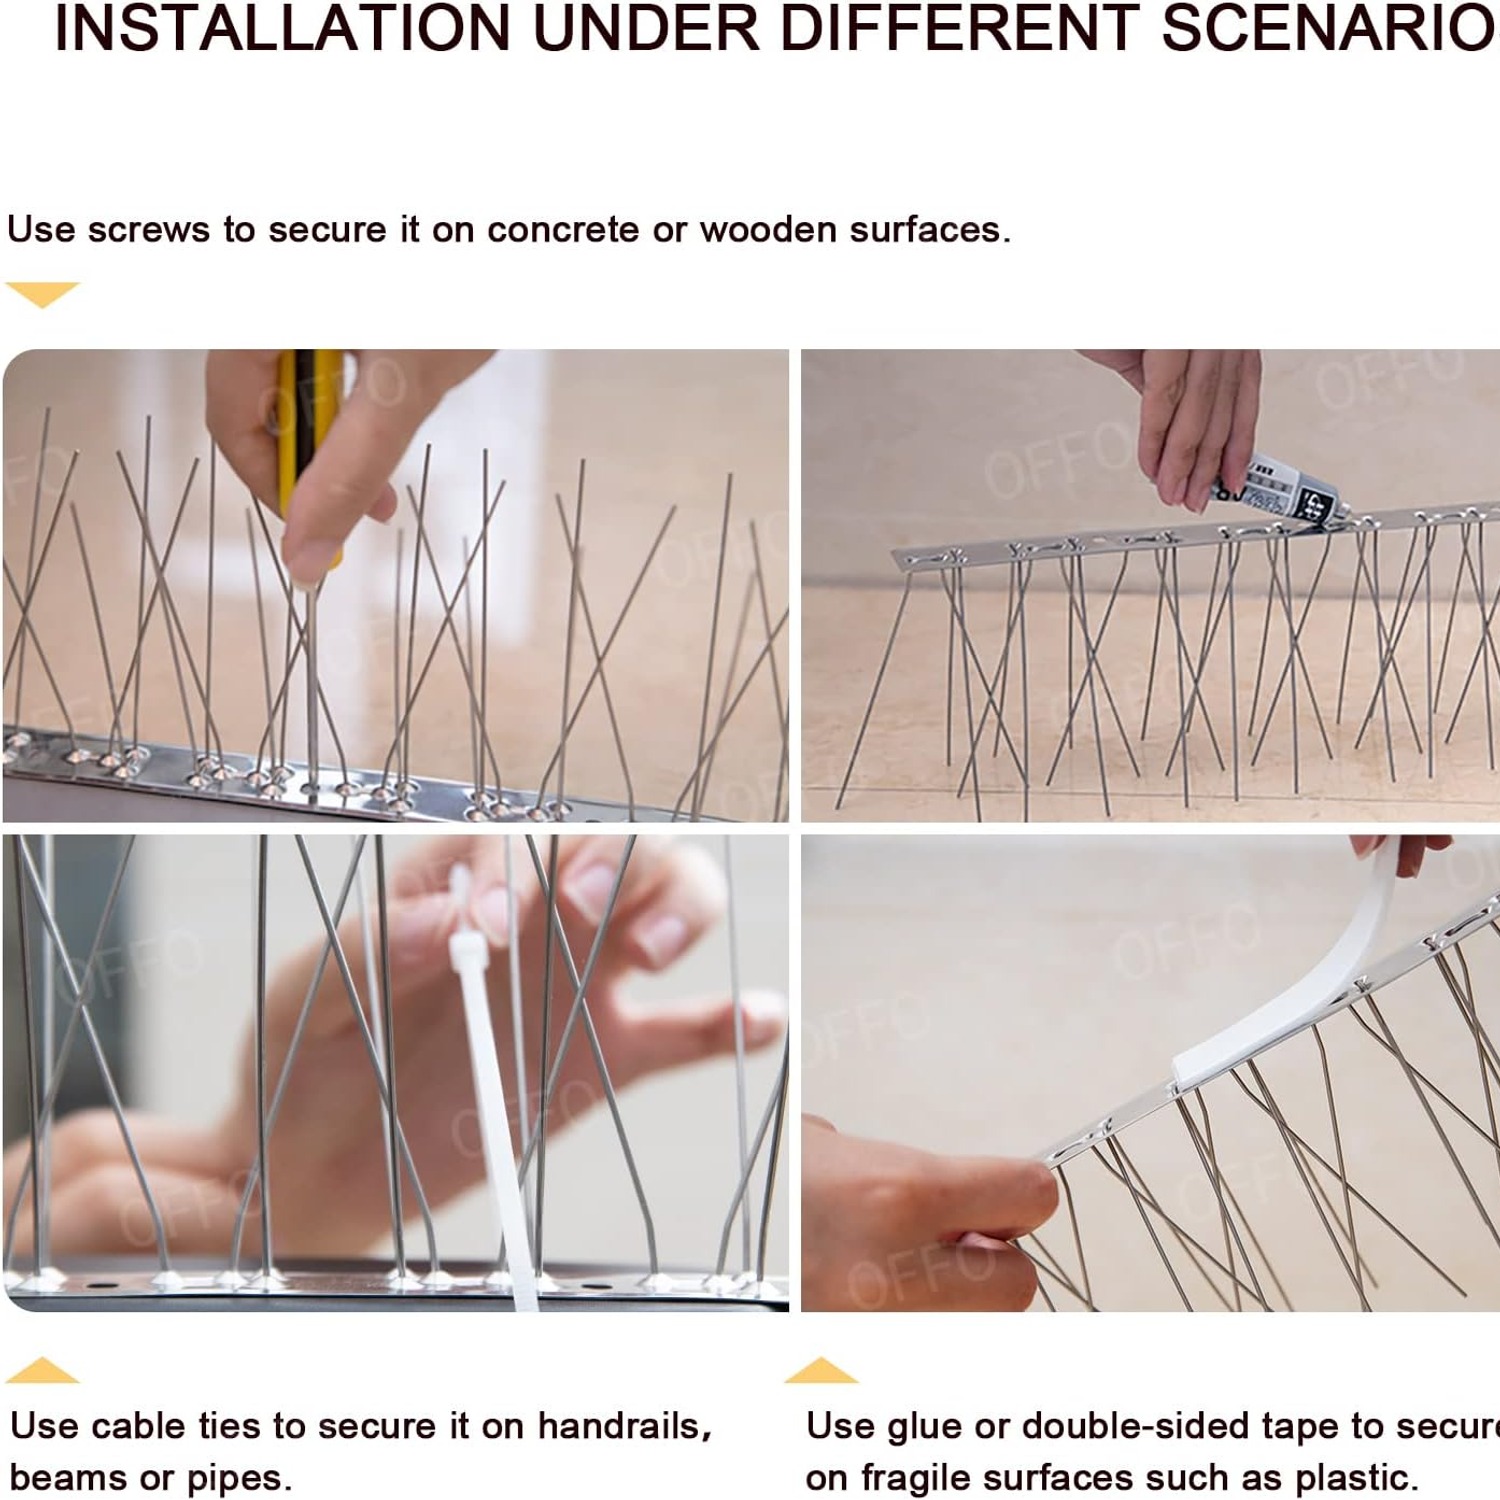
Renters often like spikes because the fixing method is flexible. You can screw them down if you own the place, or use a strong outdoor adhesive if you would rather not make holes. Neither screws nor adhesive come with the pack, so budget a few extra dollars for whichever suits your surface.
Choosing the right coverage
The most common mistake with any bird deterrent is partial coverage. Birds are patient. If you spike three quarters of a sill and leave a quarter bare, they will use the bare quarter. Worse, they will sit right at the edge of the spiked section and you will feel like the product failed when the real issue was the gap.
So measure properly. Run a tape along every flat surface the birds actually use, not just the one you notice most. Corners count. The top of a downpipe bracket counts. A narrow ledge above a doorway counts. Once you have a total, work out your packs from there.
Think about surface width too. The strips have a base width of about 2.9 cm according to the item dimensions. If your sill is noticeably wider than the pin coverage, a bird can still land on the clear strip behind or in front of the spikes. In that case run two rows side by side, which is a common approach and worth planning for when you order. People searching for the best bird spikes for window sills often overlook this and buy exactly half of what they need.
Fitting them properly
Start by cleaning the surface. Droppings, grit and moss all get in the way of adhesive and make screws sit crooked. Scrub it down, rinse and let it dry fully. On a sill that has been used by birds for a while, this is the longest part of the job.
Next, lay out your run. Push the sections together end to end until you have the length you want. The joints hold firm across a full run, so you can build the whole line on the ground and then lift it into place. Check it against the ledge before you fix anything.
For mounting, pick your method based on the surface. Masonry, timber and solid render take screws well, and screws give you the most secure fix in windy spots. Glass, tile, painted metal and anything you do not want to drill call for a strong outdoor adhesive instead. Apply the adhesive in a continuous bead along the base rather than in dots, press the strip down firmly and leave it to cure for as long as the product instructions say. Most people rush this step and end up with a strip that lifts at one end.
On a rooftop or anywhere above head height, use proper access equipment and work with someone else present. No deterrent is worth a fall.
Care and maintenance
Once fitted, spikes need very little attention, but a little goes a long way. Twice a year is a sensible rhythm.
Wipe the strips with a damp cloth and mild soapy water when droppings or grit build up, then rinse and let them dry. Avoid steel wool and harsh scouring pads, since scratching the finish gives corrosion somewhere to start. If you live near the coast or on a road that gets salted in winter, an extra rinse is worth the effort.
Clear anything that has collected between the pins. Leaves, twigs and cobwebs all gather there over a season, and a thick mat of debris can turn a spiked surface back into a flat one. This is the single most important maintenance task with any spike product, and it is the reason people sometimes think their spikes have stopped working.
Finally, check the fixings. Give each strip a gentle pull. Re-tighten screws that have loosened and re-apply adhesive where a corner has lifted. Birds find weak points quickly, and a flapping strip invites them back.
Common questions before you buy
Will they look ugly? Less than most people expect. The finish is bright silver and the profile is slim, so from the ground a sill with spikes mostly reads as a thin line. They are far less noticeable than the stains they prevent.
Do they handle weather? The pins are 304-grade metal with a rust-resistant finish, described as holding their shape through sun, rain and snow. That is the standard specification for outdoor hardware of this type.
Do they need power? No. The power source is listed as manual, so there is nothing to plug in, charge or replace.
Will small birds still get through? Possibly. Spikes work best against the medium and larger birds that cause the heaviest mess. If sparrows are nesting in a cavity, blocking the cavity is the better answer.
The short version
Bird spikes fix a habit, not a bird. Cover every flat surface the birds use, not just the obvious one, and the roosting stops. This pack gives you four pre-cut stainless steel strips covering about 1.04 metres (3.4 feet), joined by push-in connectors that need no tools. Add screws or a strong outdoor adhesive, clean the surface properly before you fix anything, and clear debris from the pins a couple of times a year.
Measure first, buy enough to cover the whole run, and the job stays done.