



The complete guide
How To Choose And Set Up A Drip Irrigation Kit
The problem with watering by hand
Hand watering looks simple. You fill the can, you walk the garden, you feel useful. The trouble starts in July, when the soil dries out in two days instead of five and the job stops being pleasant. You start rushing. You give each plant a quick splash that wets the top centimetre and runs off before it sinks in. The surface looks watered. Fifteen centimetres down, where the roots actually are, it is still dry.
Then you go away for a long weekend, and everything in a pot is in trouble by Sunday.
A drip irrigation kit fixes a specific version of this problem. It does not make your garden grow better by magic. What it does is put a measured amount of water exactly where the roots are, slowly enough that the soil can absorb it, at a time you choose, whether you are home or not. Once it is running, the daily watering round becomes a weekly check instead.
How a drip system actually works
The principle is simple. Water leaves your tap at normal pressure, travels down a thick mainline, and then splits off into much thinner tubes that run to individual plants. At the end of each thin tube sits an emitter, which is a small fitting that restricts the flow to a trickle. Instead of litres per minute, you get something closer to litres per hour.
That slowness is the whole point. Soil absorbs water at a limited rate. Pour it on fast and most of it runs sideways or off the surface. Deliver it slowly and it soaks straight down into the root zone, which is where it does the work.
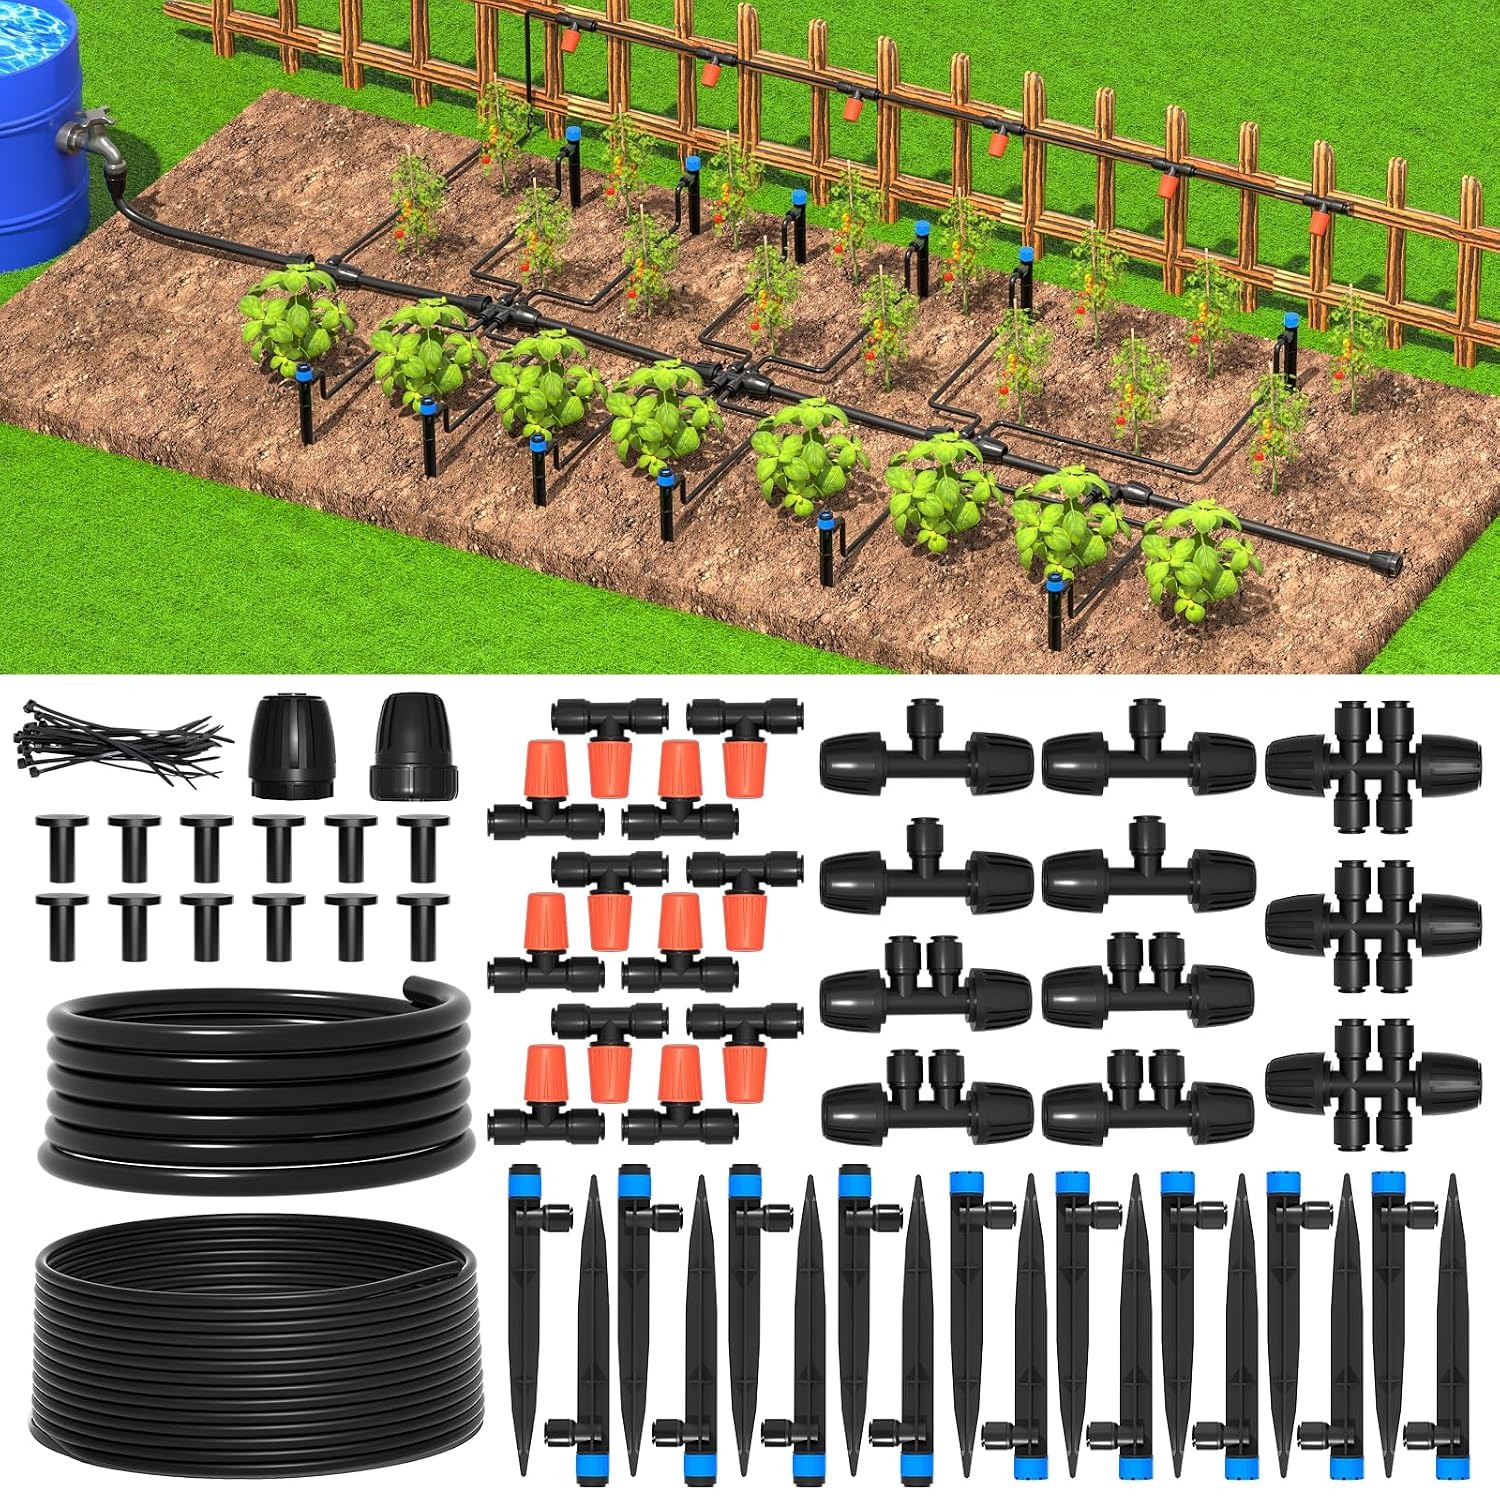
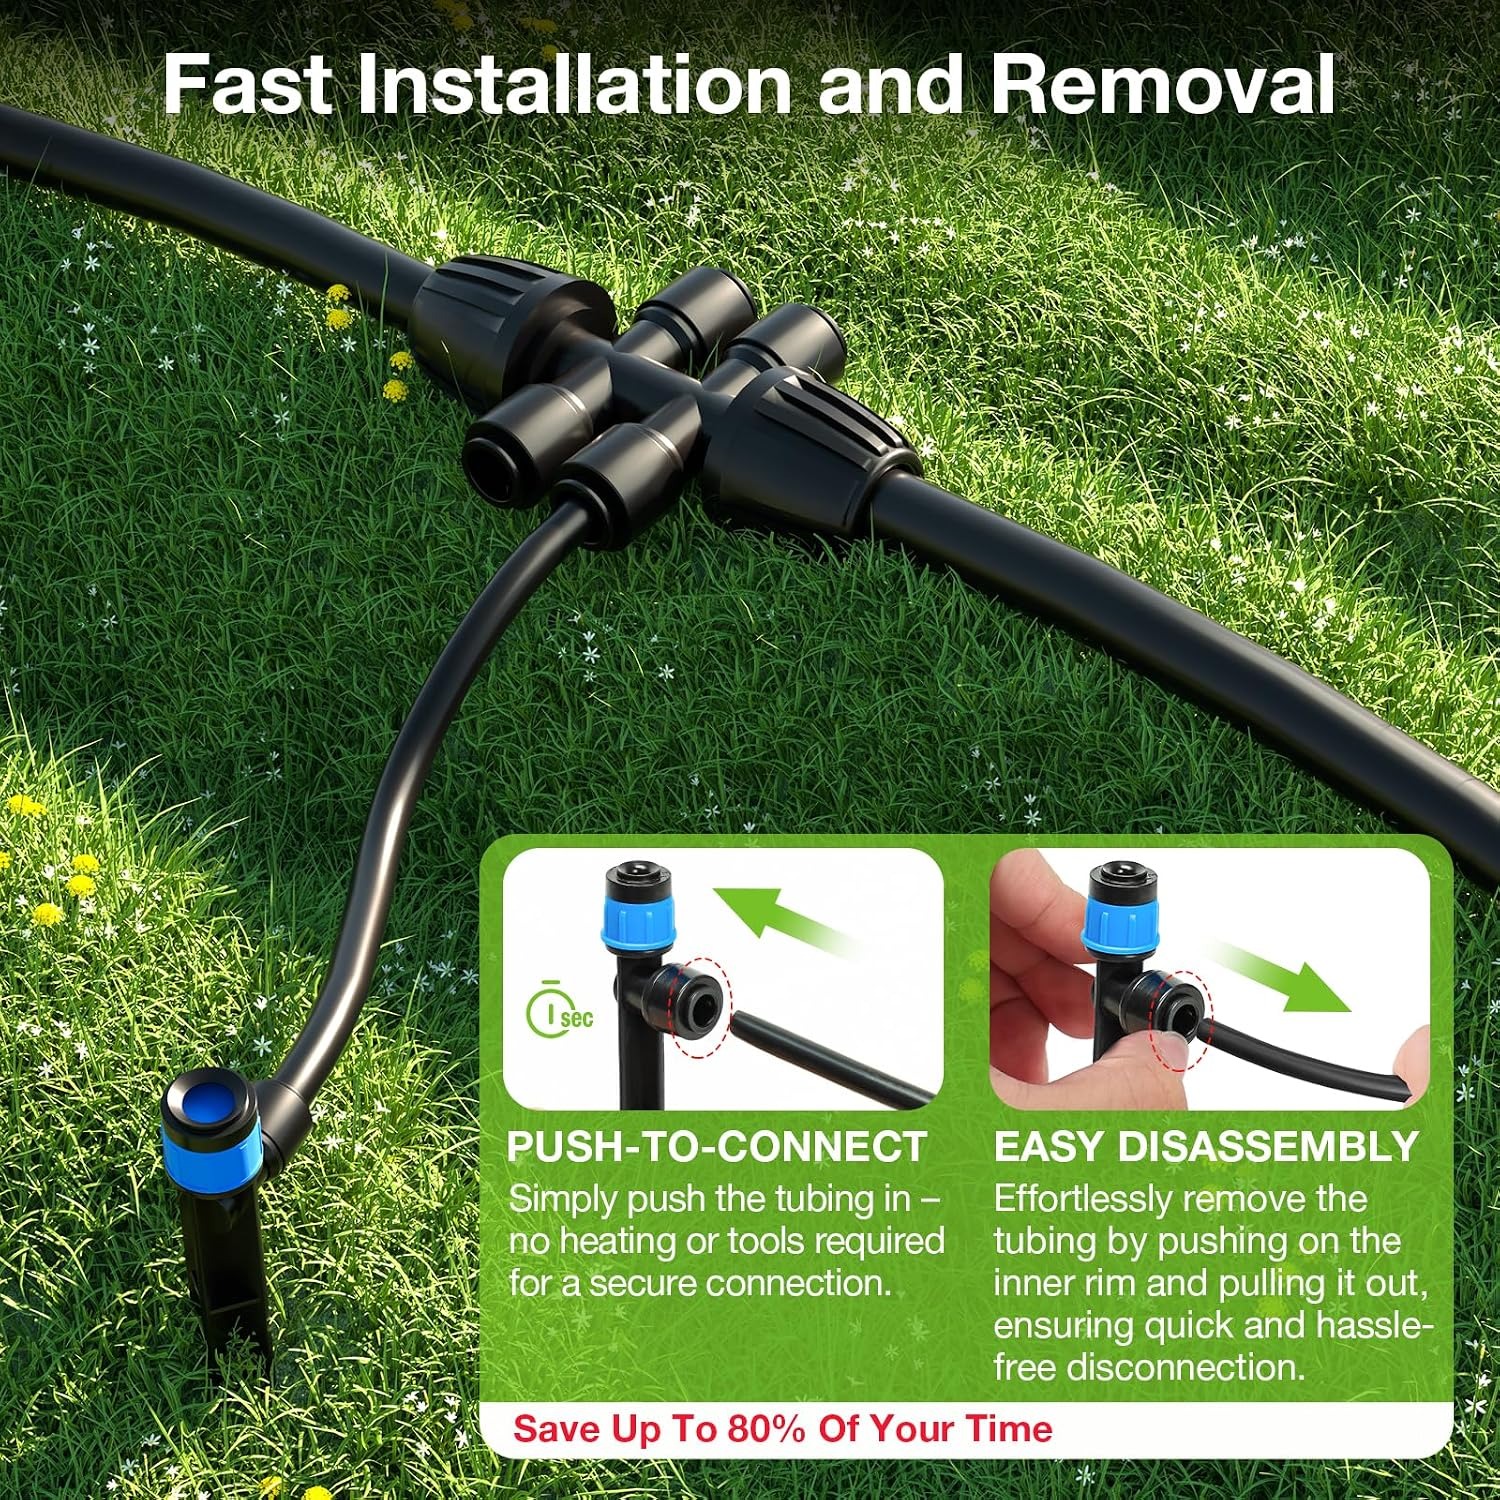
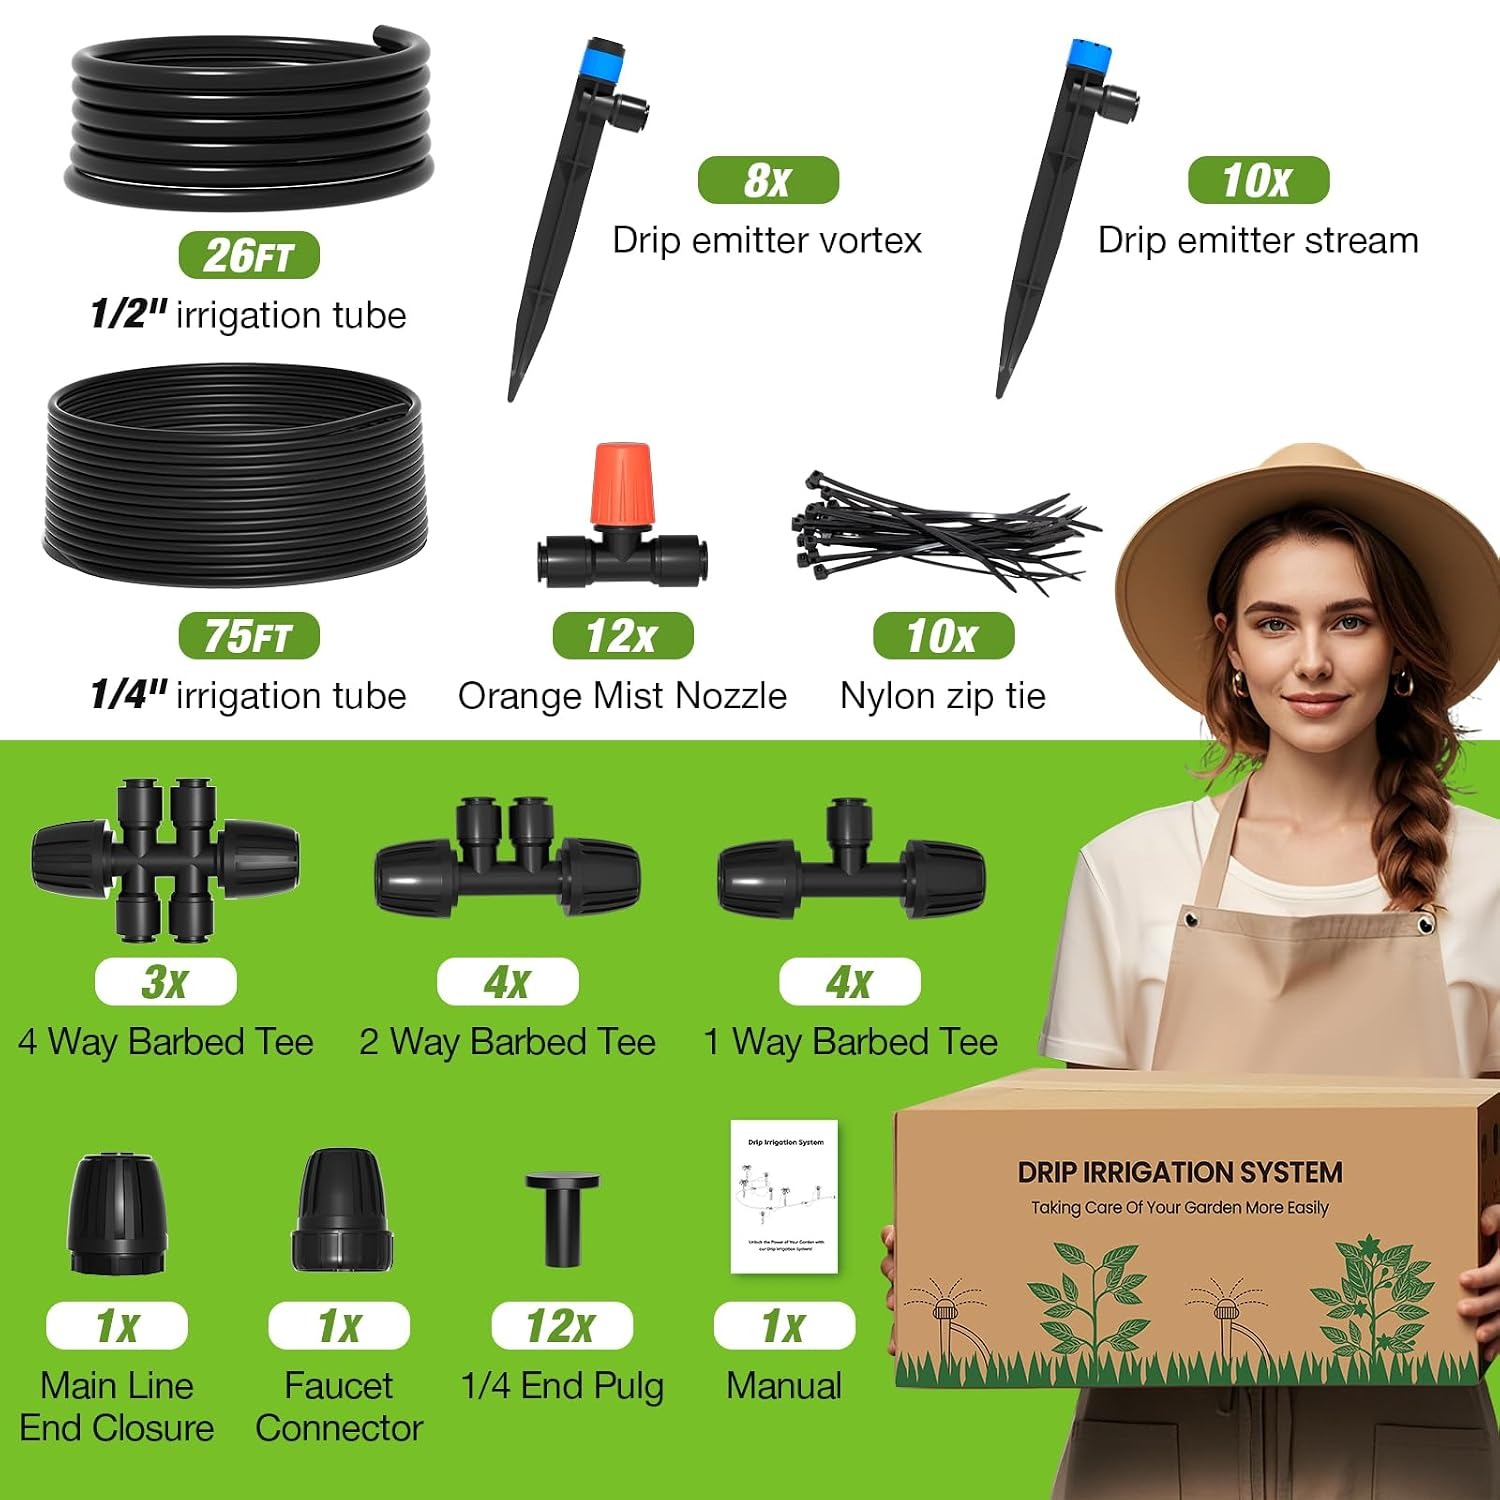
In this kit, the mainline is 1/2 inch tubing and comes in a 7.9 m (26 ft) length. The branch tubing is 1/4 inch and you get 22.9 m (75 ft) of it. The two sizes connect with lock barbed tees that you push in by hand. Across the whole set there are 135 pieces, so there is room to experiment.
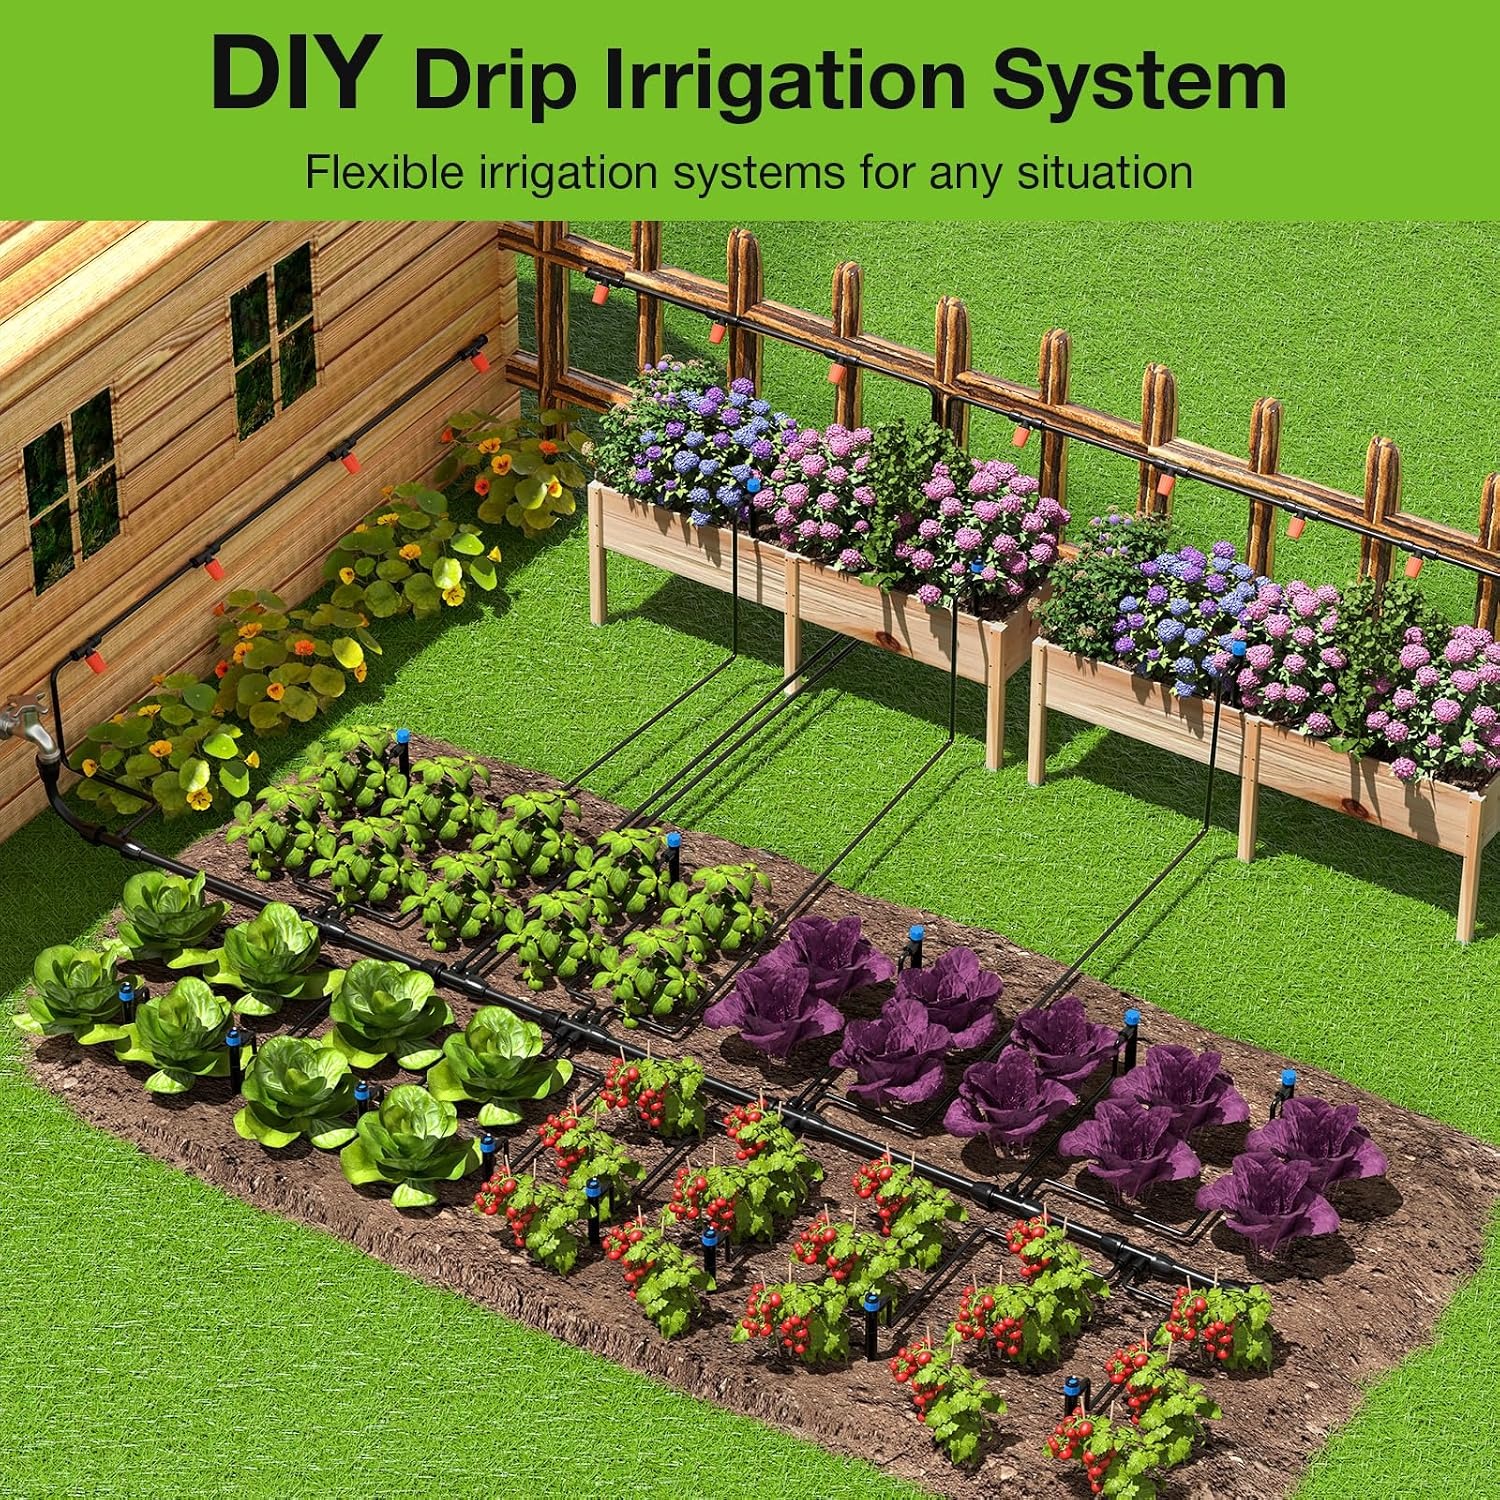
The layout is called branching, which is exactly what it sounds like. The mainline is the trunk, the thin tubes are the branches. You can tap into the mainline anywhere along its length, which means you are not locked into whatever plan you made on day one.
Everything runs on water pressure alone. There is no pump, no battery and no plug. The fittings are brass and stainless steel, and the system is rated to a maximum of 600 kilopascal, which covers normal household tap pressure.
Three emitter types and why that matters
Most gardens are not planted with one type of plant. You might have tomatoes that drink heavily, a row of lettuces that want steady light moisture, a few established shrubs with deep roots and a tray of seedlings that will wash away under anything stronger than a mist.
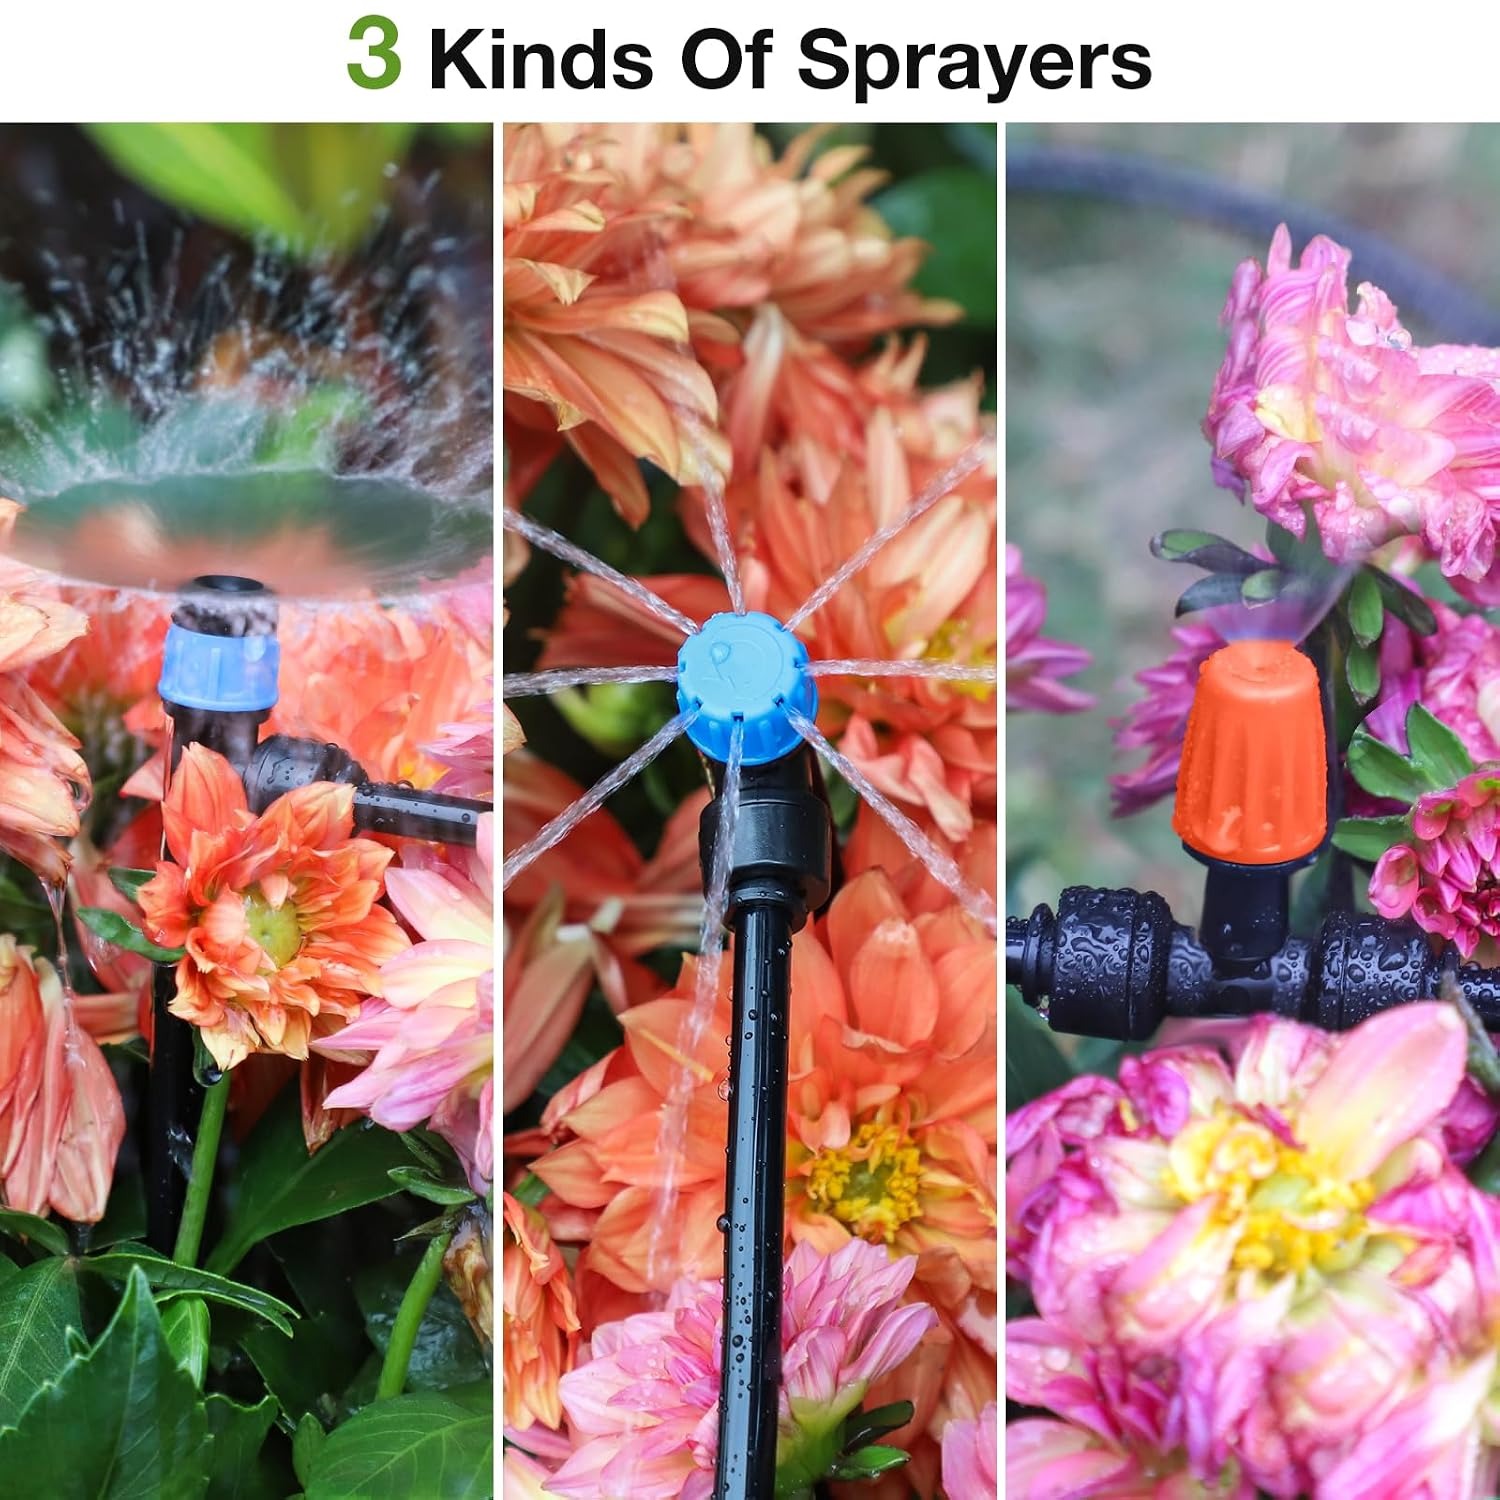
This set includes three emitter styles to deal with that range.
Drip emitters put out micro droplets at the base of a single plant. These are the workhorses for vegetables, tomatoes, peppers and anything in a pot.
Vortex emitters spread water over a wider circle. They suit shrubs, larger perennials and anything with a root ball that extends well past the stem.
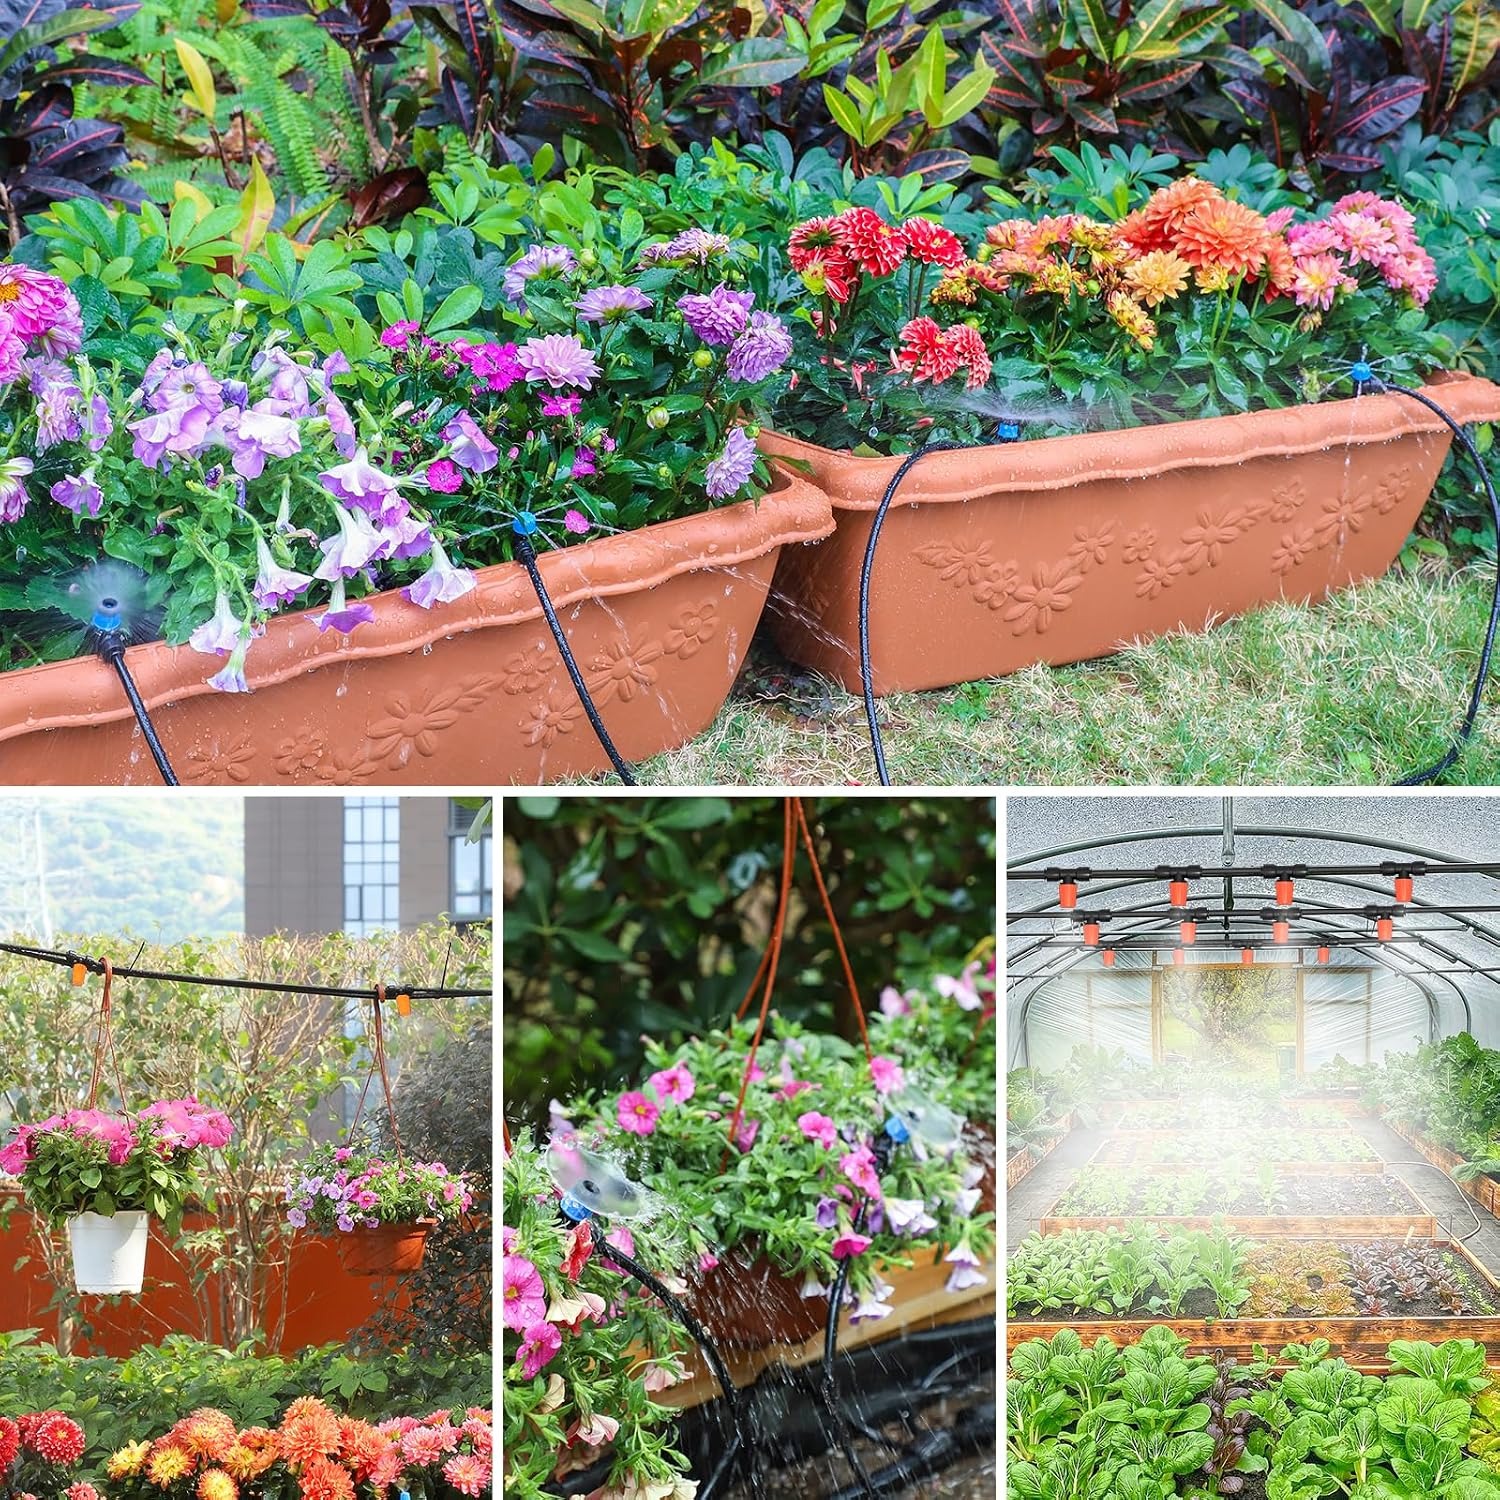
Misting nozzles produce a fine spray rather than drops. These are the ones for seedling trays, ferns and greenhouse humidity, and they are also sometimes used for cooling a patio area in hot weather.
Each spray nozzle can be adjusted individually for flow rate. That is more useful than it sounds, because plants in the same bed rarely need identical amounts. You can dial back the one over the herbs and open up the one over the courgettes without touching anything else.
Who this suits
If you have raised beds, this is a natural fit. Raised beds drain faster than ground soil and dry out quicker in heat, so they benefit most from steady delivery. Run the mainline along one long edge and branch into each row.
Patio pots are the other obvious case. Pots are the first thing to suffer in a hot spell, and a line of thin tubing threaded between them solves that completely. Each pot gets its own emitter.
Greenhouses work well because runs are short and the tap is usually nearby. Vegetable plots, flower beds and borders all suit a branching layout too.
Where it is less straightforward is a rain barrel setup. Gravity-fed barrels give low pressure, and emitters generally need some pressure behind them to flow evenly. If a barrel is your only source, look into a small pressurising pump before you buy tubing.
Planning the layout before you cut anything
Spend twenty minutes on this and you will save an hour later. Walk the garden and note where the tap is, how far the furthest plant sits from it, and whether the mainline can run along a bed edge or needs to cross a path.
Count your plants, or at least your plant groups. Then check the numbers. You have 7.9 m of mainline to get from the tap to the far end of the planting area, and 22.9 m of branch tubing to divide among the individual runs. If you have thirty pots spaced half a metre apart, that is fifteen metres of branch tubing straight away, and it adds up faster than people expect.
Sketch it. Nothing fancy, just a box for each bed and a line for the tubing. Mark where you want tees.
Putting it together
Cut the mainline to length with scissors and connect it to the tap using the faucet connector. Lay it where it needs to go, but do not fix anything down yet. Push the lock barbed tees into the mainline wherever a branch is needed, then run the 1/4 inch tubing from each tee to its plant and fit the emitter on the end.
Turn the water on at low pressure first and watch. You are looking for two things: drips at joints that should not be dripping, and emitters that are not flowing. Joints usually just need pushing home more firmly. Emitters that are not flowing are usually blocked by a bit of debris from cutting the tube, and a rinse fixes them.
Once it all runs properly, pin the tubing down and cover the lines with mulch if you have it. Mulch keeps the sun off the tubing and stops you catching it with a hoe.
Adding a timer
The kit is driven by tap pressure, so left alone it waters when you turn the tap on. Fit a battery timer at the faucet and it becomes genuinely automatic. Early morning is the best watering window, before the heat builds and before evaporation takes a share.
Start conservatively. Fifteen or twenty minutes a day is a sensible baseline for most beds in warm weather, then check the soil a few centimetres down after a few days and adjust. Dig a small hole with your finger. If it is damp at root depth, you are fine. If it is dry, add time rather than frequency, because one longer soak beats two short ones.
Looking after it
At the start of each season, pull the end caps and flush the lines for a minute to clear out anything that has settled. If your water carries sediment, an inline filter at the tap is a cheap addition that prevents most clogging problems.
If flow drops at one emitter, it is almost always that emitter rather than the system. Unscrew it, rinse it, put it back.
Before the first hard frost, drain everything, disconnect it from the tap and store it indoors. Water sitting in tubing over winter can freeze and split it. The whole kit folds back into a box of 27.8 x 24.2 x 12.2 cm and weighs 2.43 kg, so storage is not an issue.
The short version
A drip irrigation kit takes the guesswork and the daily walk out of watering. This one gives you 7.9 m of mainline, 22.9 m of branch tubing and 135 parts, with three emitter styles so different plants can share one system. It runs on tap pressure alone, uses brass and stainless steel fittings, and is rated to 600 kilopascal. Setup needs scissors and a plan, not plumbing skills. Add a tap timer and you have a system that waters the garden properly whether you are standing there or not.