


The complete guide
Seed Starting Trays, A Practical Buyer's Guide
The problem with starting seeds on a saucer
Nearly everyone starts out the same way. A yoghurt pot, some compost, a sunny window, and high hopes. A few seeds come up, most do not, and the ones that do grow pale and floppy and then fall over. It is easy to decide you are just bad at it.
You are probably not bad at it. The pot had no drainage, so the compost stayed soggy and the roots drowned. There was no cover, so the surface dried out between waterings while the bottom stayed wet. And without labels, by week three you had no idea which pot held the chillies and which held the basil.
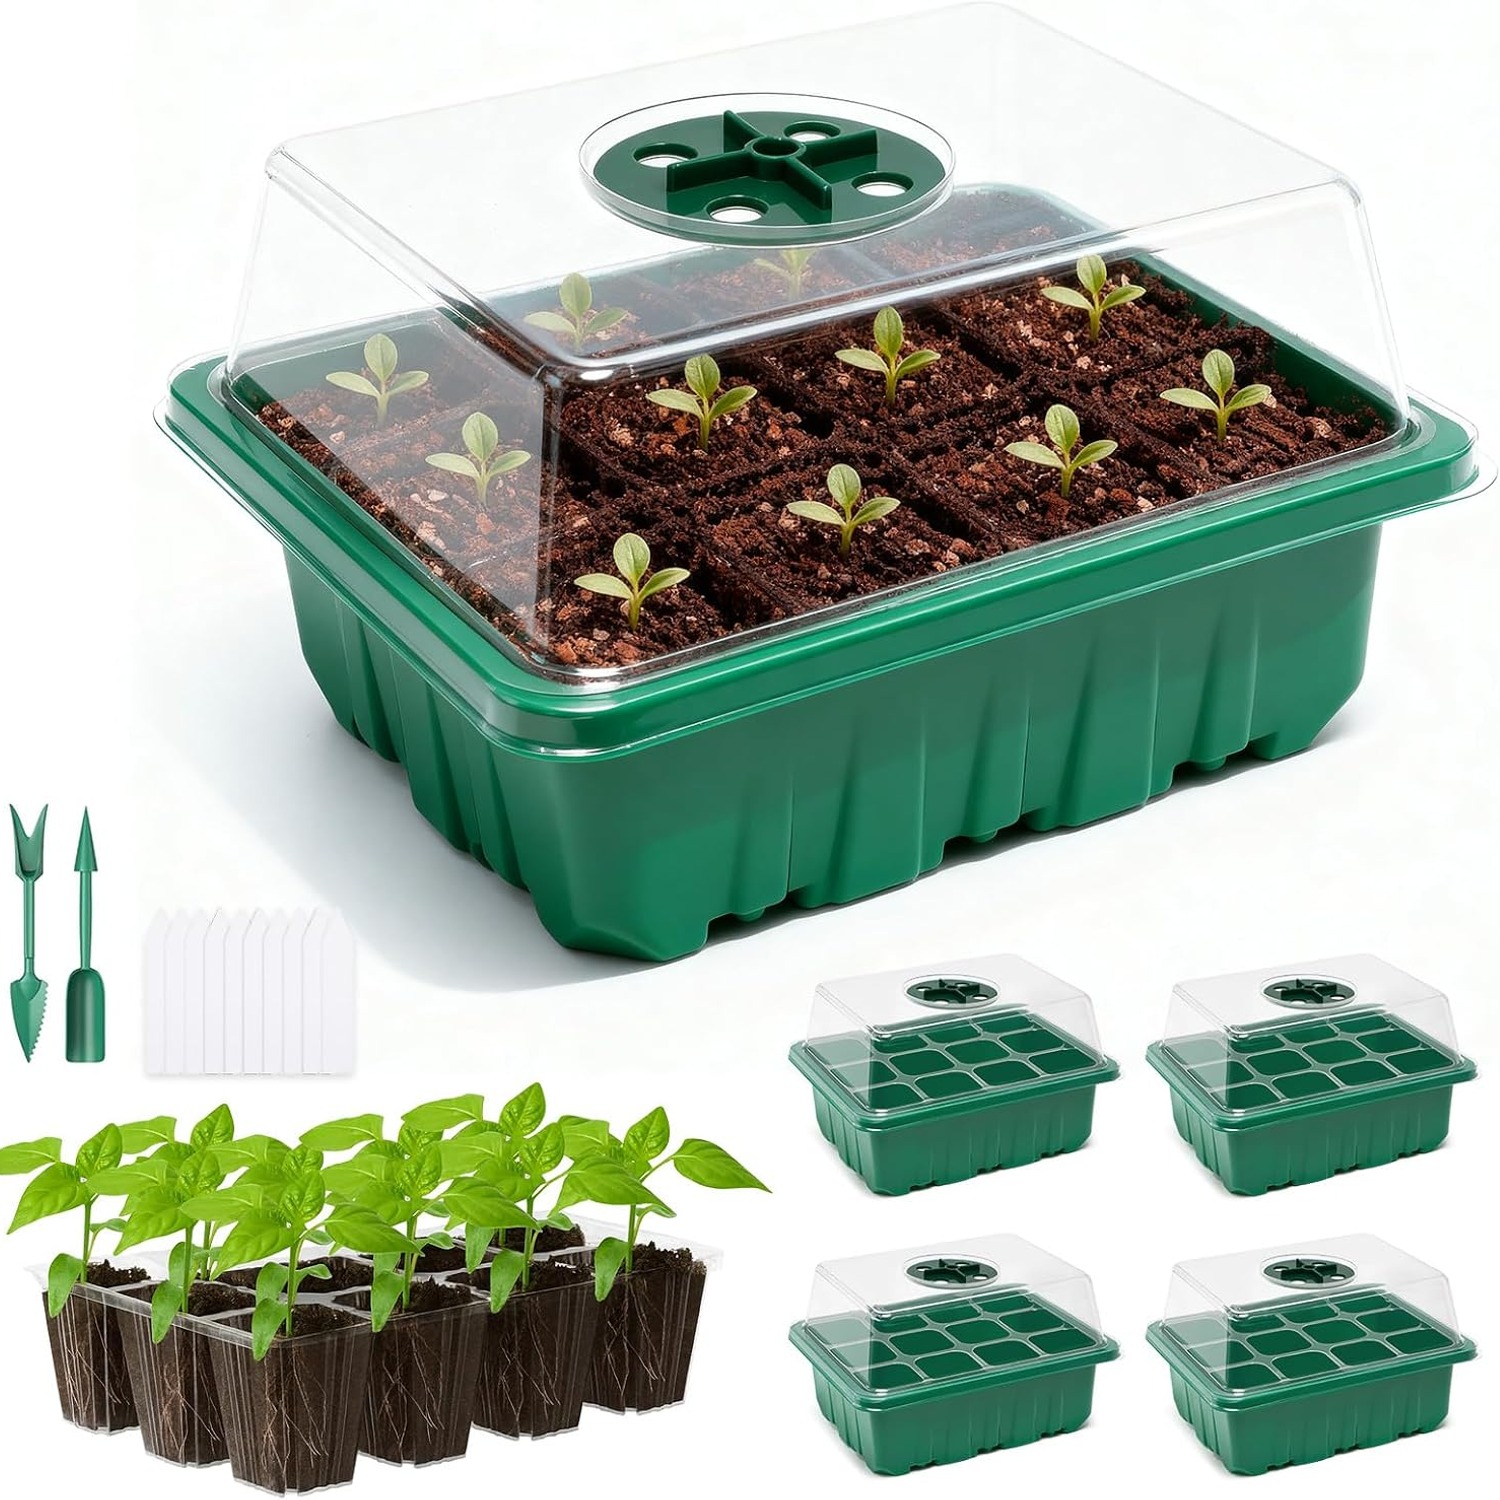
Starter trays for seeds solve those problems in one object. A cell gives each seed its own ration of compost. A drainage hole lets surplus water leave. A dome holds humidity while germination happens. A base tray catches the run-off. Nothing about that is clever or complicated, which is exactly why it works.
How a seed starting tray actually works
Germination has a short, very specific set of needs. Moisture to soften the seed coat, warmth to trigger the process, and air at the roots. Get all three at once and most seeds come up.
The dome handles the moisture part. Put it on after sowing and it traps the water that evaporates from the compost, so the surface stays damp without you watering it twice a day. That is the stage where seeds are most vulnerable, because a seed that swells and then dries out usually dies.
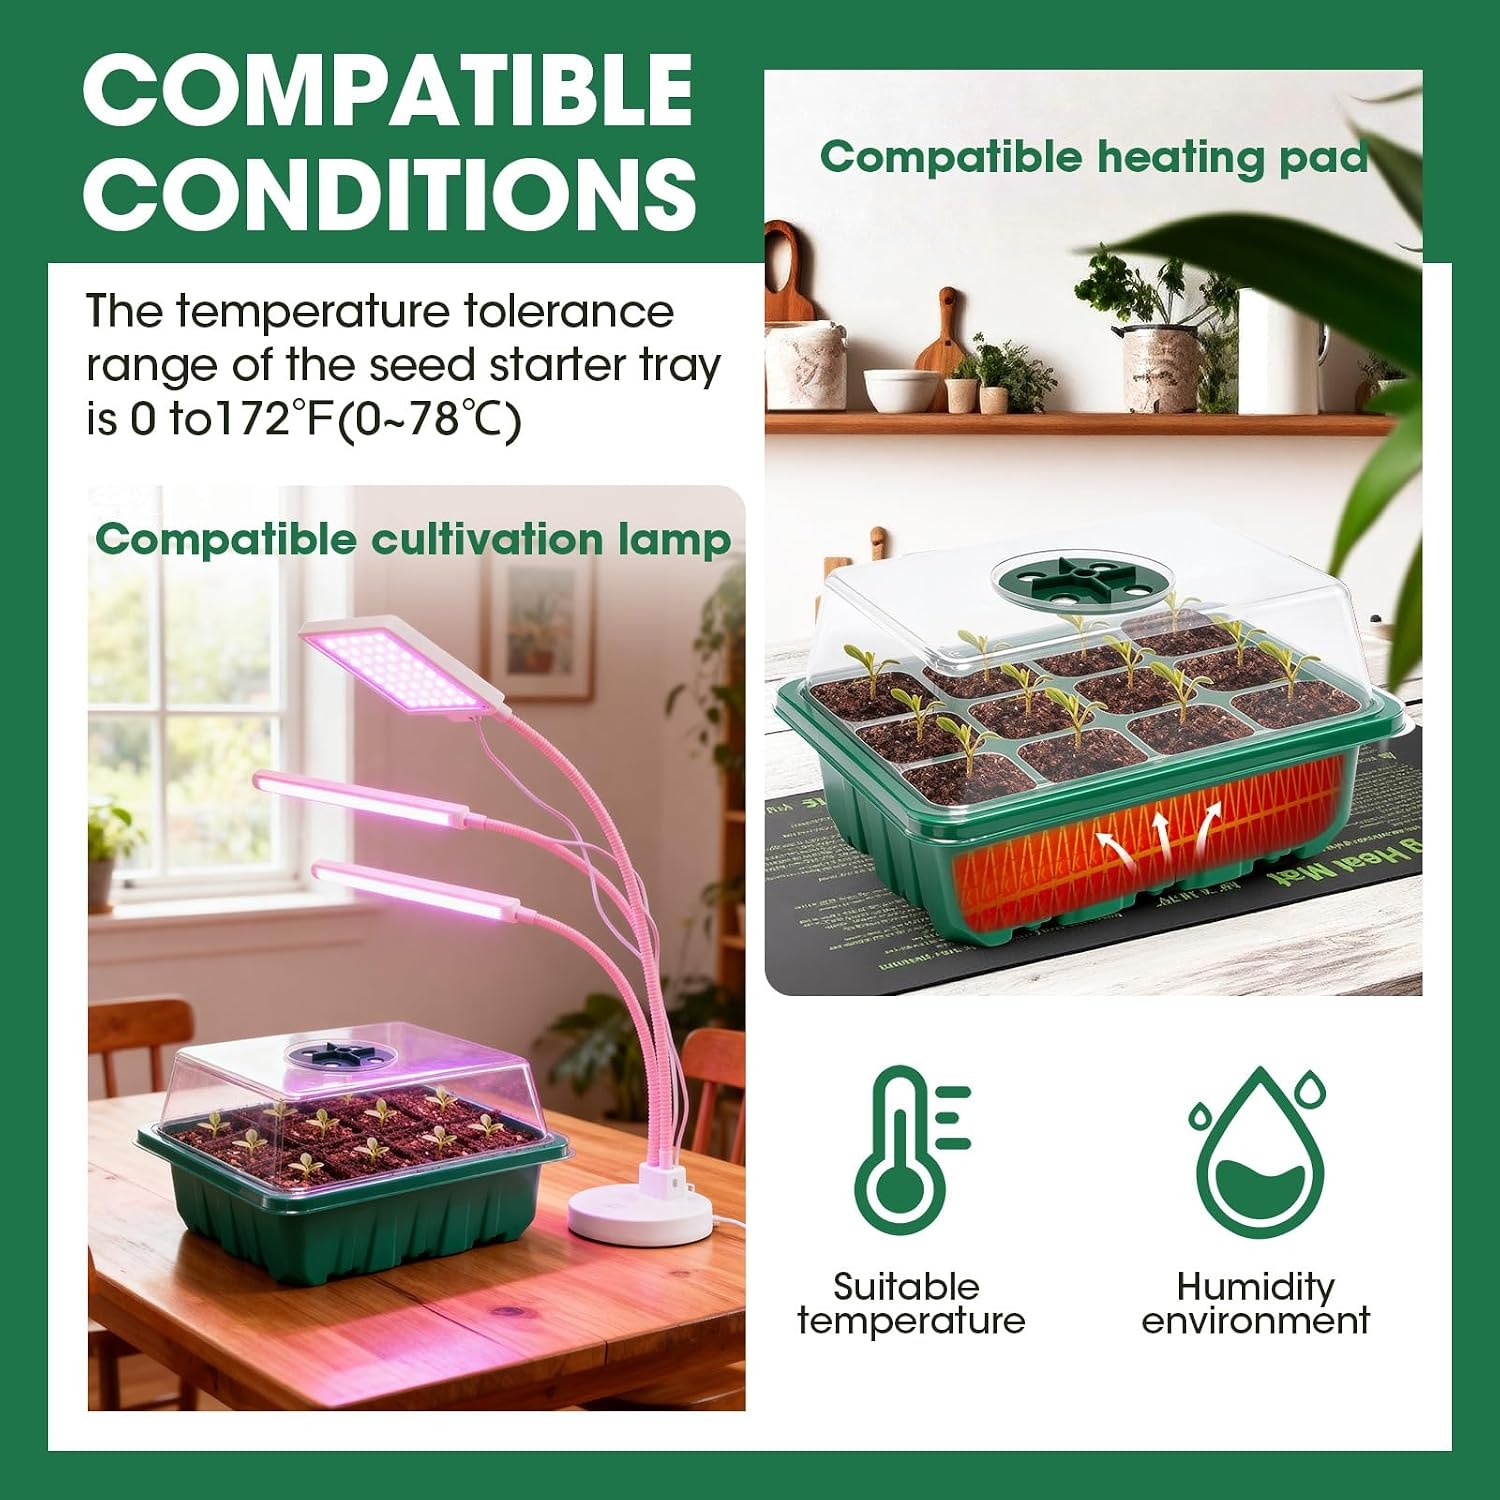
Warmth comes from the room, a windowsill, or a heat mat. This set is described as compatible with mats and lamps, with a stated tolerance range of 0 to 78°C and a suggested growing temperature of 20 to 30°C. No mat or lamp is included, so if you want bottom heat you buy that separately.
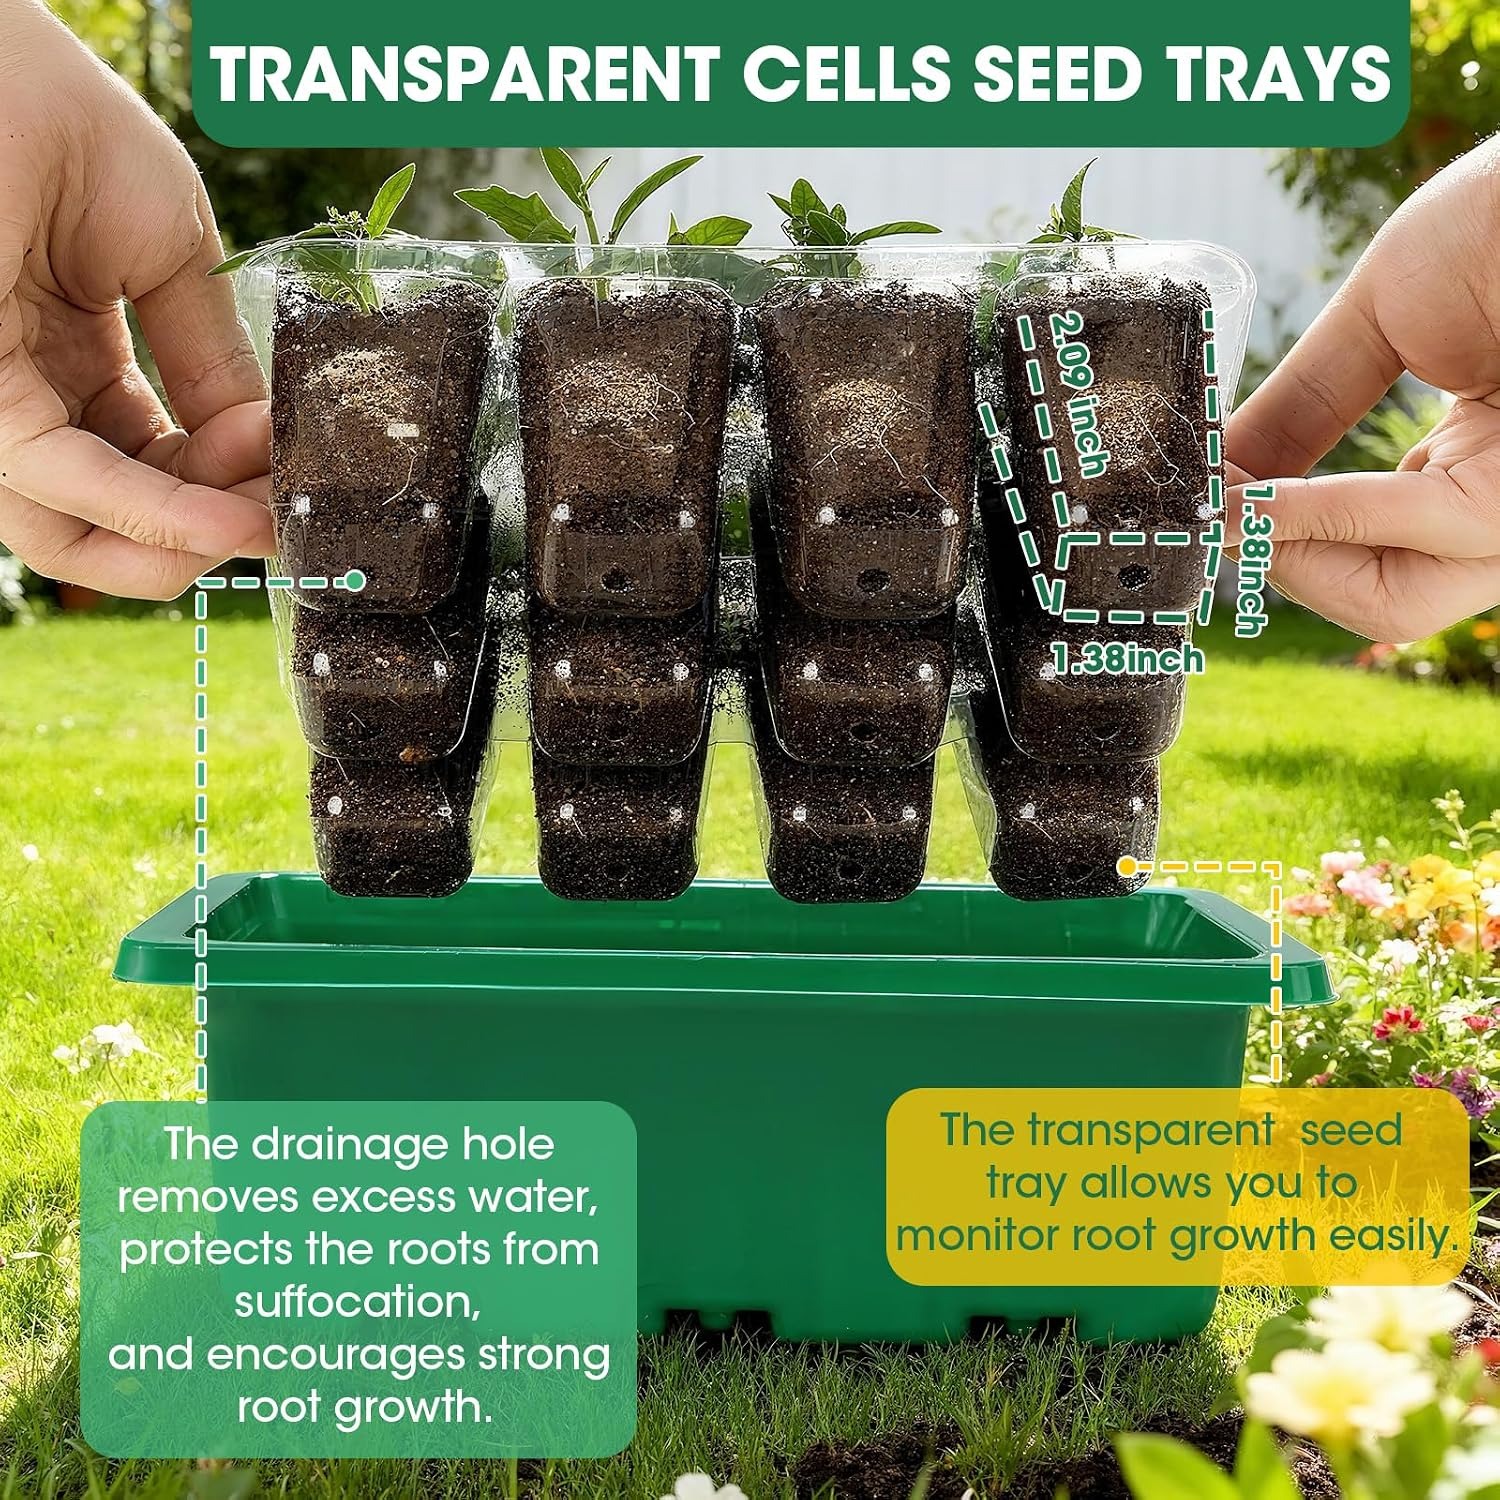
Air is where the drainage holes earn their keep. Roots need oxygen as much as water. Holes in the bottom of each cell let excess water fall through into the watertight base tray, leaving air gaps in the compost. Without that, you get waterlogged compost and the collapse people call damping off.
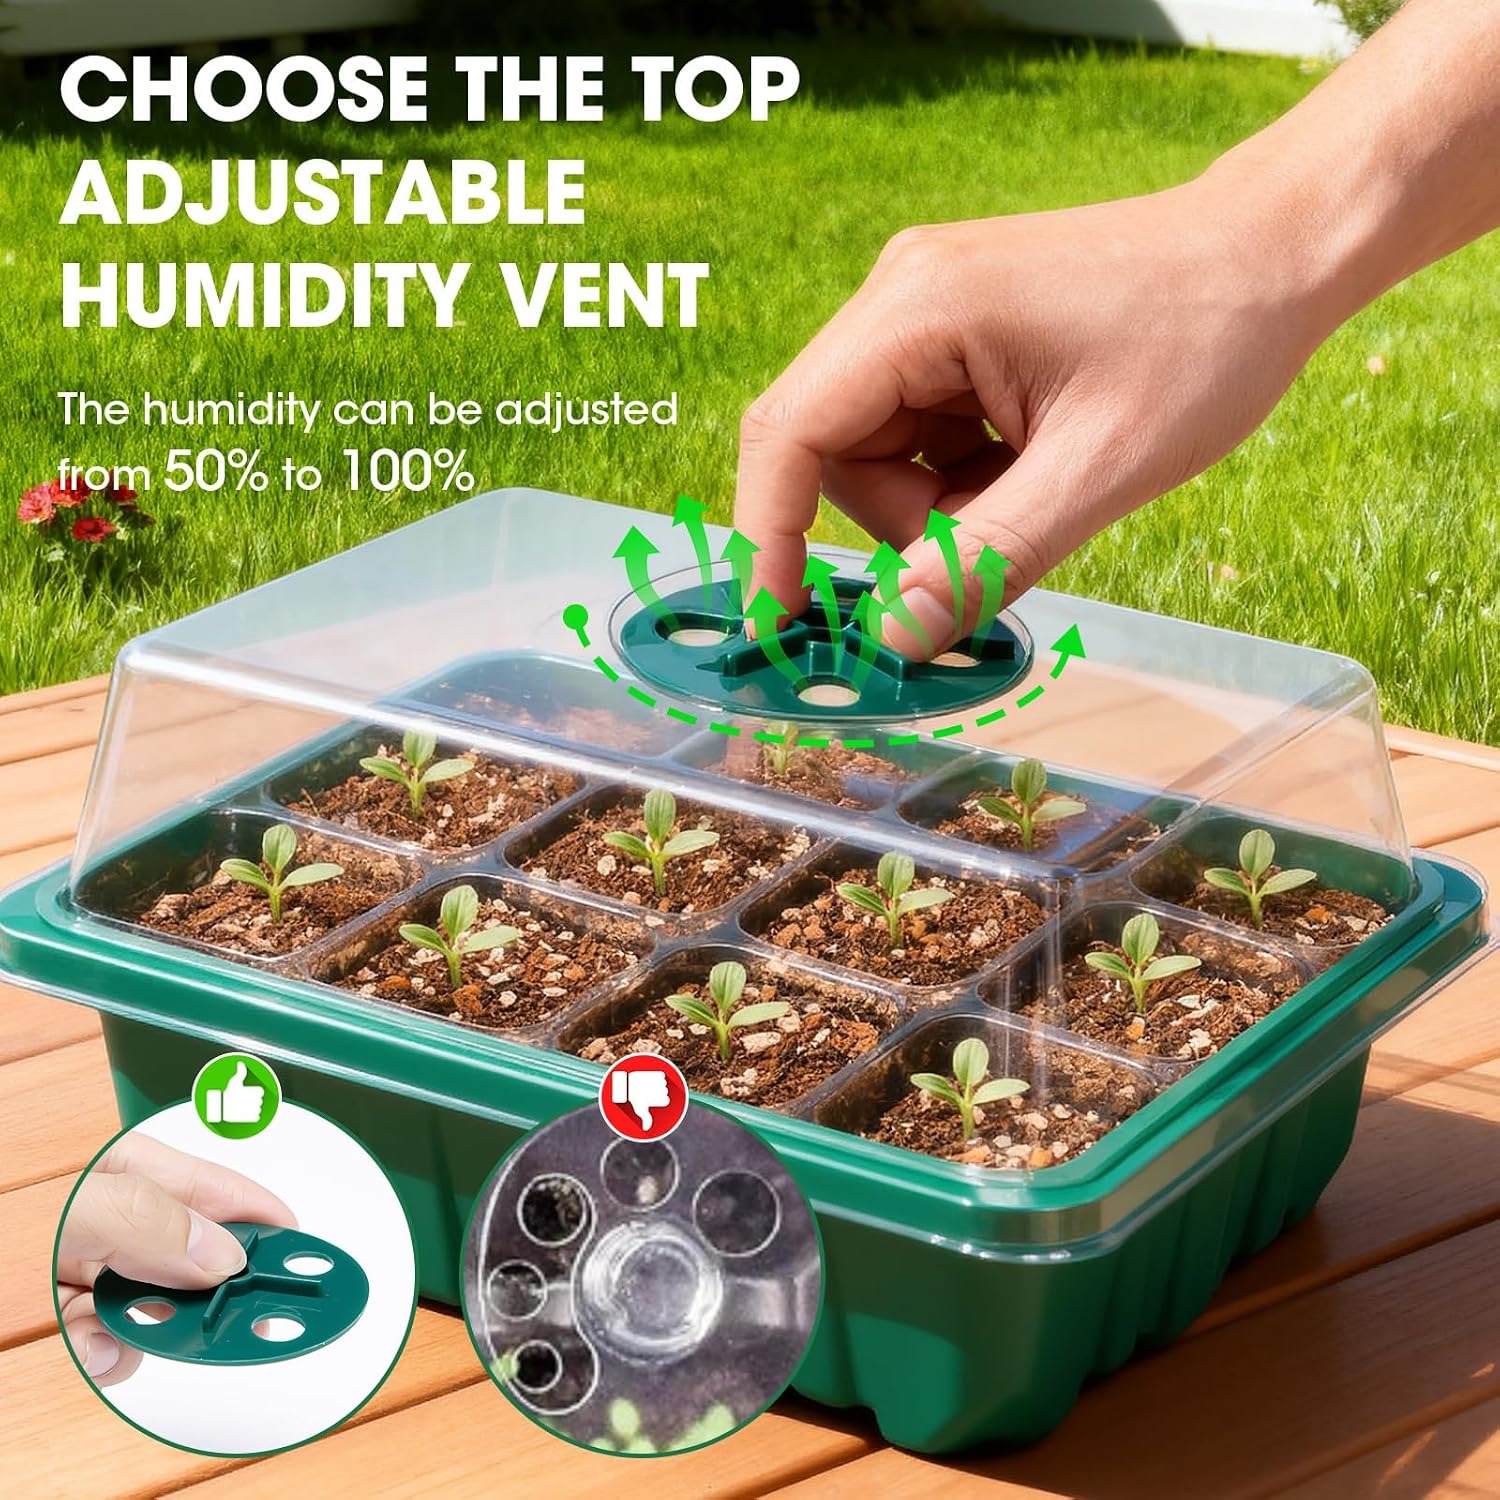
The vents in the dome manage the shift between those stages. Closed at the start for humidity, cracked open as shoots appear, then the dome comes off entirely. That slow change is what builds sturdy stems.
Who this kind of set suits
If you sow a few trays each spring for the vegetable patch, a 300-cell pack is roughly the right scale. Five trays of 60 cells covers a decent range of tomatoes, peppers, lettuce and flowers without being so large you cannot find a window for it.
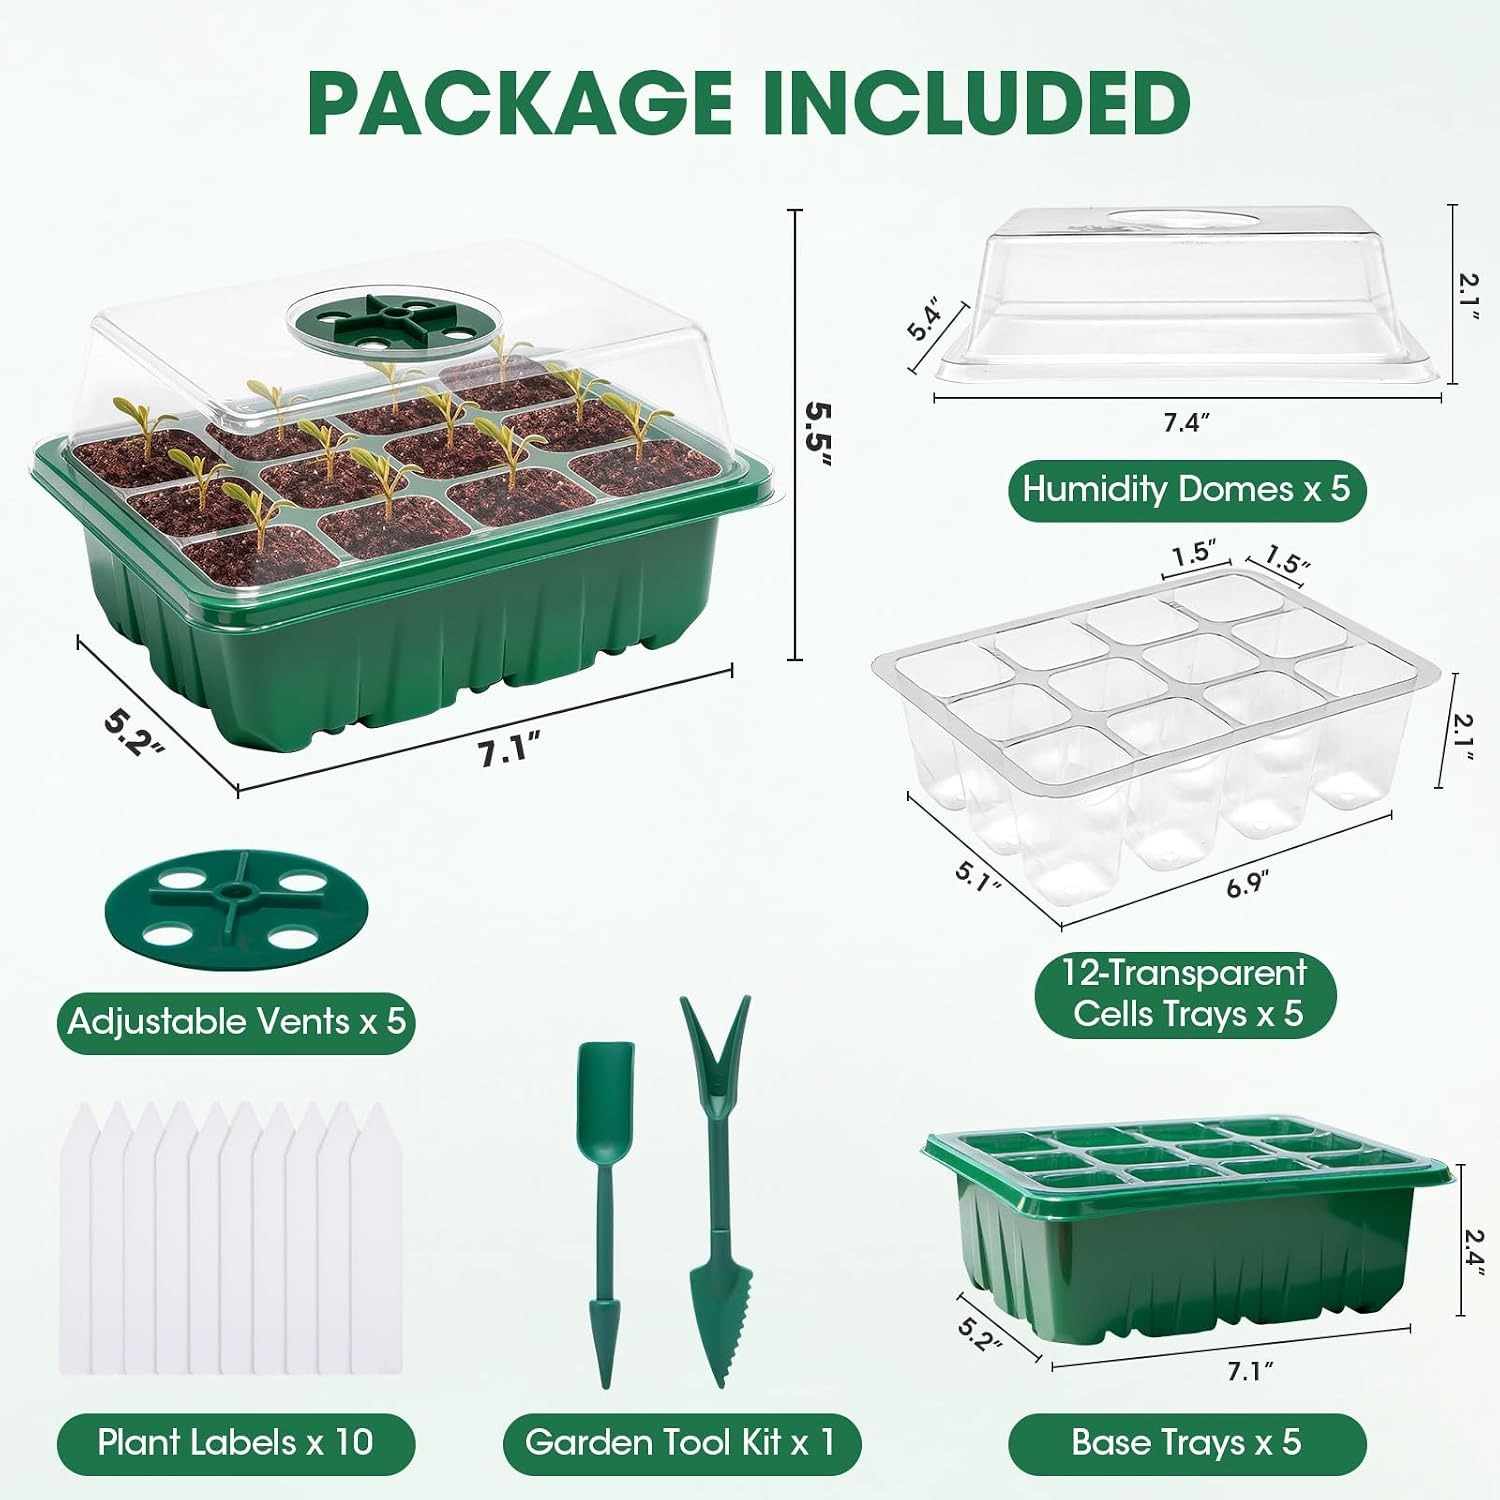
It suits people with limited space too. The trays are small, 18 × 13.2 × 14 cm as supplied, and the whole pack weighs 540 g. You can run one or two trays on a sill and keep the rest in a cupboard until you need them.
Apartment growers and anyone starting herbs or houseplants from seed will find it useful, since the listed usage is indoor. The clear cells also make it genuinely interesting for kids, because you can see the roots forming and there is something to look at before anything pokes above the soil.
If you sow at commercial scale, or you grow mostly big-seeded crops like squash and beans that want deep pots from day one, you will outgrow cells this size fairly quickly. That is a question of scale, not quality.
How to choose between seed trays
Cell count is the first decision. More cells means more plants but smaller individual root spaces, so you pot on sooner. Fewer, larger cells let plants stay put longer but take up more bench space for the same number of seedlings. Sixty cells per tray sits in the middle, which is why it is such a common format.
Next, check whether the trays drain. A surprising number of cheap trays are solid, which means every watering is a gamble. Drainage holes plus a watertight base tray is the arrangement you want, because it lets you water from below as well as above.
Look at the dome. A dome without vents is a blunt instrument. You either have full humidity or none, with nothing in between, and that abrupt change shocks young seedlings. Adjustable vents are worth having.
Consider whether the cells are clear. Opaque cells work fine, but you lose the ability to check root growth. Being able to see when roots have reached the edge of the cell tells you exactly when to pot on, which is one of the harder judgement calls for new growers.
Finally, think about whether the trays will survive a second season. Thin, brittle plastic cracks when you flex it to pop out a plug. Trays described as reusable cycle after cycle are better value over time, even if the first purchase costs a little more.
Getting the best results
Use a proper seed compost rather than garden soil or general potting mix. Seed compost is fine-textured and low in nutrients, which is what tiny roots want. Fill the cells, tap the tray on the bench to settle the compost, and firm lightly with your fingertips.
Sow at the depth on the packet. Some seeds need light to germinate and should sit on the surface, others want burying. Getting this wrong is a common reason trays fail to come up.
Water before you put the dome on, not after, and water gently so you do not wash the seeds out of position. A fine spray or bottom watering both work well.
Label as you sow, not afterwards. Ten labels come in the pack. Variety plus date on each one means you know what you have and how long it has been in the tray.
Once seedlings appear, give them as much light as you can. Low light is the main cause of long, weak stems. If you are growing on a sill, turn the tray every day or two so the seedlings do not all lean one way.
Care and storage
At the end of each batch, empty the compost out and rinse the trays. Wash with warm water and a little mild dish soap, using a soft brush for the corners of the cells. Rinse well, then let everything air dry completely before stacking it away.
Avoid harsh scourers. They scratch the clear plastic, which makes the cells cloudier each season and defeats the point of being able to see the roots.
Store the trays flat, out of direct sun, somewhere they will not be crushed. Thin plastic warps under weight and sunlight degrades it over time. Keep the domes with the trays so you are not hunting for them next February.
The short version
A good seed starting tray does four things. It gives each seed its own compartment, it drains, it holds humidity while you need it, and it lets you dial that humidity back when you do not. This pack covers all four, with 300 cells across five trays, vented domes, clear cells for watching roots and watertight bases to catch run-off.
Add ten labels and two small tools and you have the whole starting kit in one box. It is compact to store, light to move, and built to be used again next year. If you have been losing seedlings to soggy compost or guessing which pot is which, this is the simple fix.