


The complete guide
The Practical Guide to Core Aerating Your Lawn by Hand
The problem nobody sees until the grass gives up
Lawns fail from the bottom, not the top. You can water, feed and mow on schedule and still end up with thin, yellowish grass that bounces back slowly after a party or a wet winter. In most cases the cause is sitting under your feet. Soil compaction squeezes the air pockets out of the ground, and roots cannot grow through soil that has no gaps in it.
It builds up quietly. Foot traffic, kids, dogs, garden furniture, a mower going over the same line every week, rain hammering down on bare patches. Each one presses the soil particles a little closer together. After two or three seasons the top 5 to 10 cm of your lawn can be dense enough that water beads up and runs off instead of soaking in.
The symptoms are easy to spot once you know them. Puddles that linger after rain. Grass that turns straw-coloured in dry spells faster than the neighbour's. Thin patches along the route everyone takes to the shed. A screwdriver that you can barely push into the ground by hand. If two or three of those sound familiar, compaction is likely your issue.
How a manual lawn corer fixes it
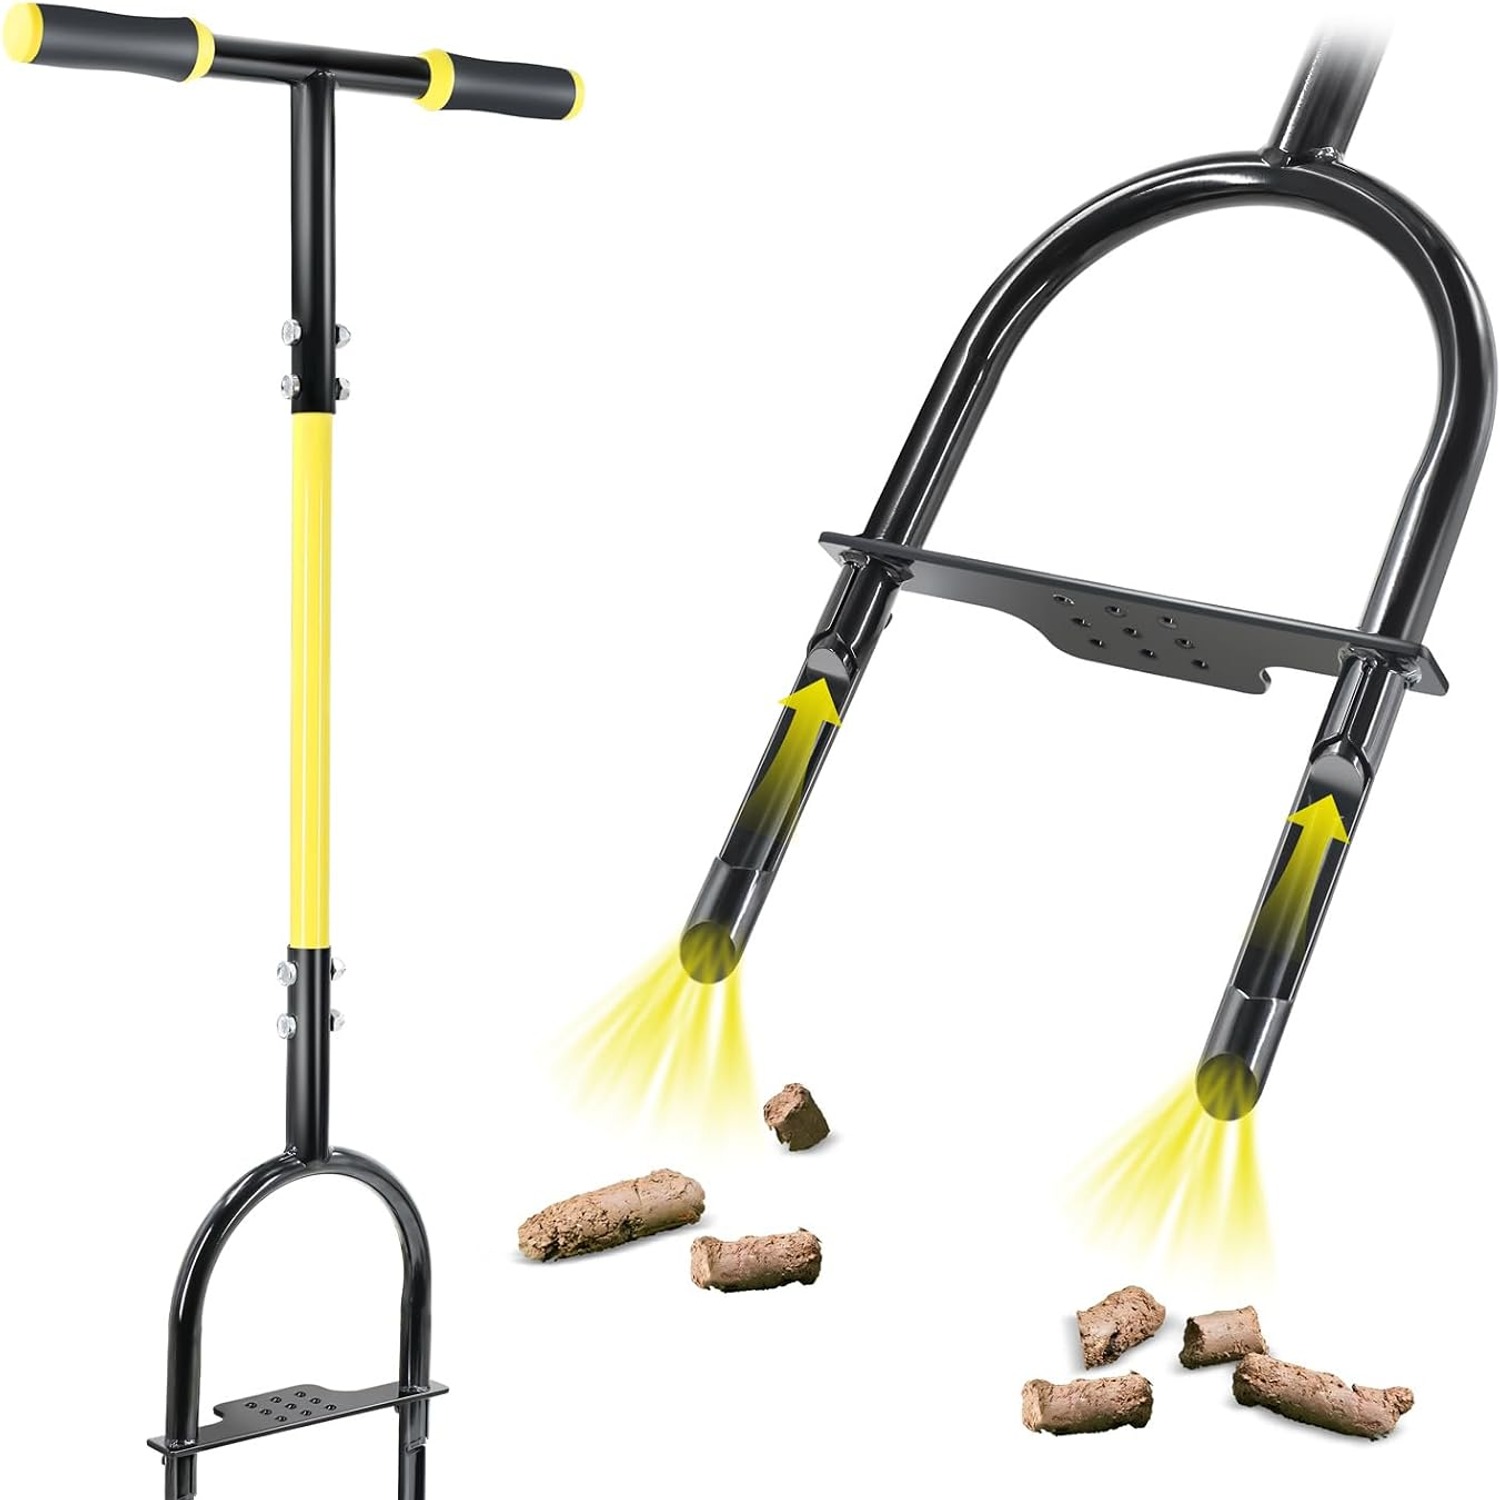
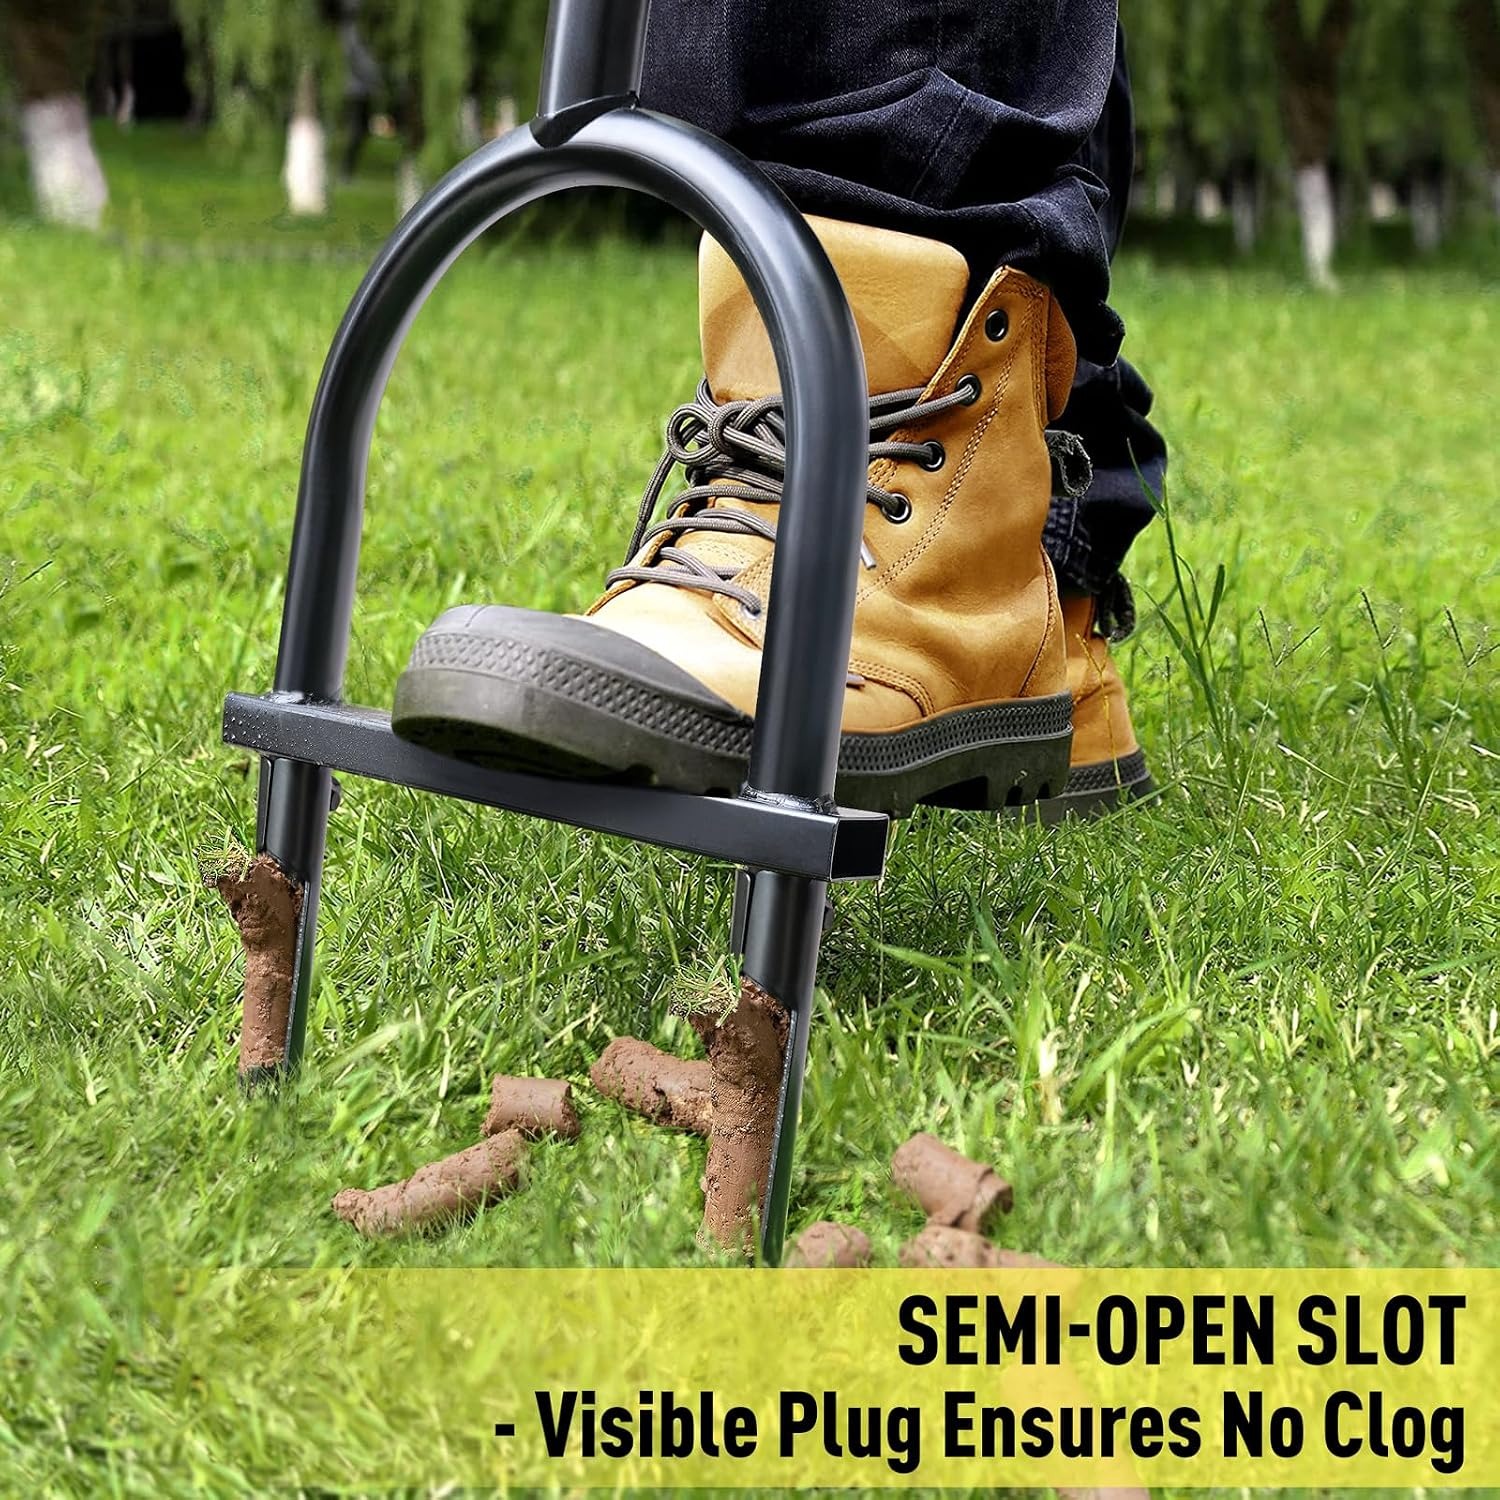
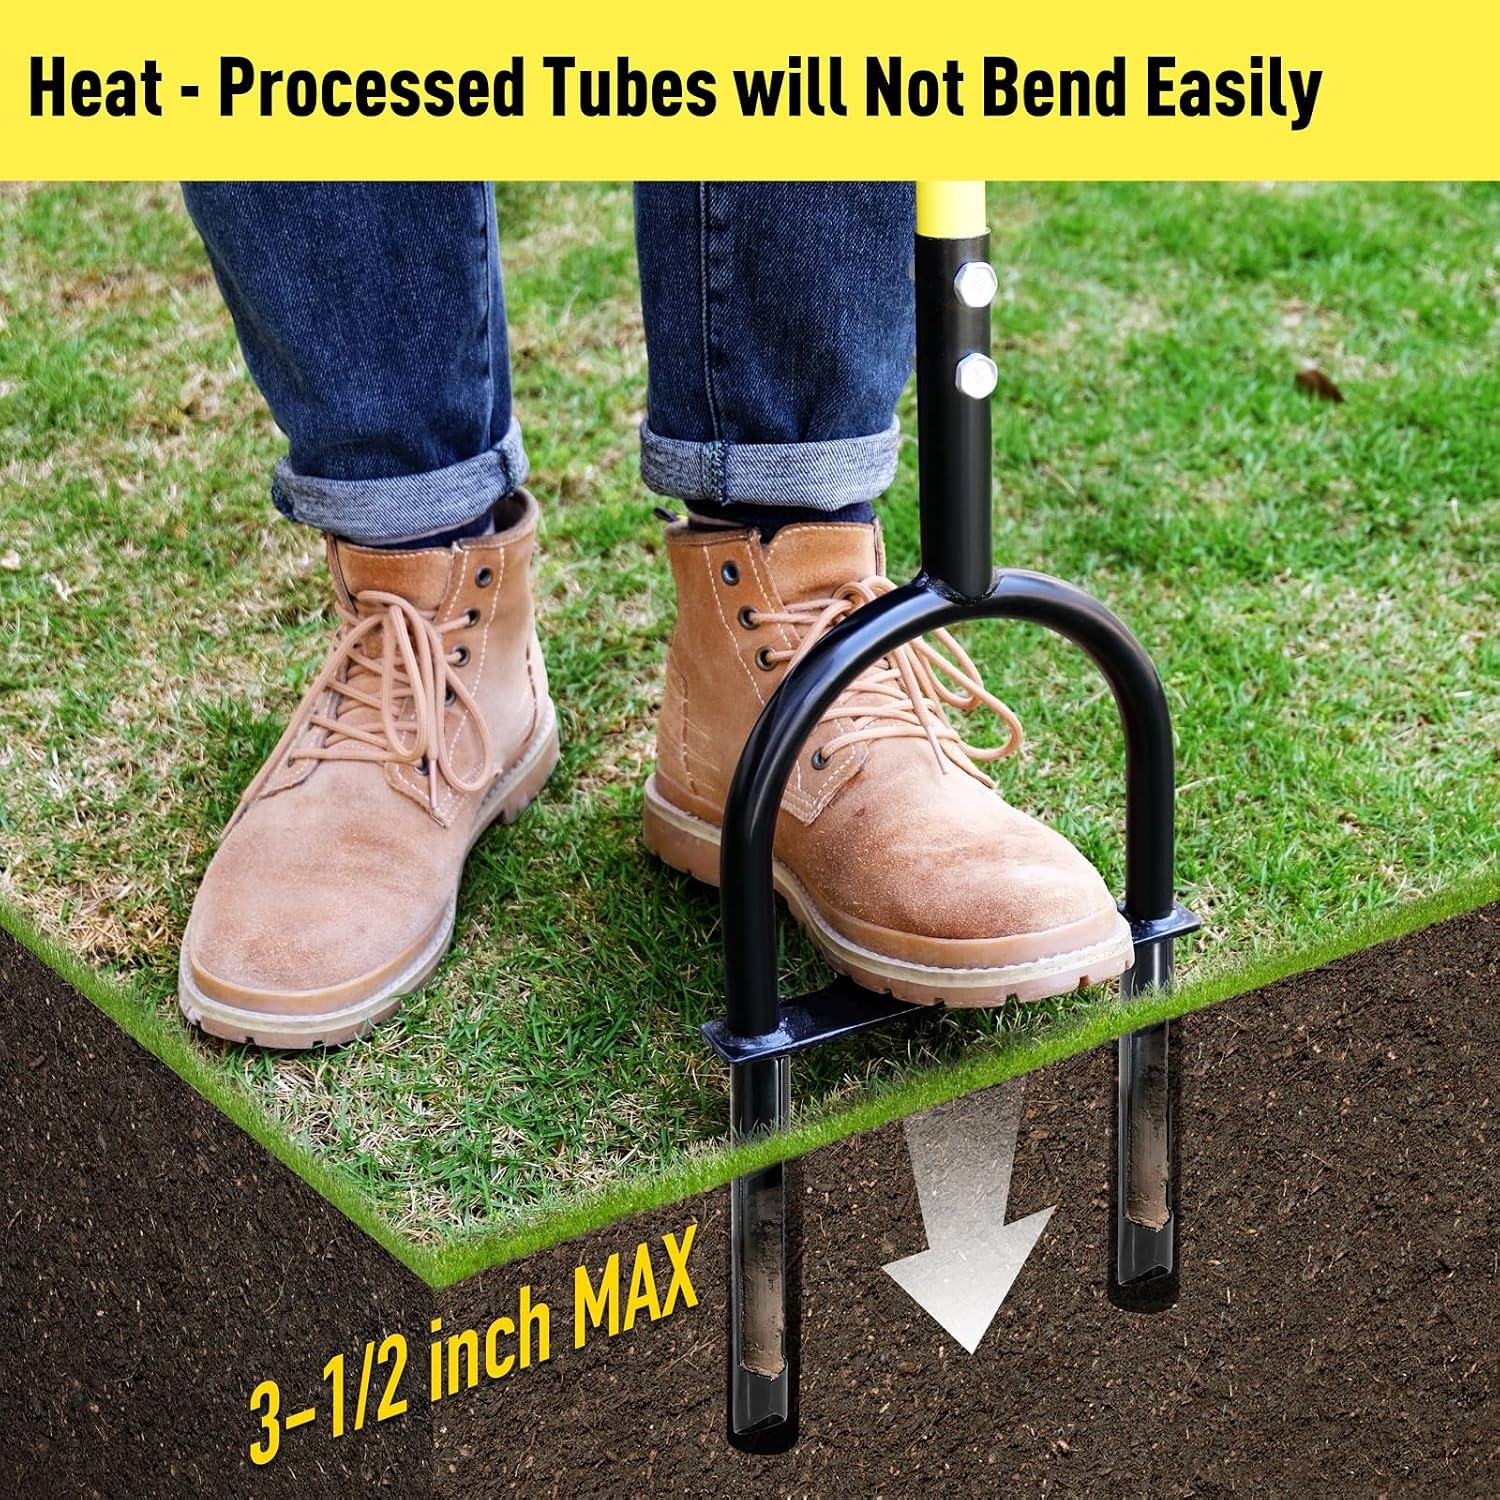
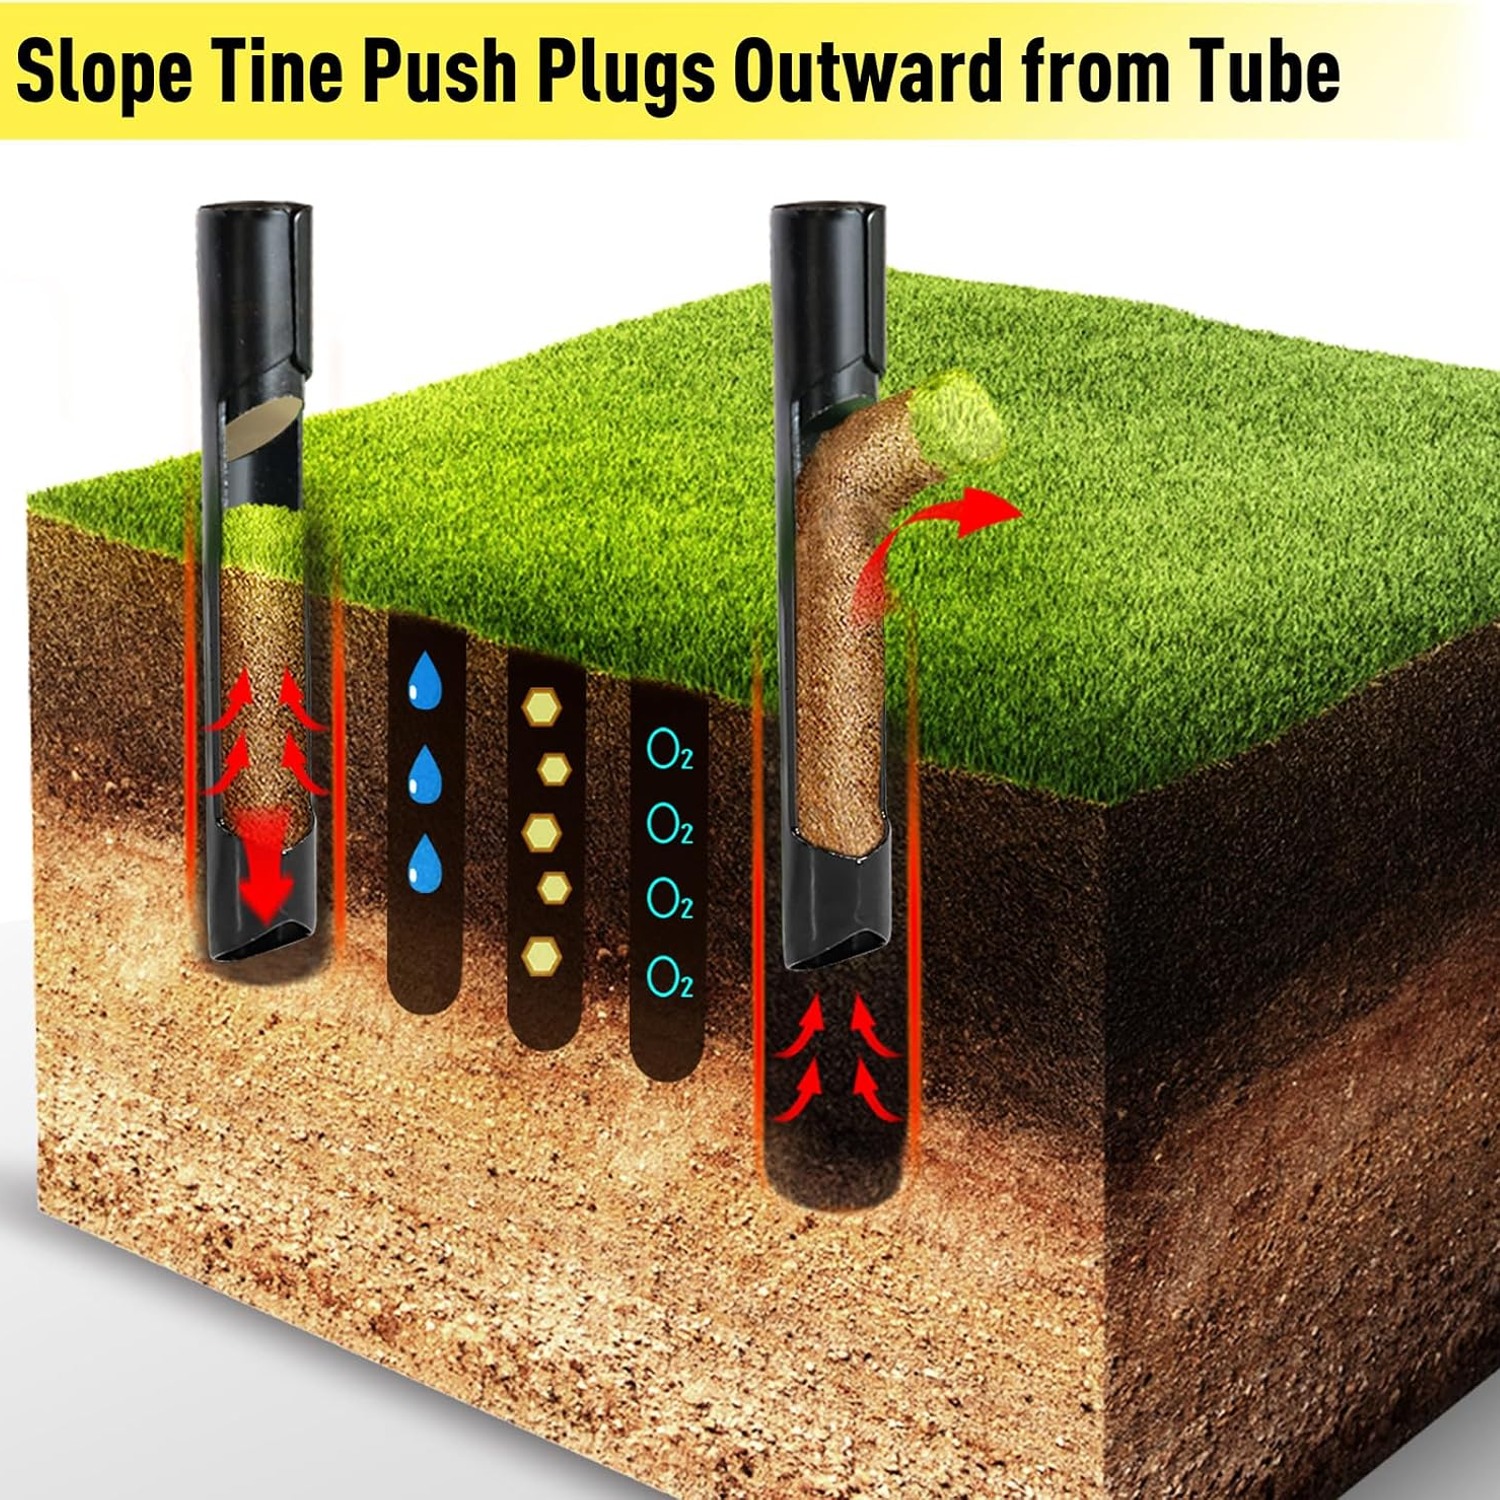
A core aerator tool works by physical removal, which is the key thing to understand. The two hollow tines on this tool cut down into the turf and lift out cylinders of soil, up to 3.5 inches deep (around 8.9 cm). Where that plug used to be, there is now an open shaft running down into the root zone.
Those shafts do several jobs at once. Air gets into the soil, which roots and soil organisms both need. Water goes straight down rather than running sideways. Fertiliser and lime reach the depth where they can actually be absorbed. And the soil immediately around each hole gets somewhere to expand into, so the compaction eases over a wider area than the hole itself.
This is why a hollow tine aerator beats a spiked one. A solid spike makes a hole too, but it makes it by shoving soil out of the way, which packs the walls of the hole tighter than the surrounding ground. On clay soils, repeated spiking can leave you with a lawn full of hard-walled tubes. Removing material instead of displacing it avoids that entirely.
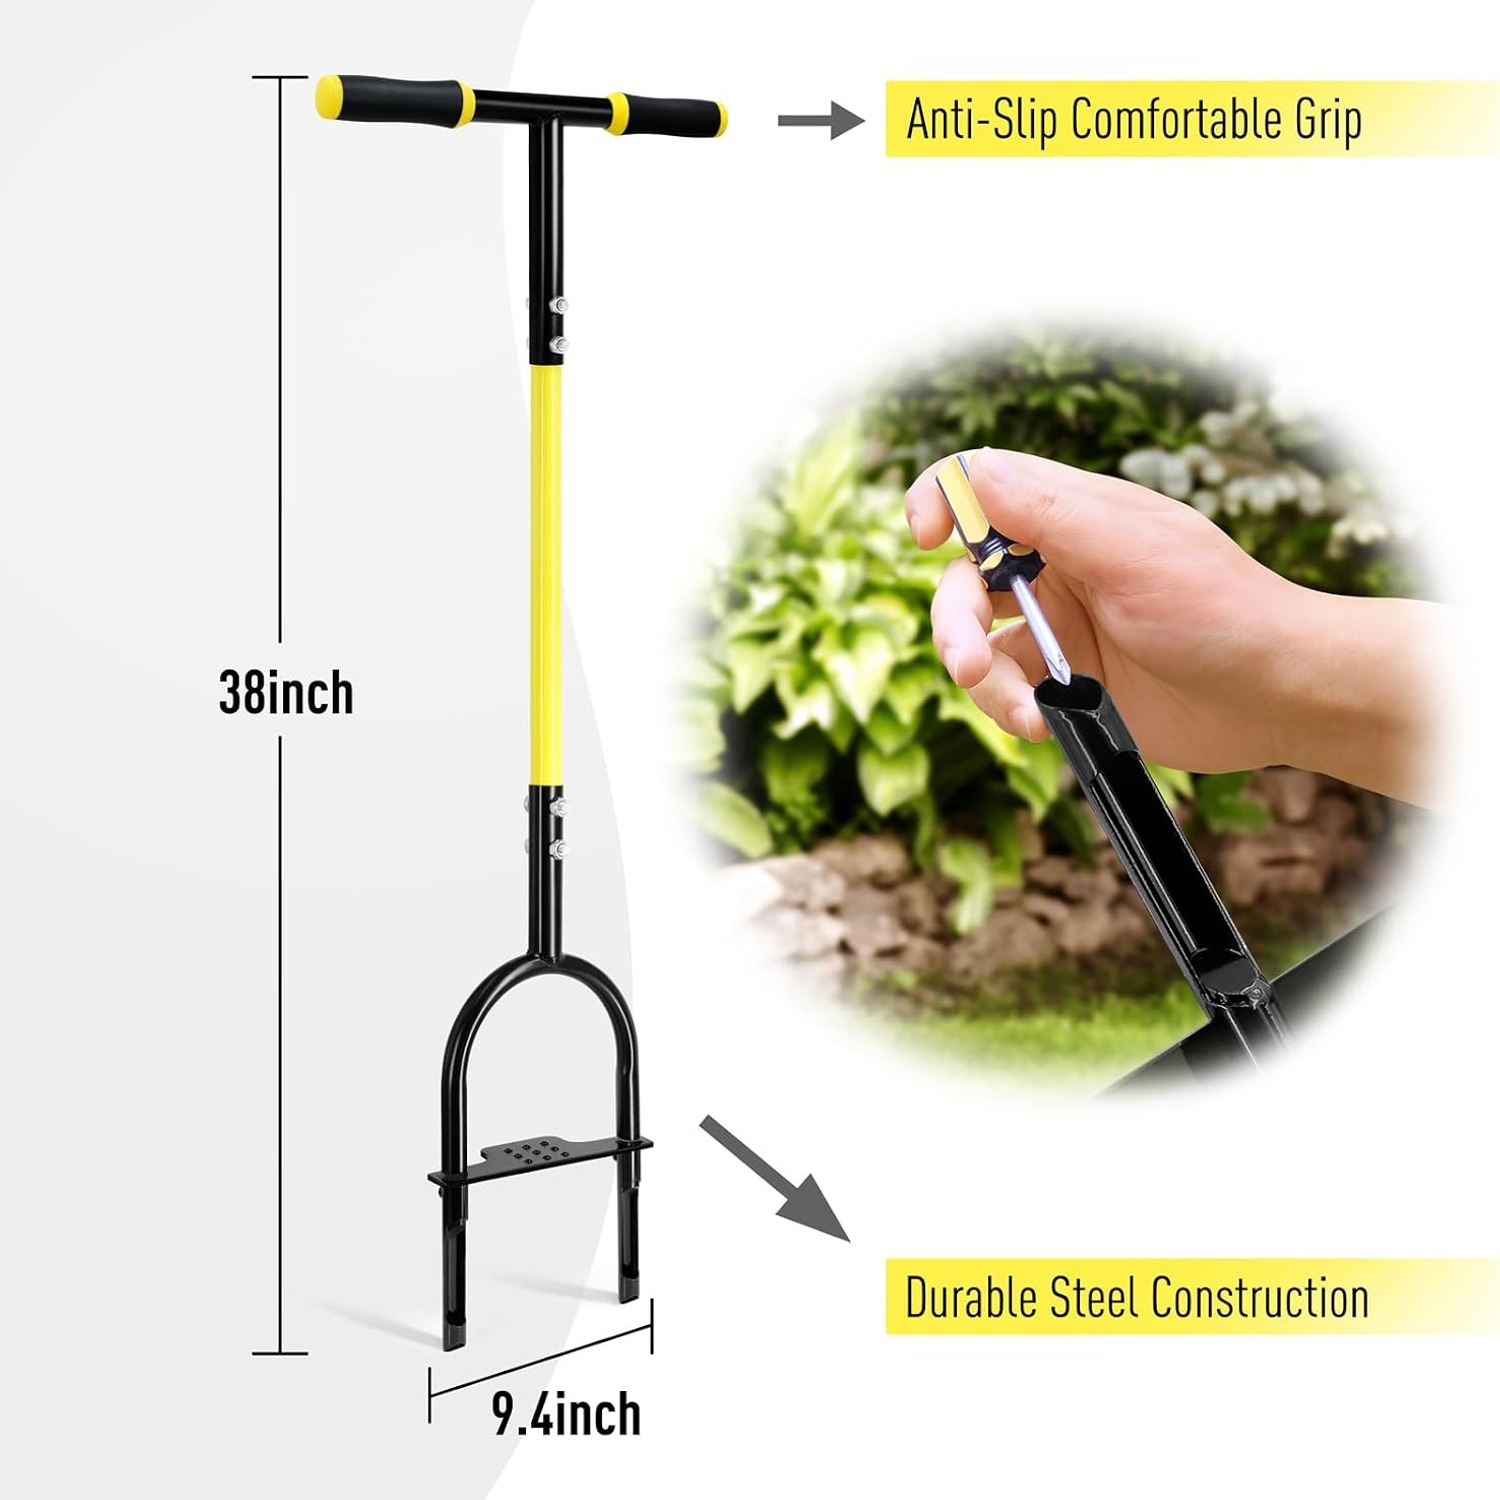
The tool itself is built around that one job. Two sharpened tines, tapered so that cores slide up and out rather than wedging in. A steel frame you can step on to drive the tines down with your weight rather than your arms. A 38-inch (roughly 96.5 cm) height so that you stay upright. A T-handle with soft rubber grips, because you will be pulling on it a few hundred times.
Who it suits
This is a tool for people with a private yard who care how the lawn looks and are happy to put in some physical work. A hobbyist with a back garden, a homeowner trying to recover a worn patch by the patio, someone who has just laid or inherited a lawn on heavy ground. If you already own a decent spade and prefer hand tools to petrol engines, this fits straight into that setup.
It is less suited to very large areas. Covering half an acre with a two-tine hand tool is possible but slow, and most people would rather hire a powered unit for that. The sweet spot is a typical domestic lawn, or a targeted session on the worst sections of a bigger one.
It also suits anyone who has given up on short-handled aerators. The commonest complaint about hand aeration is the back pain, and most of that comes from tools built for someone about 150 cm tall. The taller frame here is the fix.
Getting the timing right
If you take one thing from this guide, make it this. Soil moisture decides whether aeration is easy or miserable.
Dry, baked ground resists the tines. You push, the tool barely goes in, the plug does not release, and you end up frustrated after twenty holes. Saturated mud is nearly as bad, because the cores turn to paste and clog the tubes while you churn the surface into a mess.
What you want is moist soil. Water the lawn thoroughly the evening before, or wait until the day after a solid rainfall. The tines will slip in with a fraction of the effort, the cores will release cleanly, and you will cover far more ground before you need a break. The maker recommends this too, and it also puts less stress on the tool.
Season matters as well. Spring and autumn are the usual windows because the grass is growing and can knit over the holes quickly. Autumn is often the better of the two in cooler climates, since it pairs naturally with overseeding and a final feed before winter. Avoid high summer, when heat stress is already working against the lawn, and avoid frozen ground entirely.
How to actually do it
Mow first, a bit shorter than normal, and clear anything off the lawn. Mark out any irrigation lines, cables or sprinkler heads so you do not drive a tine through one.
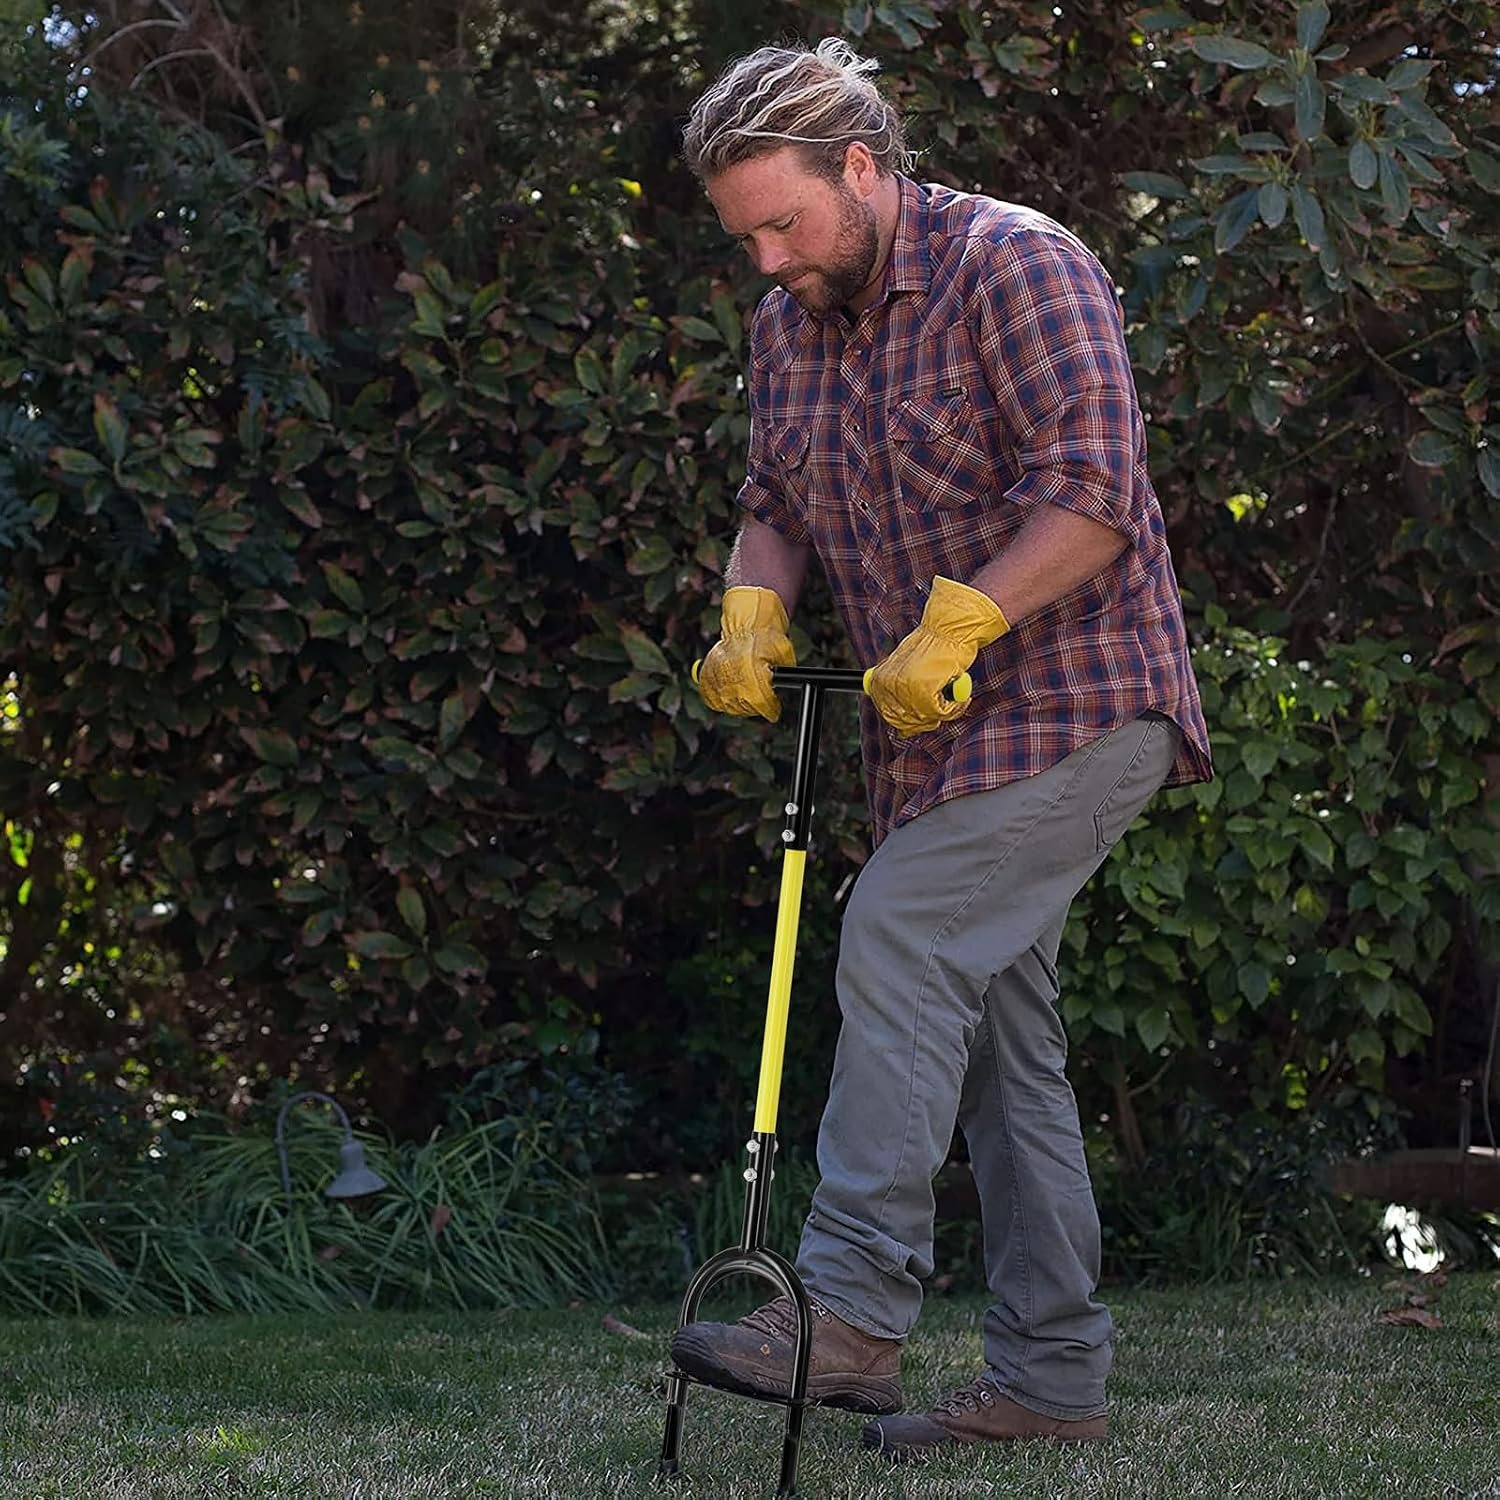
Then work in strips, the same way you mow. Place the tines, step down on the footplate, let your body weight do the driving, then lift straight up. Spacing of about 8 to 15 cm between holes gives a good result on most lawns. Tighter spacing is better on badly compacted ground, but it multiplies the work, so be realistic about what you can finish.
Give the worst areas extra attention. The strip between the gate and the back door, the bit under the trampoline, the turning point where the mower always pivots. Those spots usually need two passes at right angles to each other.
Leave the plugs where they fall. They look untidy for a week or so, then dry out and crumble back into the turf, returning organic matter and soil microbes to the surface. Running the mower over them once they are dry breaks them down faster. If you really cannot stand the look, rake them off after they dry.
Immediately after aerating is the best moment for overseeding and feeding. Seed falls into the holes and gets protection, moisture and soil contact in one go. Granular or liquid feed goes straight down to the roots rather than sitting on a sealed surface. Water afterwards and keep traffic off for a couple of weeks if you can.
Care and storage
The maintenance is simple but worth doing. Rinse the soil off the tines when you finish, and clear out anything stuck inside the hollow tubes. Wet soil left inside overnight is the main cause of blockages next time. Let everything dry before you put it away.
Before a long spell in the shed, run an oily rag over the steel. It takes thirty seconds and keeps surface rust off. Check the handle hardware now and again, since bolts work loose on any tool that gets stepped on and levered. Store it indoors or under cover. Leaving it propped against a wall in the rain all winter is the fastest way to shorten its life.
If a plug jams in a tine, push it out from the top with a stick or long screwdriver rather than banging the tool on concrete.
The short version
Compacted soil starves grass roots of air and water, and no amount of feeding fixes that from the surface. A manual lawn corer removes plugs of soil to open real channels into the root zone, which is a step up from simply spiking holes. This one uses two sharpened hollow tines reaching up to 3.5 inches deep, on a 38-inch frame with a cushioned T-handle so you can work standing up.
Water the lawn first, work in strips, leave the plugs to break down, and follow up with seed or feed while the holes are open. Do that once or twice a year and the lawn repays you with thicker growth, better drainage and far more resilience through dry spells and busy summers.