


The complete guide
Choosing a Hand Held Tiller Cultivator: A Practical Buyer's Guide
The problem with ground that will not give
Most garden disappointments start below the surface. You water, and it pools on top instead of soaking down. You feed, and the plants look no happier. You push a trowel in and it stops dead after a few centimetres. That is compaction, and it happens to almost every bed eventually. Rain packs the particles together, foot traffic presses them tighter, and clay soils set harder still once they dry out.
Roots cannot push through soil that dense. Air cannot circulate. Water either runs off the top or sits and turns the root zone sour. You can add all the compost you like, but if it sits on a sealed surface it is just an expensive mulch.
The fix is mechanical. The soil has to be physically opened up again. A hand held tiller cultivator does that job at a scale that suits real gardens, which is to say beds and borders rather than fields.
How a twist tiller works
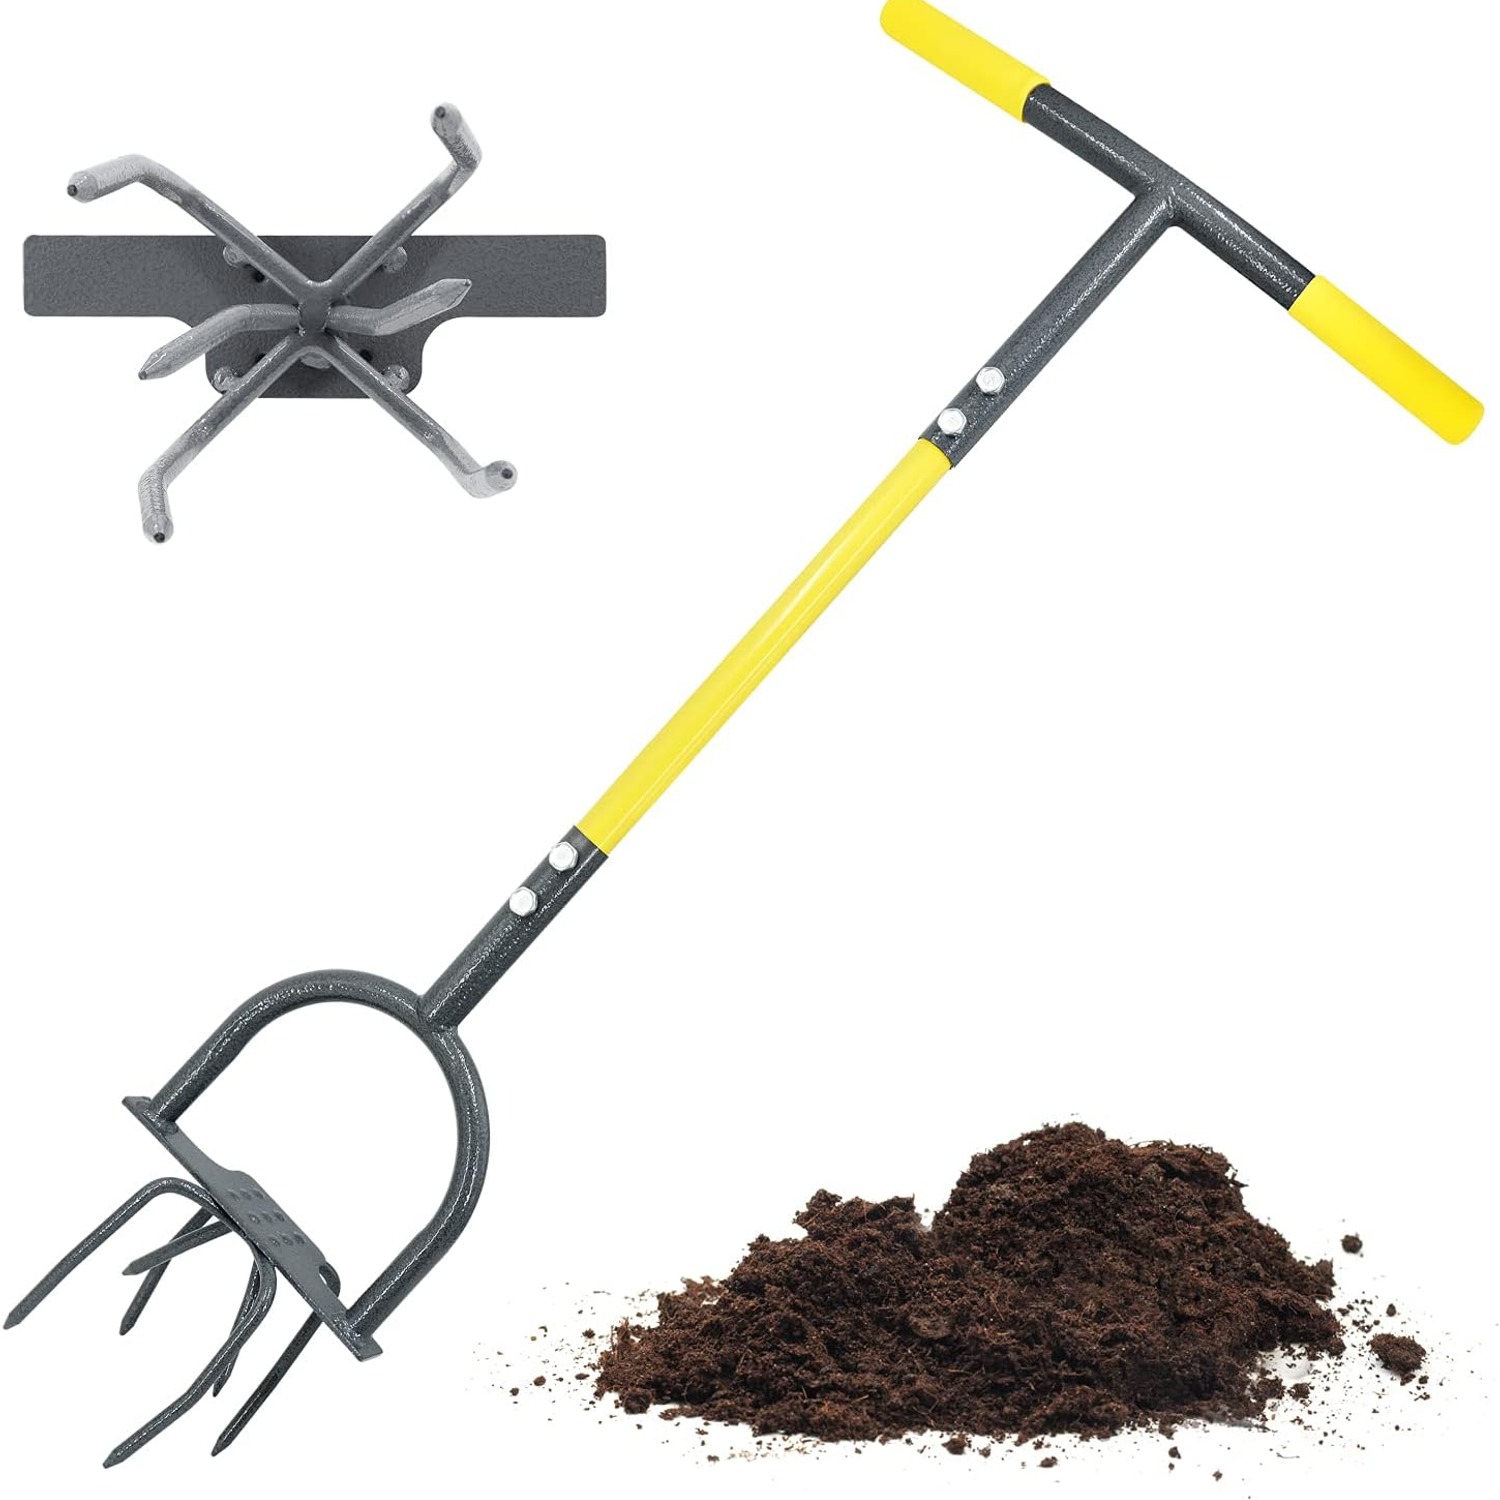
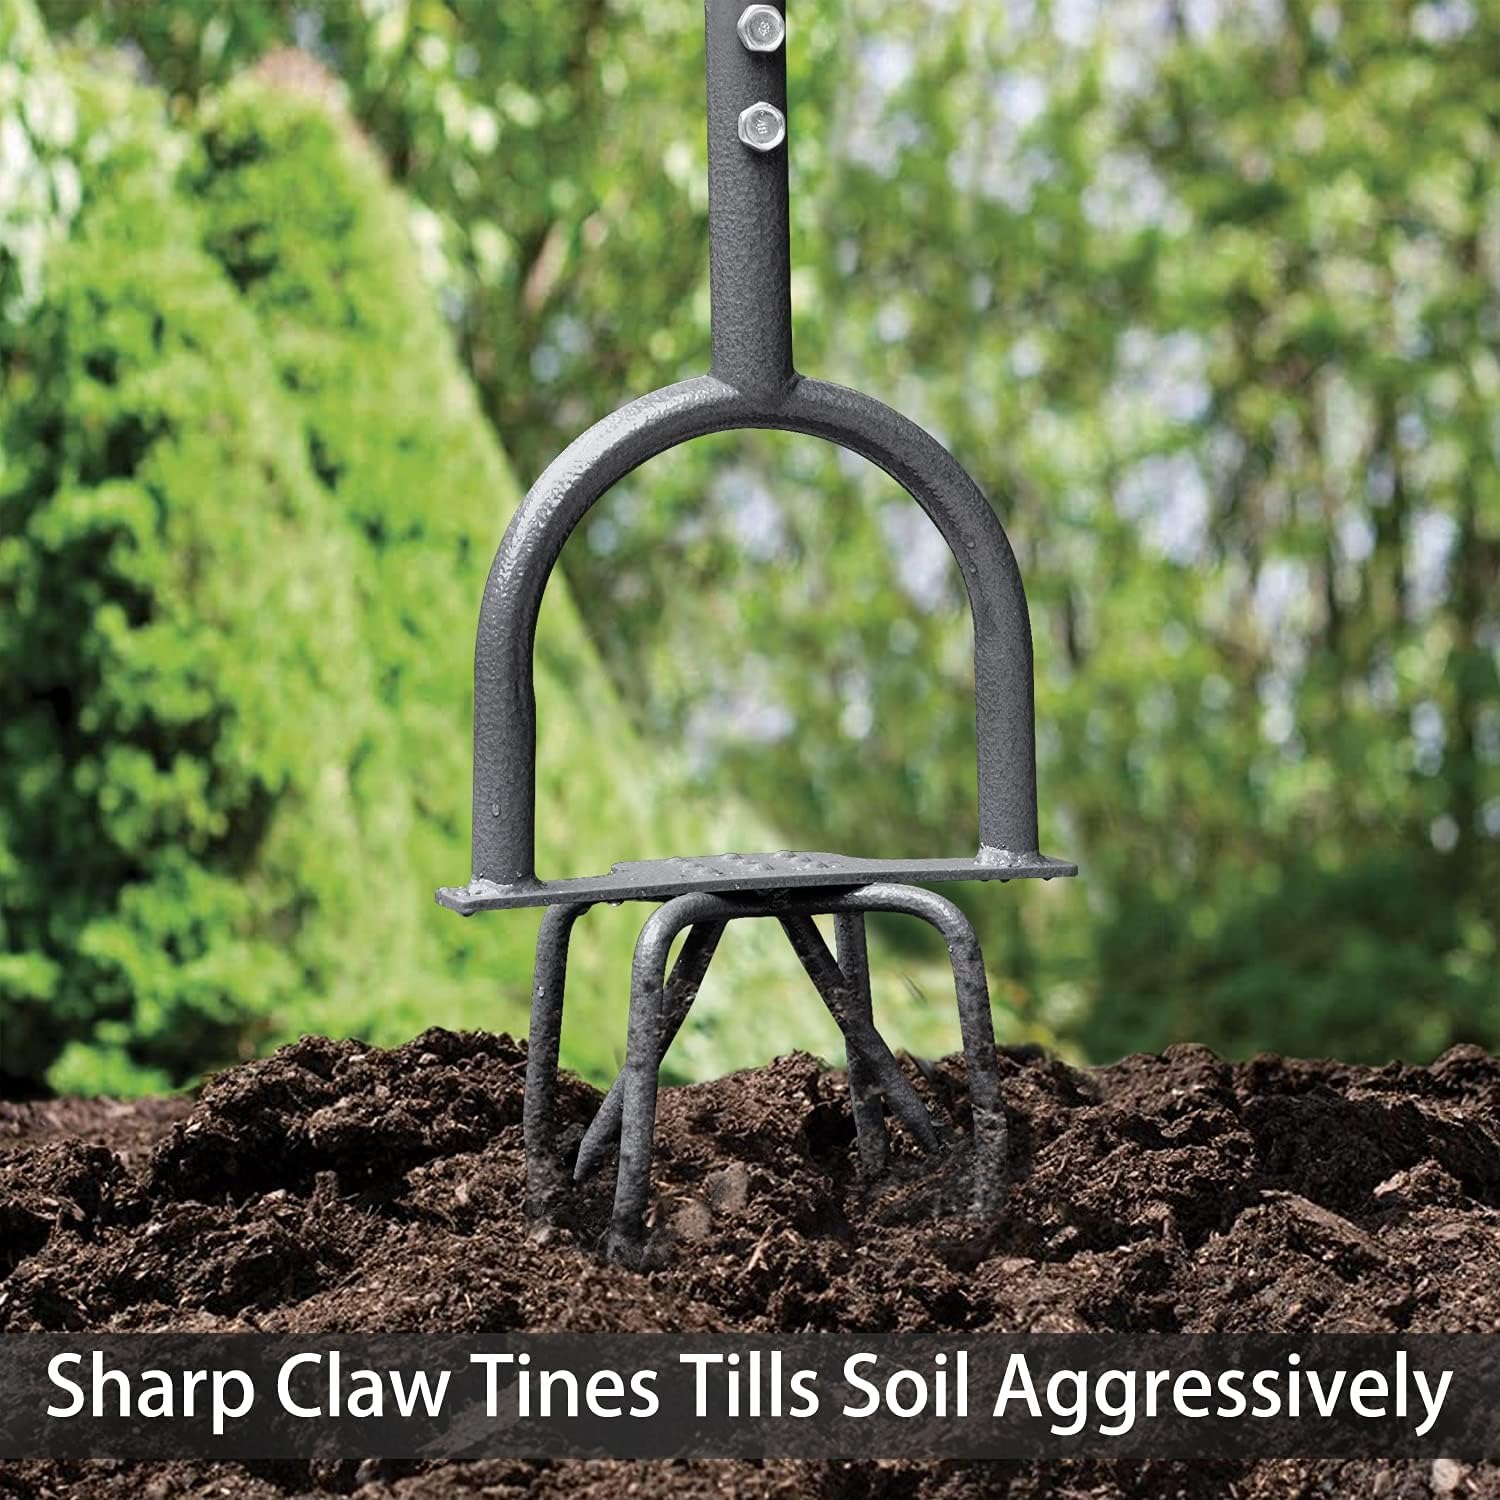
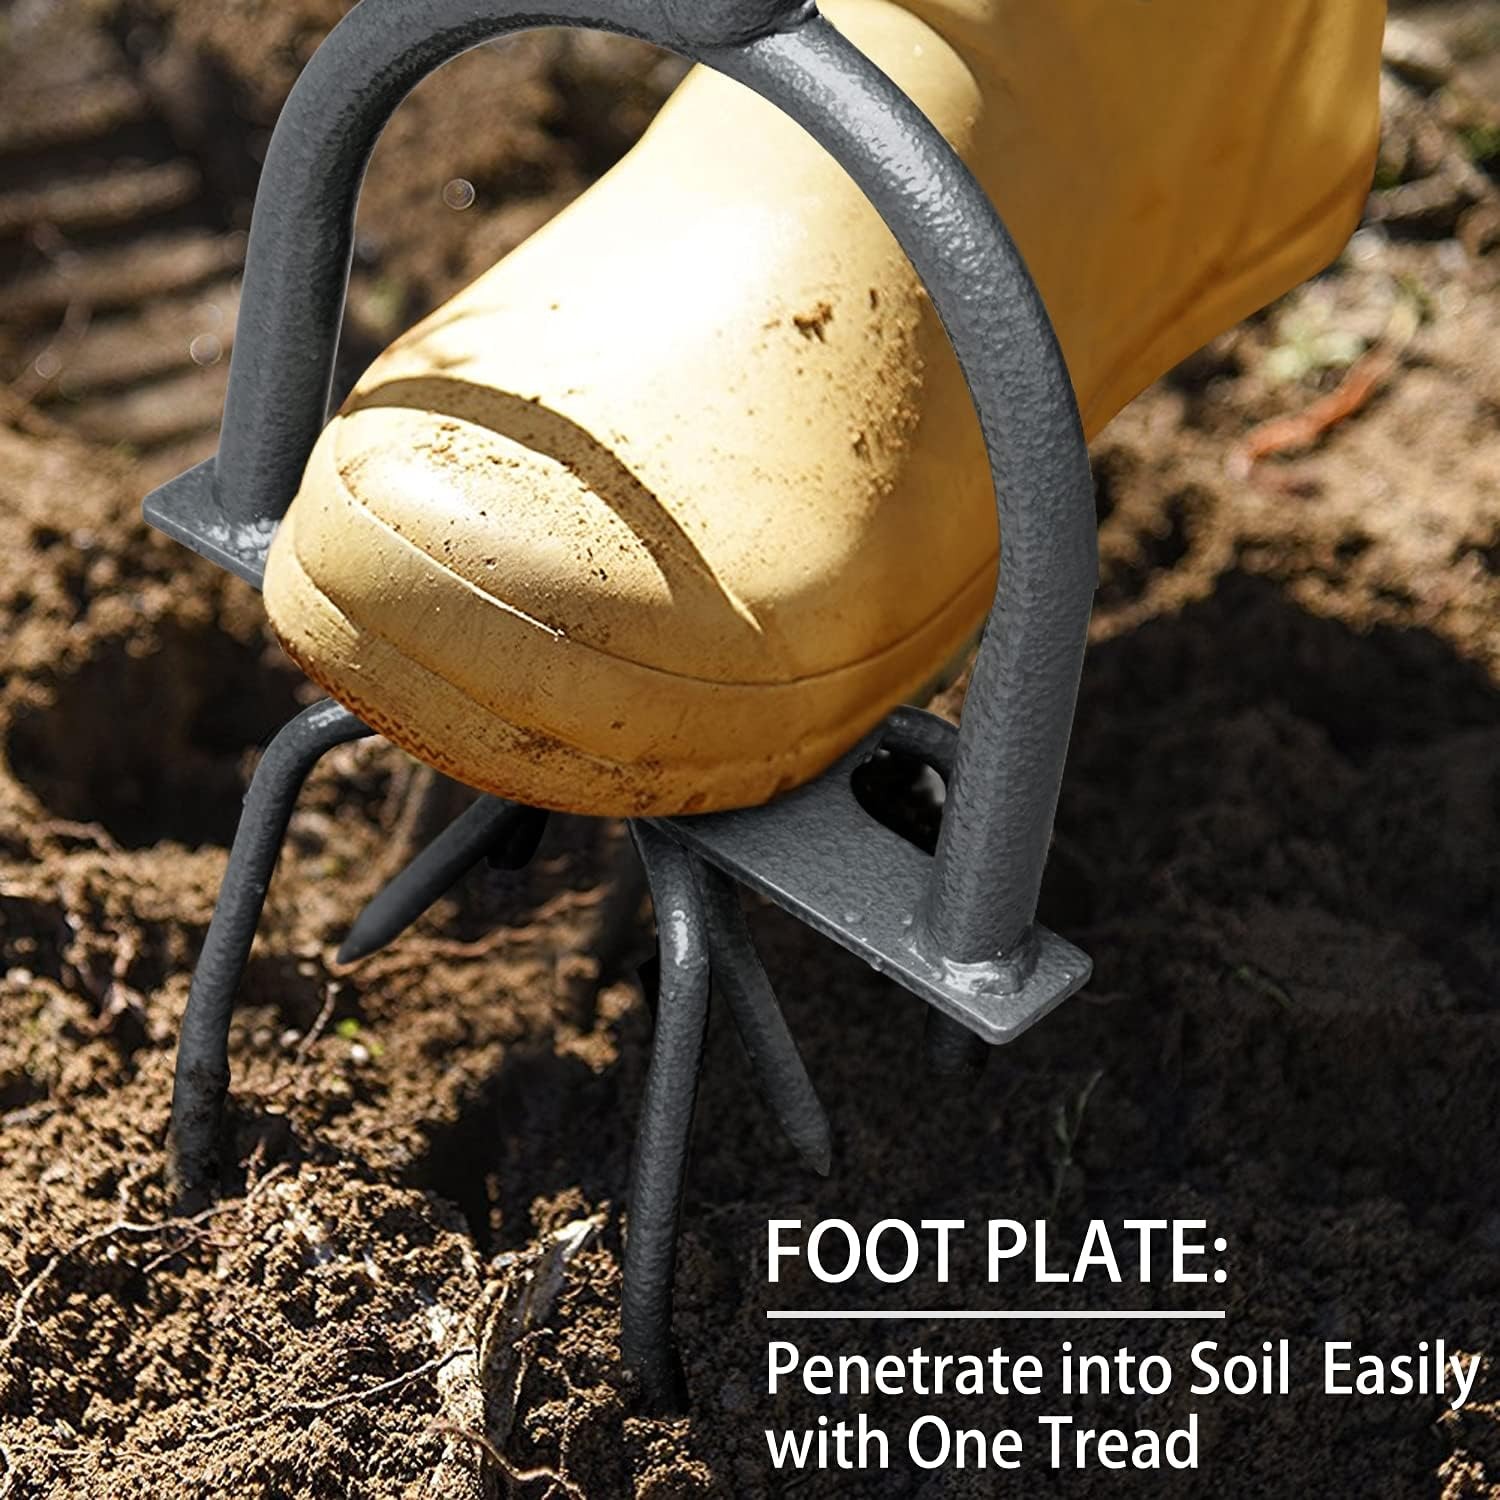
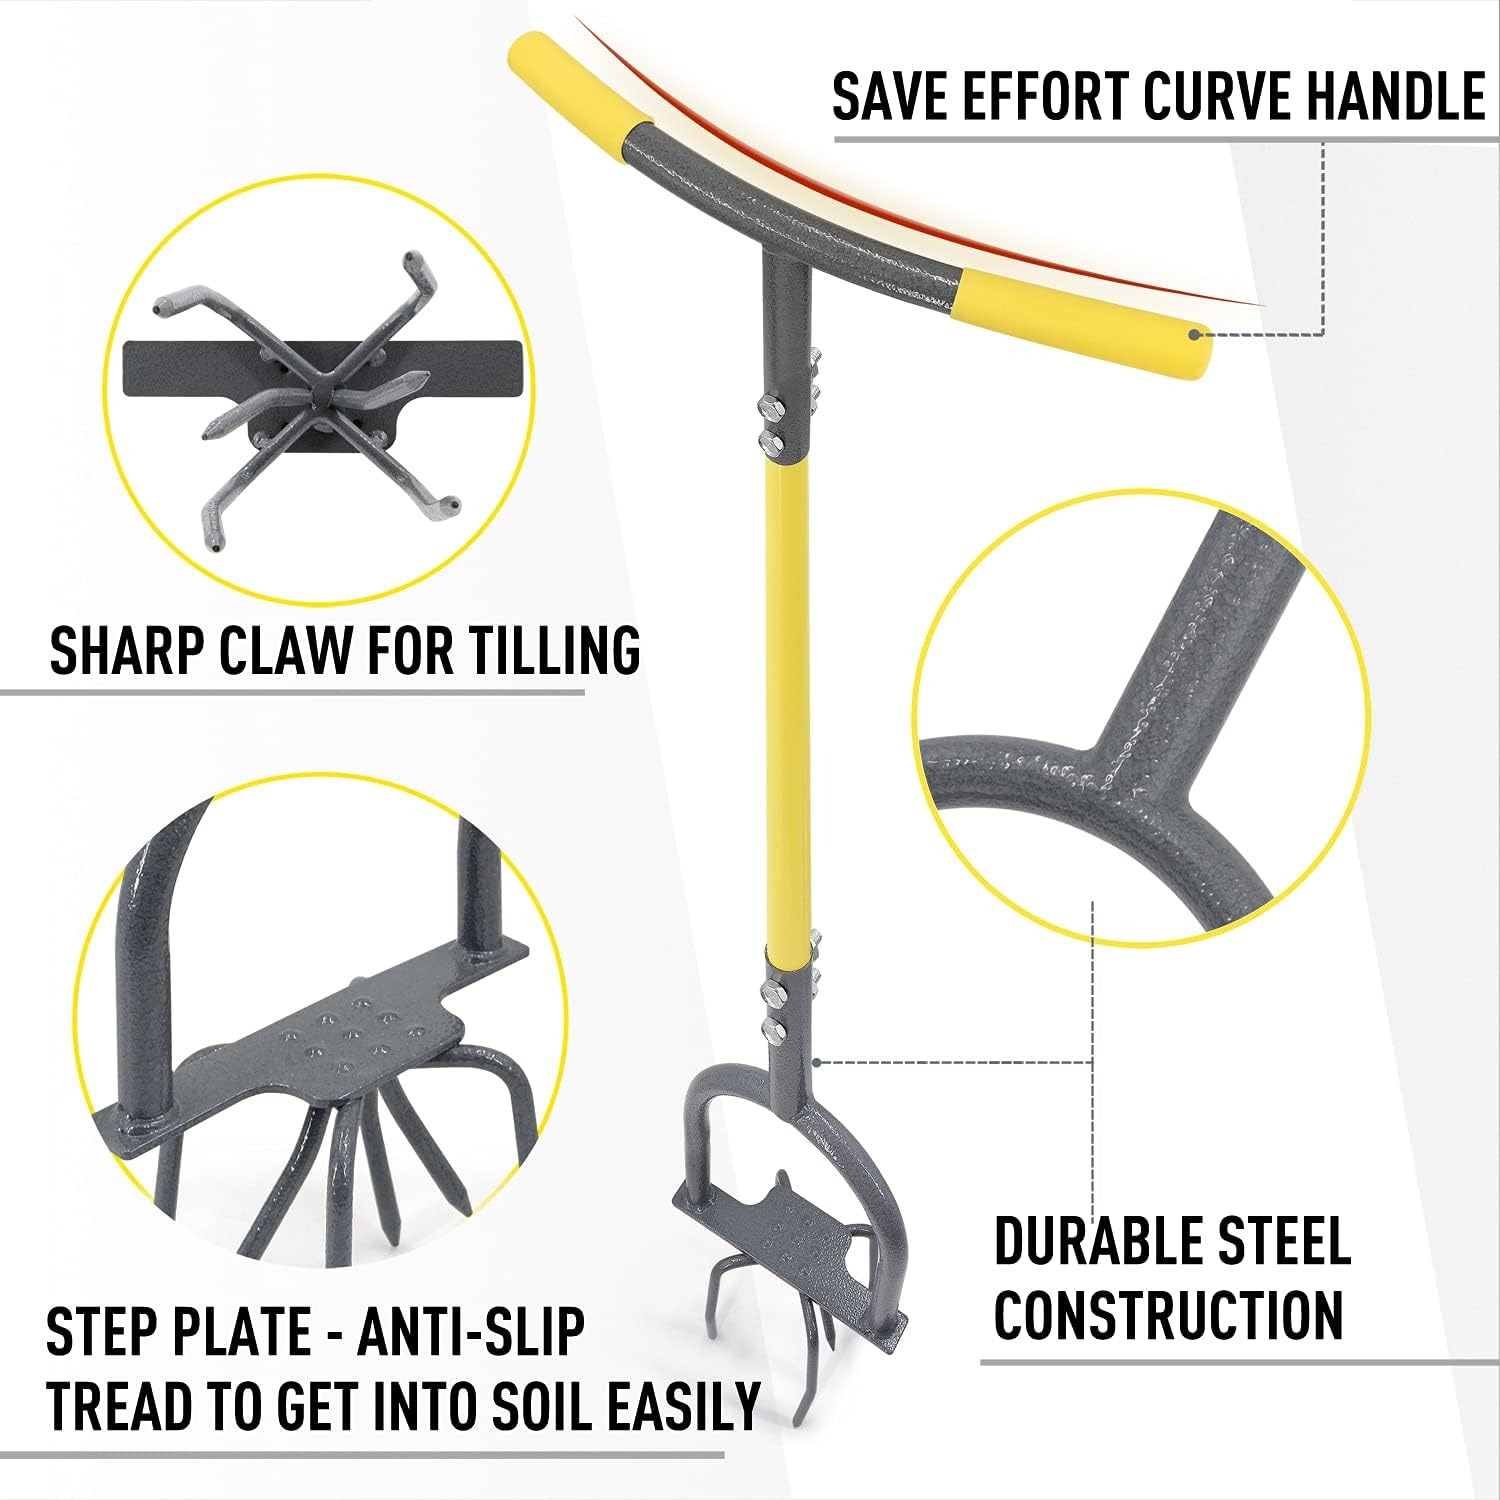
The principle is simple enough that it has barely changed in decades. Four sharp, arrow-shaped tines sit at the business end of a long shaft. Above them is a flat foot plate with a non-slip surface. At the top is a curved handle wide enough for both hands.
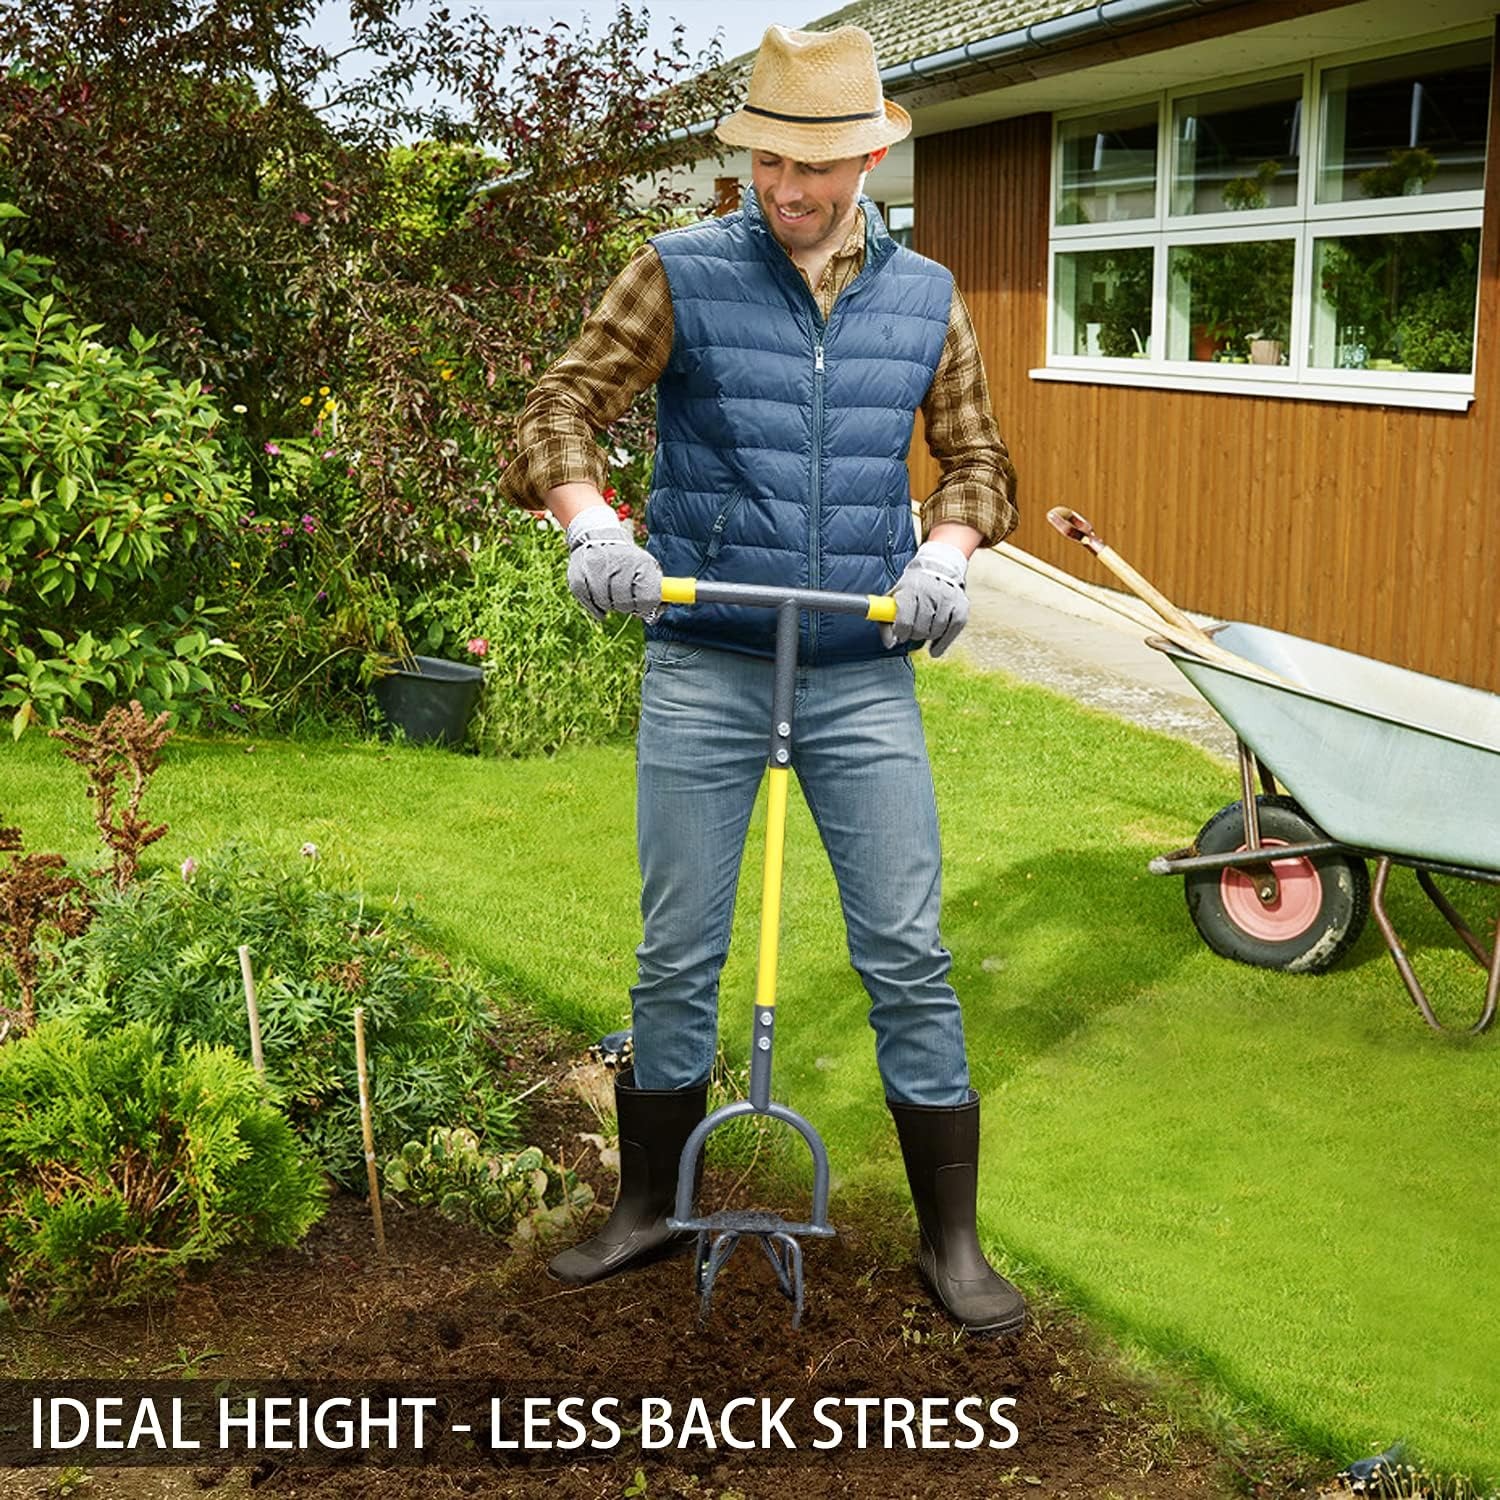
You place the tines on the soil, put a foot on the plate, and press down. Your body weight does the work of driving the tines in, which is far more force than your arms could apply on their own. Then you grip the handle and twist. Because the tines are angled rather than straight, that rotation drags them sideways through the soil, tearing it apart instead of simply boring a hole. Lift, move along, repeat.
The result is a loosened pocket of crumbled soil every time. Work along a bed in overlapping steps and you have turned the whole thing without ever picking up a spade.
The foot plate deserves a mention on its own. It does two things at once. It gives you a stable surface to apply weight through, and it keeps you balanced while you do the twisting part. Without it, you would be stabbing at the ground with your arms and getting nowhere on anything firm.
Who this kind of tool actually suits
There is a clear group of people who get the most out of a manual garden tiller.
The first is anyone who finds bending and kneeling difficult. This tool is just under 94 cm long for a reason. You stand upright through the whole job. For gardeners dealing with stiff knees, a cranky back or general joint pain, that one design choice changes whether a bed gets turned at all this year. It is often recommended as a best no bend garden tool for exactly that reason.
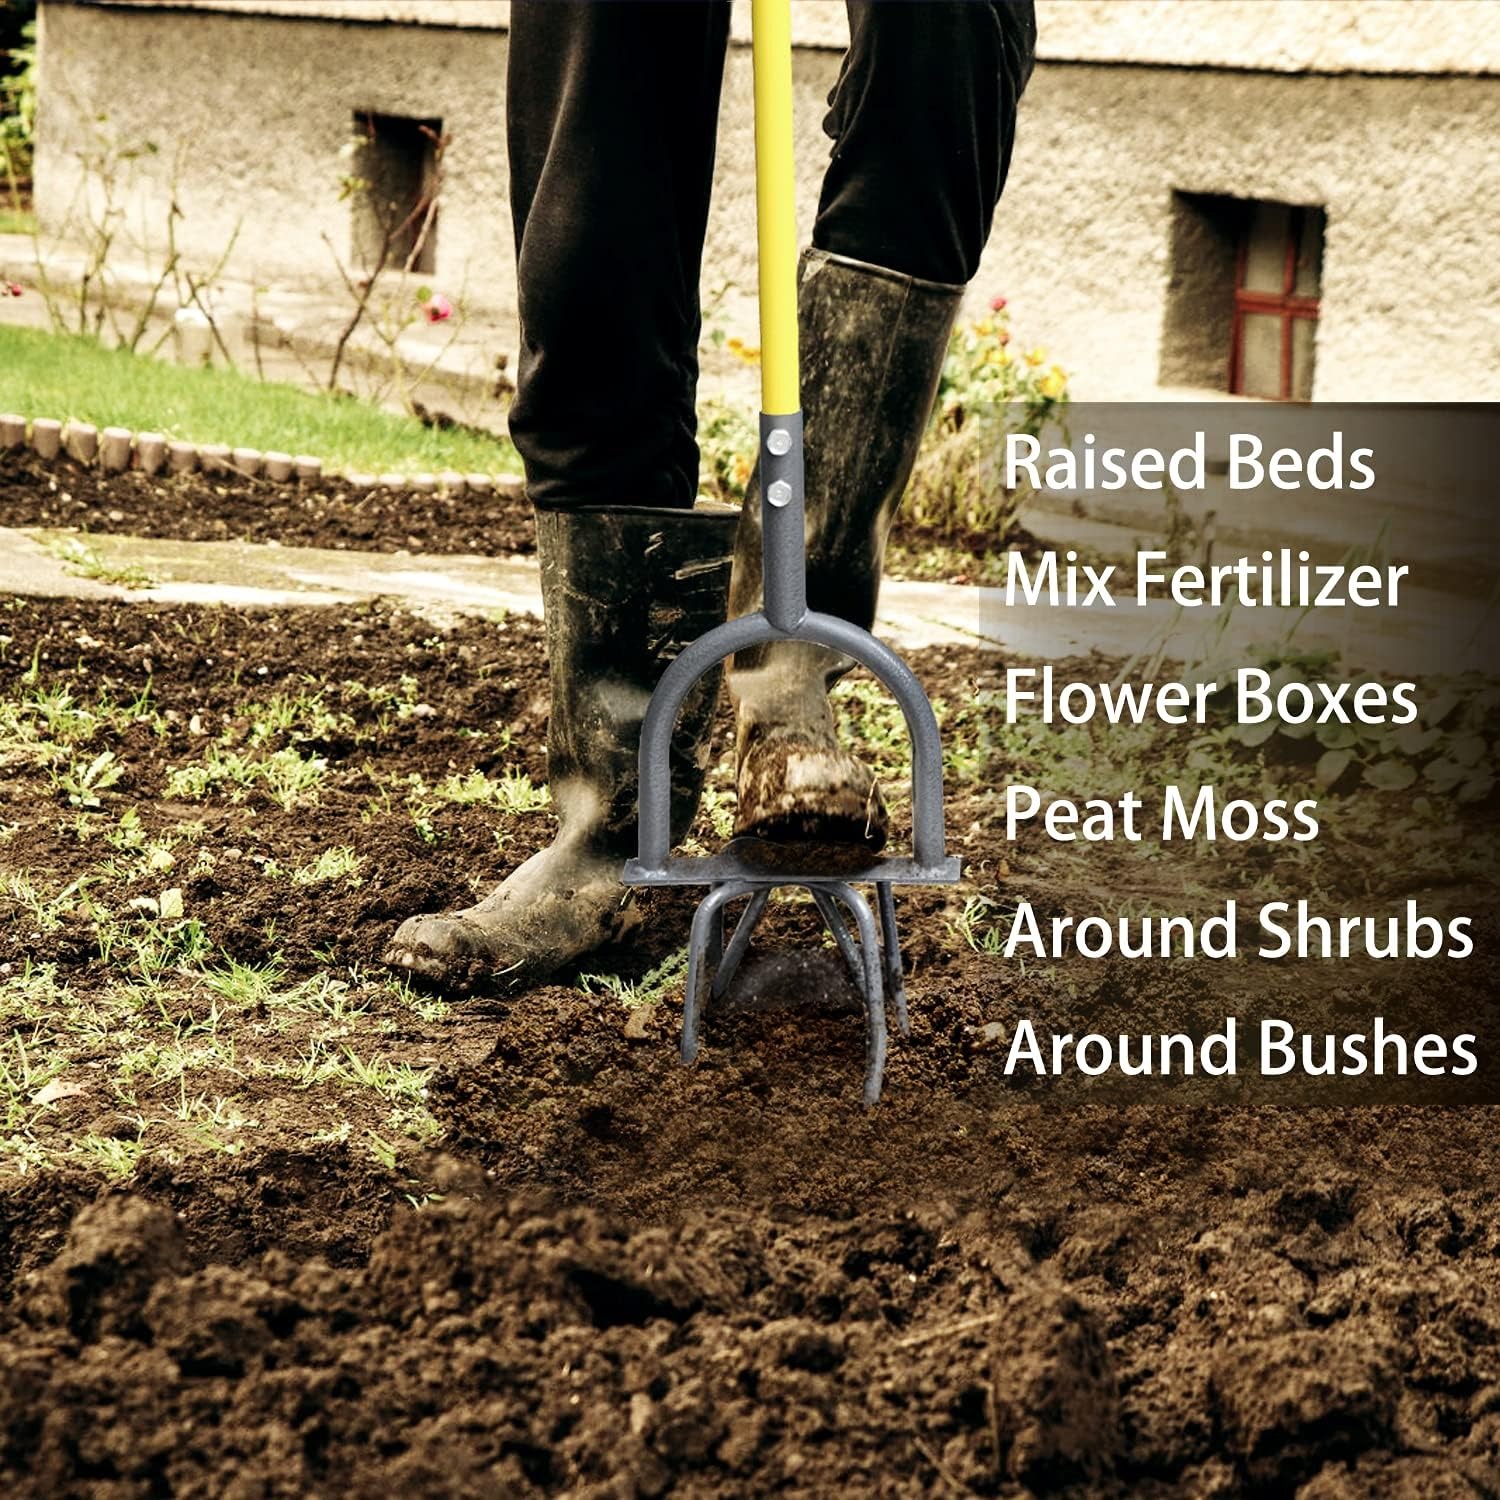
The second is anyone with beds too small or too awkward for powered equipment. Raised beds, flower boxes, narrow borders and the gaps between shrubs are all places a petrol tiller cannot physically go. A hand tool places each twist exactly where you want it.
The third is the gardener who simply does not want another machine. No fuel, no charging, no cords, no pull-starting, no servicing. You pick it up and it works, every time, in any weather, and it makes almost no noise. Early morning tilling without annoying the neighbours is an underrated benefit.
Where it is not the right answer is large-scale ground breaking. If you are converting a quarter acre of lawn into vegetable beds from scratch, hire a machine. Use the hand tiller after that for ongoing maintenance.
What to look at when comparing models
Tine design. Sharp, angled tines cut into ground. Blunt or straight ones push it around. This model uses arrow-shaped tines specifically for aggressive penetration, which is what you want on firm soil.
Build material. Steel with a protective coating is the standard to look for. This one is listed as iron and metal with a powder-coated steel construction. Coating matters because the tool lives outdoors in dirt and moisture, and bare steel does not enjoy that.
Weight. At 2.12 kg this sits in a sensible middle ground. Too light and it skates over hard ground. Too heavy and it becomes a chore to carry and lift repeatedly. You want enough mass to help the tines in without wearing yourself out.
Handle shape. A curved handle gives you something to brace both hands against when you twist. Straight bar handles work, but curved ones tend to be kinder on the wrists over a long session.
Foot plate grip. Look for an anti-slip surface. You are putting real weight through this with garden boots that may be muddy. A smooth plate is a slip waiting to happen.
Assembly. Most of these ship flat. The useful detail is whether the tools come with it. This one includes wrenches and spare screws, so you are not hunting for a spanner before you can start.
Getting the best results in the garden
Soil condition is everything. Lightly damp soil tills beautifully. Soaking wet soil smears and clumps, which is bad for structure. Bone-dry soil, especially clay, sets hard and will fight you.
The practical advice is to water the area a few hours ahead if it has baked dry, then come back once the moisture has worked down. The difference is dramatic. The same patch that bounced the tines off in the morning will open up easily by the afternoon. The same goes for stony ground, though you should also lift out any large rocks you can see first.
Work in a pattern rather than at random so you do not miss patches or go over the same ground twice. Overlap your twists slightly. On a bed you are preparing for planting, two passes at right angles gives a finer tilth than one.
For mixing amendments, spread your fertiliser, peat moss or compost on the surface first, then till. The twisting action folds material down into the top layer rather than leaving it sitting on top where it does nothing useful.
For weeding, aim the tines just to the side of the weed rather than straight through the crown. The twist lifts the plant with more of its root system intact, which means it is less likely to come back.
Looking after it
Hand tools last a very long time when treated reasonably, and die quickly when they are not. The routine here is short.
After use, knock the soil off the tines. Caked soil holds moisture against the metal, and moisture plus steel eventually equals rust, coating or no coating. Brush or rinse, then wipe the whole thing dry. Store it under cover rather than propped against the back of the shed in the weather.
Before a big session, run a hand over the fittings and check nothing has worked loose. Spare screws come in the box, which tells you something sensible about how the tool is meant to be maintained over years rather than months.
Once a season, or before winter storage, a light wipe of oil over the metal is worth the two minutes it takes.
The short version
A hand held tiller cultivator is a straightforward answer to a common problem. Soil gets packed, plants suffer, and digging it over by hand with a spade is hard on your back. This tool lets you use your leg strength and a twisting motion instead, while standing upright.
It is made from coated steel, weighs 2.12 kg, measures just under 94 cm long, and assembles in minutes with the included wrenches. It suits raised beds, vegetable plots, borders and tight spaces around established plants. It handles compacted and clay ground, provided you water dry soil first to soften it.
No fuel, no battery, no noise. Clean it, dry it, keep it under cover, and it will be opening up your beds for a long time.