


The complete guide
How to Choose a Bike Maintenance Stand (and Use It Properly)
The problem with fixing a bike on the ground
Most bike jobs are not hard. They just become hard when the bike is lying on the grass or propped against a wall. You cannot turn the cranks. The chain drops. You are kneeling on concrete with a torch in your teeth, trying to see a derailleur from underneath, and your back starts complaining about ten minutes in.
The flip-it-upside-down trick is worse. It rests the whole bike on the saddle and the brake levers, scratches the bar tape, and pushes air into hydraulic brake lines if the bike sits that way for long. Gear cables get bent at odd angles. And you still cannot spin the wheels freely.
A work stand fixes all of it at once. Clamp the bike, raise it to the height you want, and the bike simply stays where you put it. The wheels spin. The cranks turn. You can see the chain line at eye level. Jobs that used to take an hour of swearing become fifteen minutes of calm work.
How a repair stand works
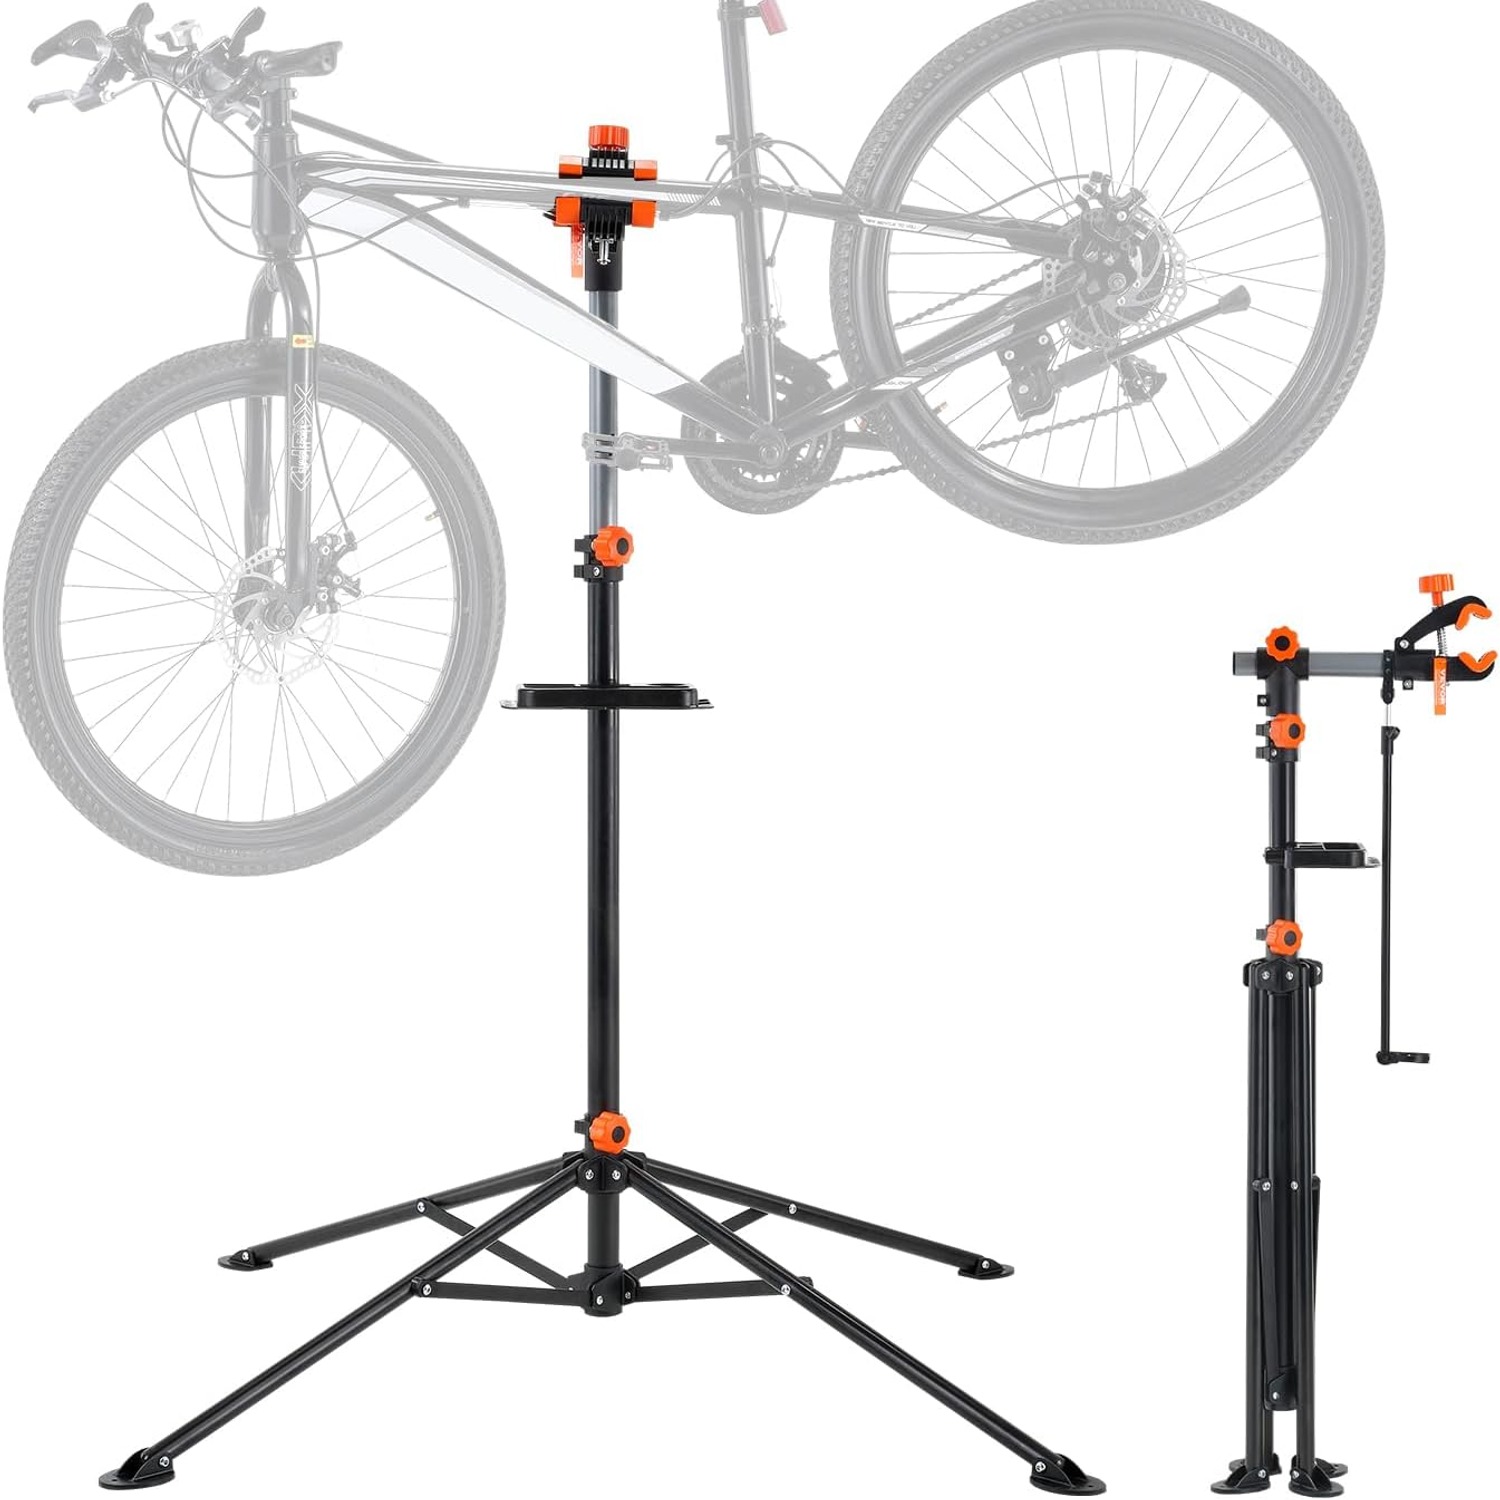
The design is simple. A column rises from a wide base. At the top sits a clamp that grips a round tube, usually the seat post, and holds the bike in mid-air. The clamp rotates so you can turn the bike to any angle, and the column telescopes so you can set the working height.
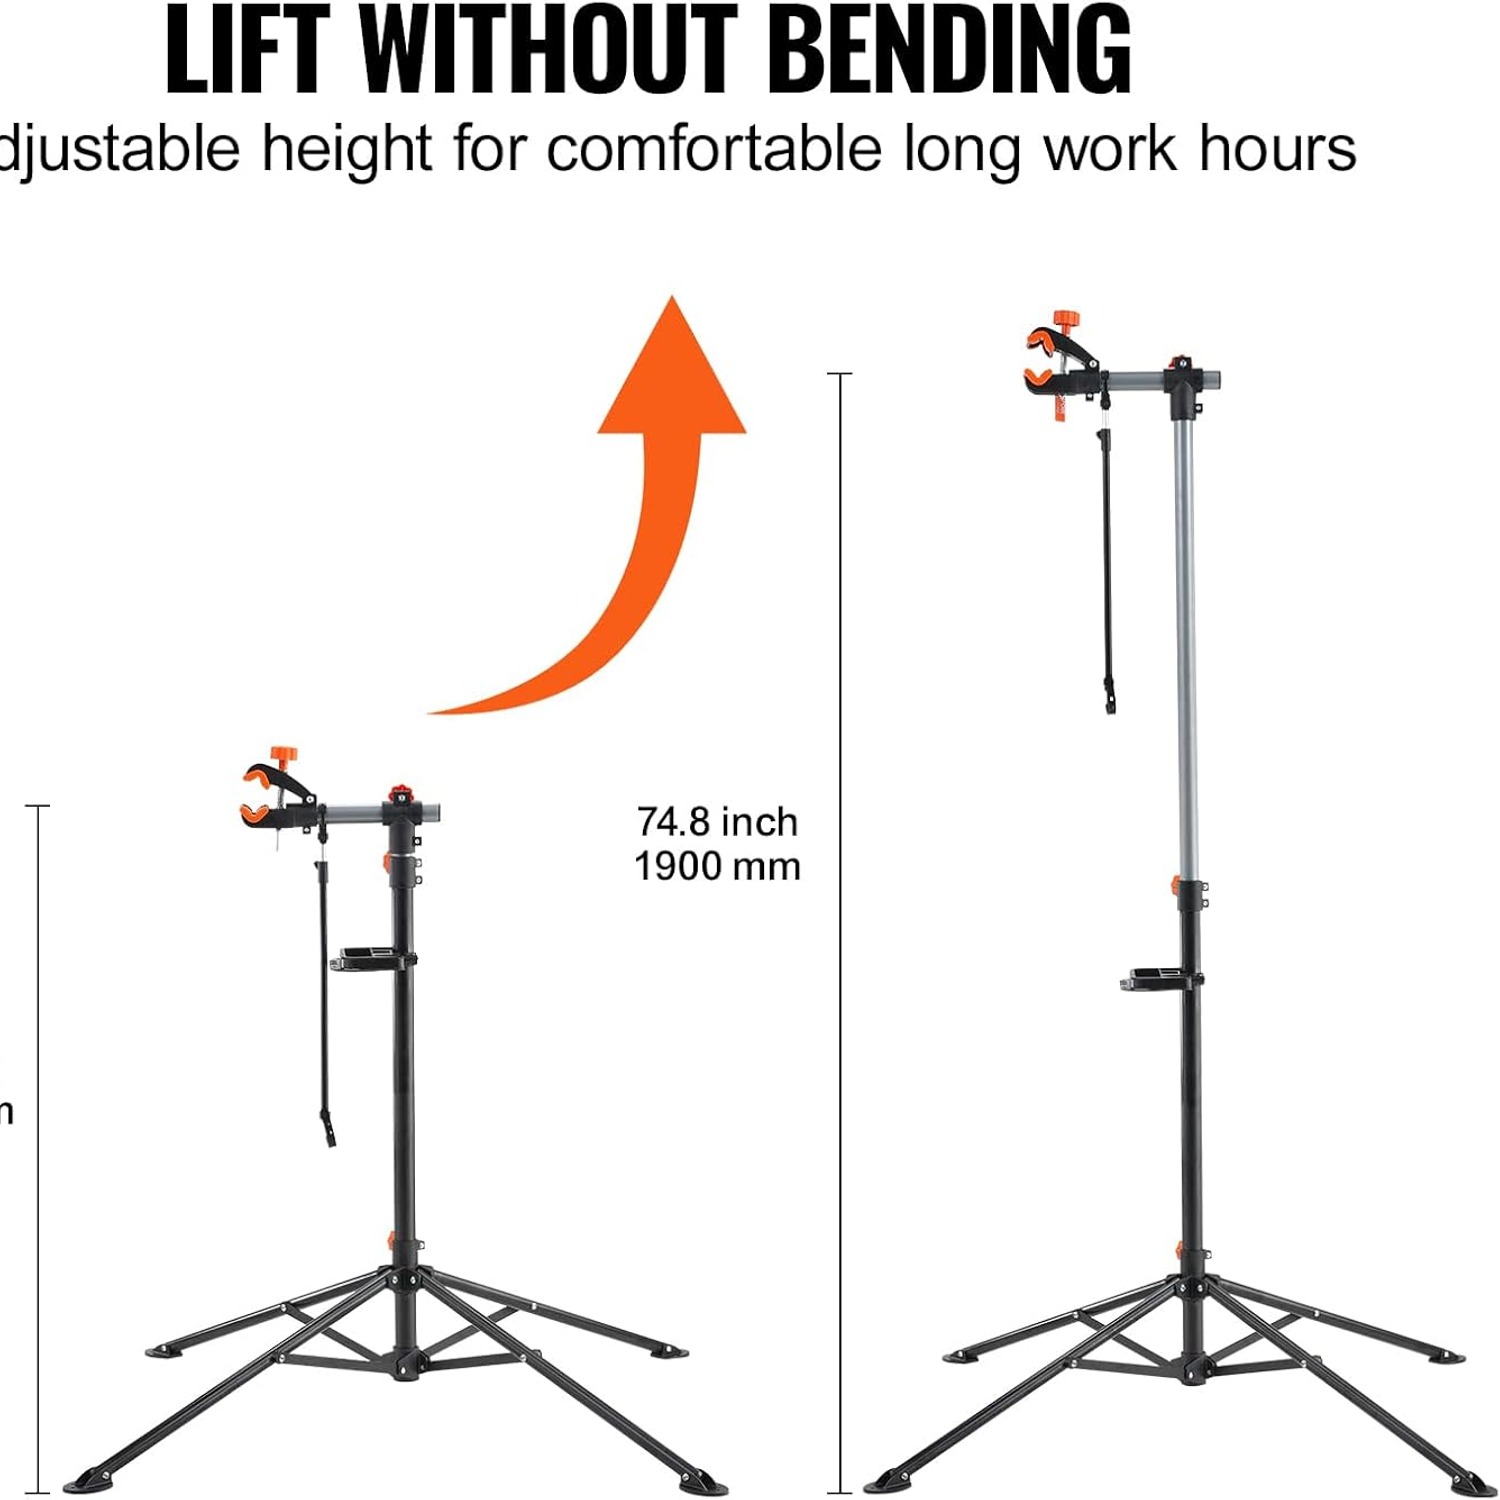
On this stand, the column extends from 107.9 cm to 190 cm. That is a wide range. At the low end you can sit on a stool and work on the rear mech with your eyes level with the cassette. At the top end you can stand straight and still reach the bottom bracket without bending. Most people find a sweet spot somewhere in between and leave it there.
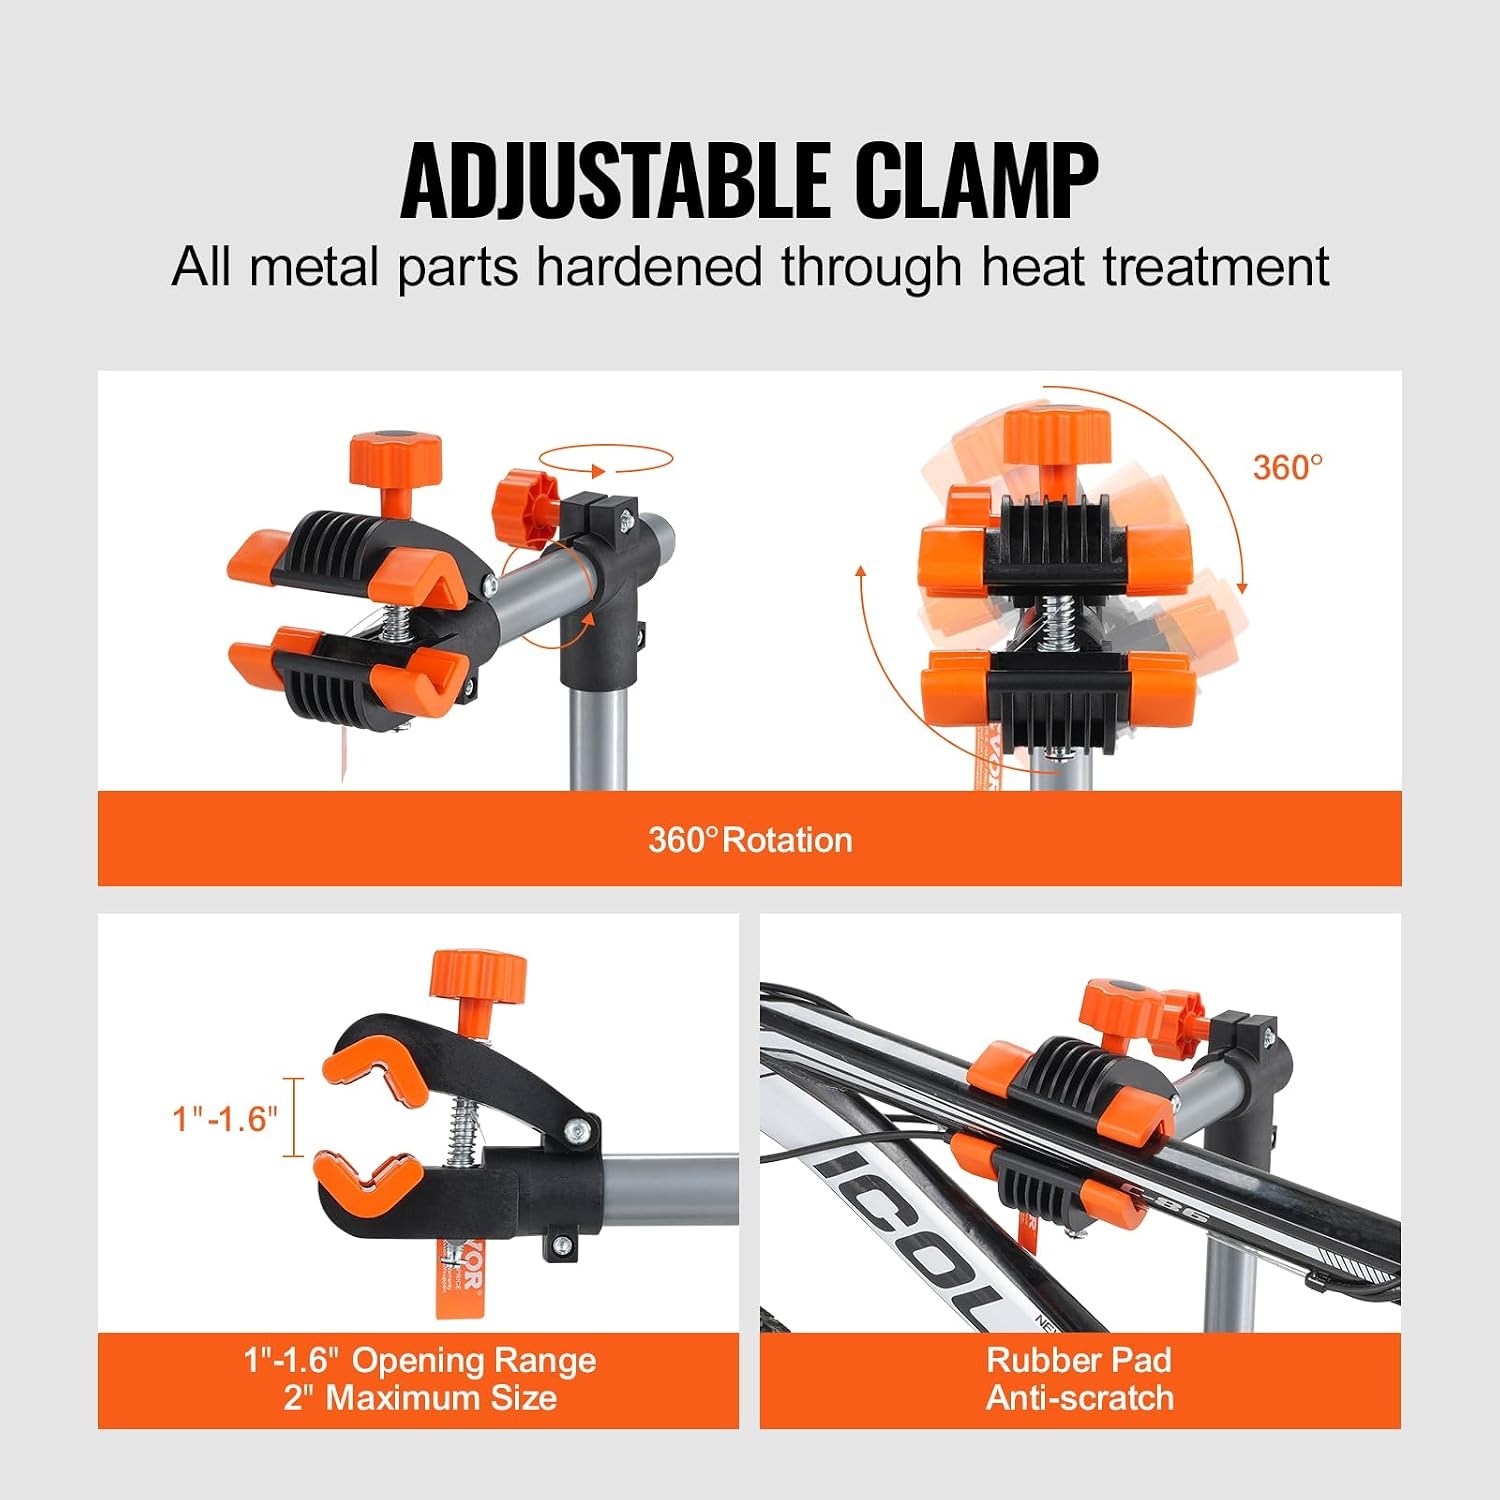
The clamp takes tubes between 25 and 40 mm, with a maximum opening of 50 mm. That covers the vast majority of seat posts and round frame tubes. It rotates a full 360 degrees, which is the feature you will appreciate most. Rolling the bike onto its side to get at the underside of the bottom bracket shell, or tipping it nose-down to bleed a brake, is the difference between a job being fiddly and a job being easy.
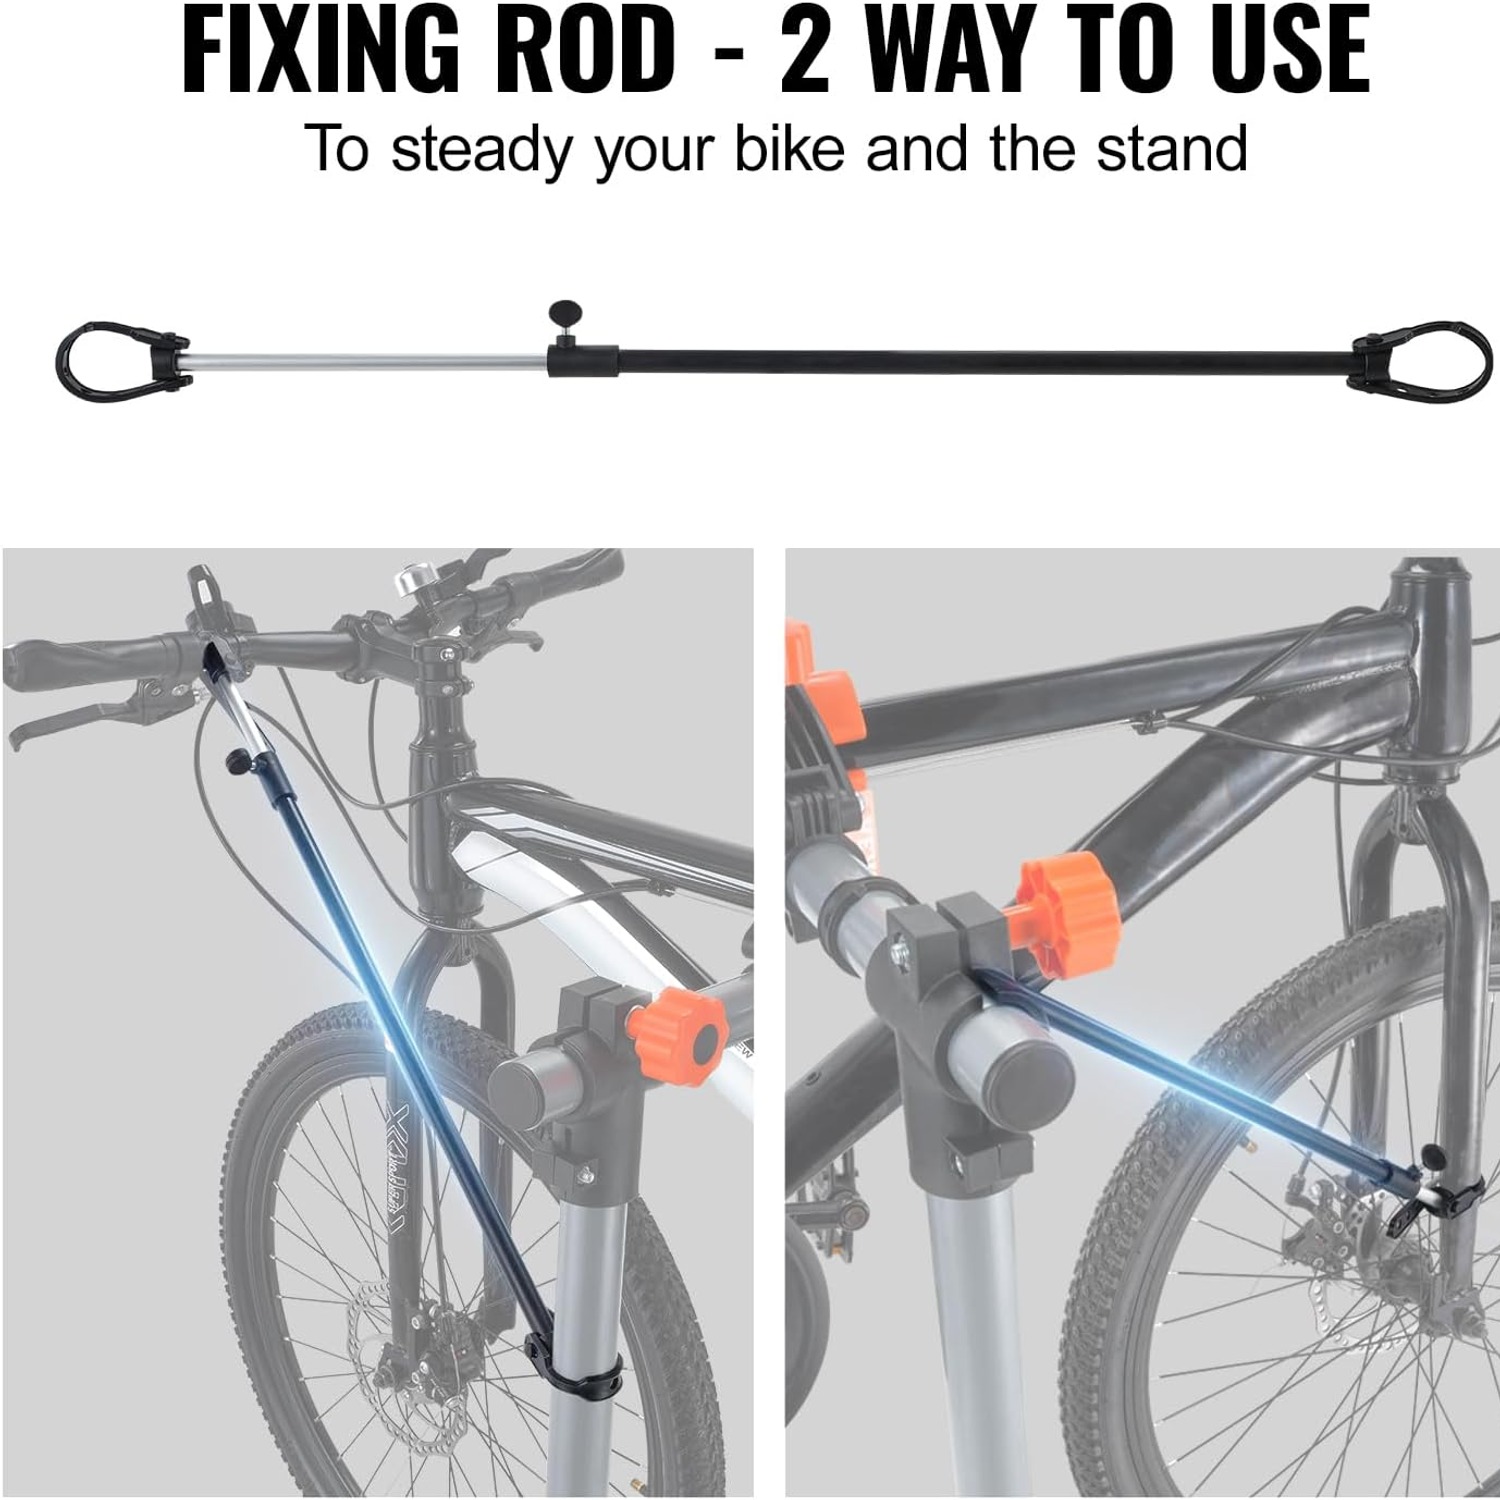
There is also a fixing rod included. It attaches to the handlebars or the front wheel and uses a strap with several holes so you can pull it snug. Without something holding the front end, the bars flop every time you touch the bike, and the wheel swings when you turn the pedals. With it, the bike behaves.
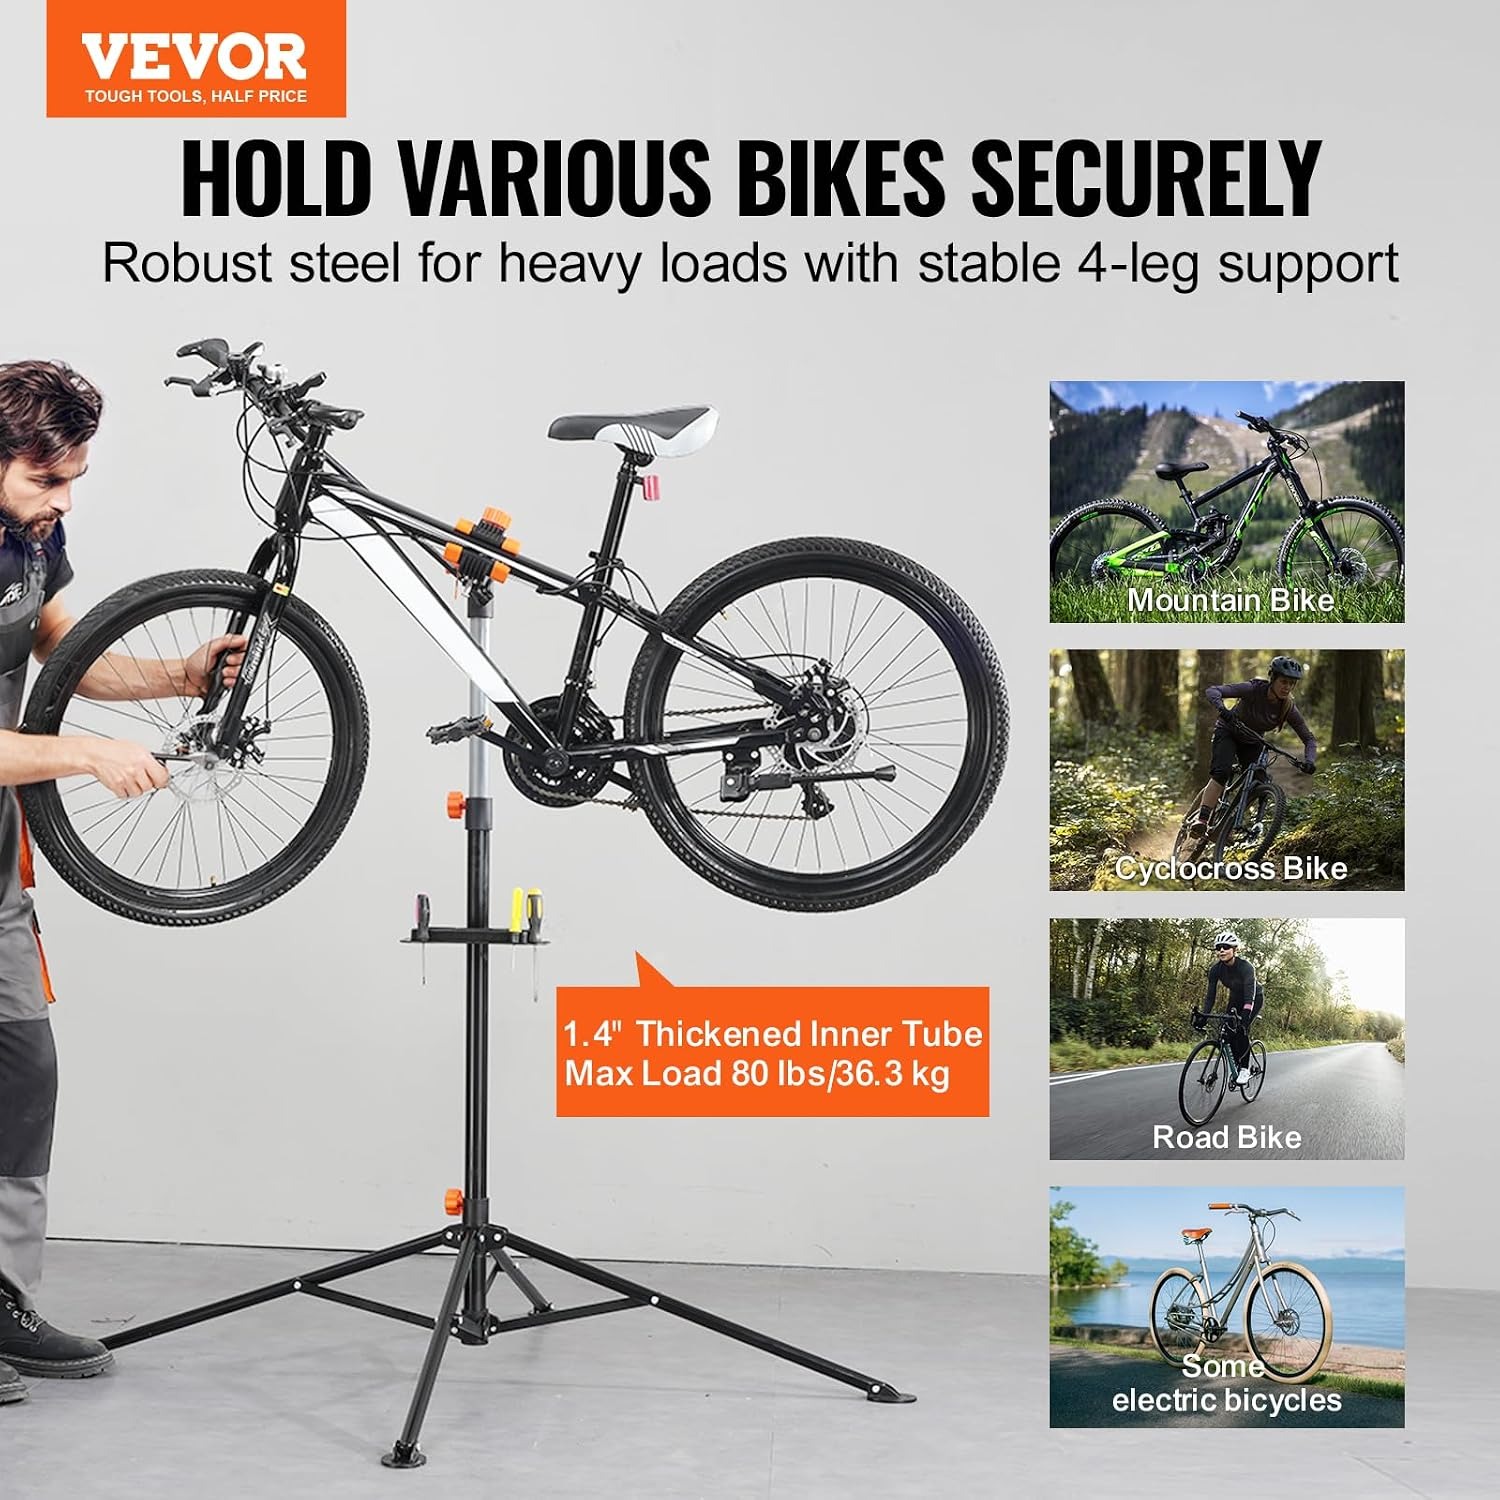
Load capacity is 36.3 kg, written as 80 lbs. The base has four legs with non-slip feet. Open the legs out fully before you clamp anything, and take the bike off before you move the stand anywhere.
Who this suits
If you own more than one bike, you will use this constantly. Two bikes in a household means roughly double the punctures, double the chain cleaning and double the brake pads. A stand pays for itself in saved trips to the shop.
It also suits the person who has just started doing their own servicing. A lot of people put off learning bike maintenance because the physical act of getting at the parts is unpleasant. Lift the bike to chest height and suddenly a cassette swap looks approachable.
Mountain bikers get a lot out of the rotating clamp, because suspension pivots, chain guides and underside bash guards all live in awkward places. Commuters who ride through winter will use it for the weekly degrease-and-relube. E-bike owners benefit too, provided the bike is under the 36.3 kg limit. Removing a heavy battery before lifting the bike makes that easier anyway.
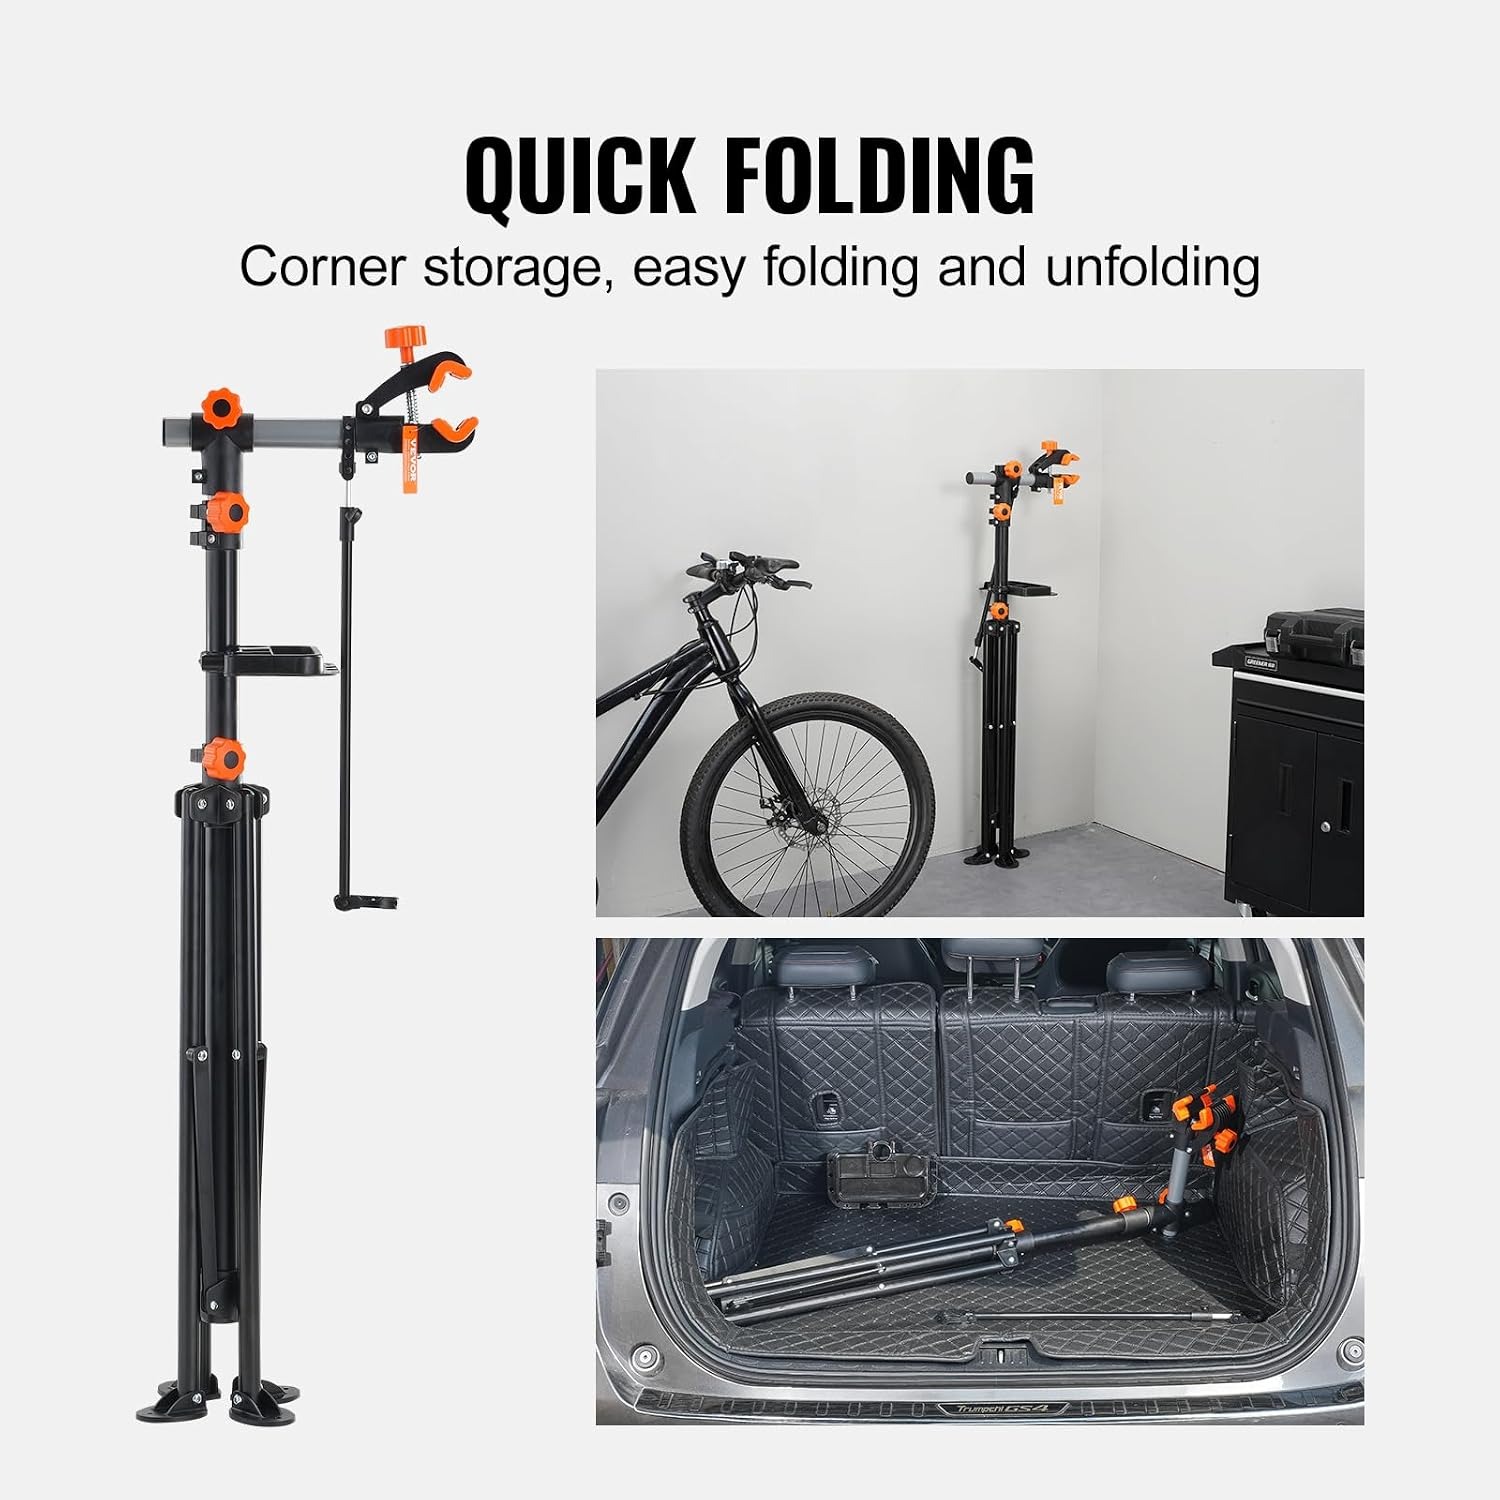
If you only ride a few times a year and the local shop does everything, you probably do not need one. But a stand that folds down to 6.94 kg and tucks in a corner is not much of an imposition if you ever plan to pick up a spanner.
How to choose, and what to check first
Three numbers matter before anything else.
Weight. Put your bike on bathroom scales. If it is under 36.3 kg you are fine. Almost every road bike, gravel bike and mountain bike sits well under that. Cargo bikes and heavy e-bikes are where you need to look twice.
Tube diameter. Measure your seat post with a caliper or a ruler. If it falls between 25 and 40 mm, the clamp will grip it properly. Oversized aero posts and very fat tubes may not fit the 50 mm maximum opening.
Frame material. Carbon seat posts and carbon frame tubes should not be clamped directly. Clamp pressure can crush carbon, and the damage often does not show until something cracks later. The usual workaround is to keep a cheap alloy seat post on the shelf and swap it in whenever the bike goes on the stand. It takes two minutes and removes all the worry.
After that, think about where you will store it. Folded, this stand goes in a garage corner, hangs in a shed, or lies in a car boot for a weekend away. If you are tight on space, the folding design matters more than any other feature.
Using it without drama
Set the legs out fully first. Every time. A partly opened base is the main cause of a stand tipping.
Clamp the seat post with enough post showing that the jaws have a solid grip. Position the bike so its weight sits roughly over the column rather than hanging out to one side. A bike clamped by the very end of a long tube acts like a lever and will try to rotate the clamp.
Tighten the clamp firmly but do not go mad on it. You want it secure, not crushed. Give the bike a gentle push once it is in to check nothing moves.
Attach the fixing rod to the bars or front wheel. This is the step most people skip and then regret when the front wheel swings into their elbow halfway through a gear adjustment.
Put your tools in the magnetic tray before you start. Chainring bolts, quick links, valve cores and small spacers are the parts that vanish into garage floors forever. The magnets hold them.
When you are finished, take the bike off first, then collapse the stand. Never carry a loaded stand across the garage.
Keeping it in good shape
This is low-maintenance kit, but a little care keeps it working smoothly.
Wipe the column and clamp after each session. Degreaser and chain lube migrate everywhere, and a greasy clamp jaw loses grip. A dry cloth is usually enough.
Dry it properly before folding. Water trapped in a folded joint is how things seize over a winter.
Check the fasteners. Levers and bolts loosen with repeated use and vibration. A quick check before each session takes five seconds and catches problems early.
Keep the magnetic tray clean. Metal filings and grit build up and stop small parts sitting flat.
Store it somewhere dry, out of the rain. A shed or garage is fine. Leaving it outside under a tarp is not.
The short version
A bike maintenance stand does one thing, and it does it well. It holds the bike still, at a height that does not hurt your back, so you can actually work.
This one adjusts from 107.9 to 190 cm, takes tubes from 25 to 40 mm in a clamp that rotates 360 degrees, holds up to 36.3 kg, weighs 6.94 kg itself, and folds away when you are done. The magnetic tray and the fixing rod are the kind of small additions you only appreciate once you have used a stand without them.
Measure your seat post, weigh your bike, and if the numbers line up, you will wonder how you managed without one.